Azure AD (SAML 2.0)
Integration with Azure AD enables Single Sign-On (SSO) for Xshield users managed through Azure AD using the Security Assertion Markup Language (SAML) 2.0 authentication standard.
Prerequisites to activate the integration
- An Azure user role with permissions to add Enterprise applications to Azure AD.
- A dedicated user group for Xshield users who require SSO access.
- Admin user role in Xshield to activate the integration.
Procedure
On a high level, the SAML Integration between Azure and Xshield are done in 3 phases:
- Activate SAML 2.0 in Xshield
- Create a new non-gallery app in Azure AD by configuring the SAML metadata and claims
- Complete the setup by adding the configuration data from Azure application to Xshield
Follow the below step by step guide to complete the integration:
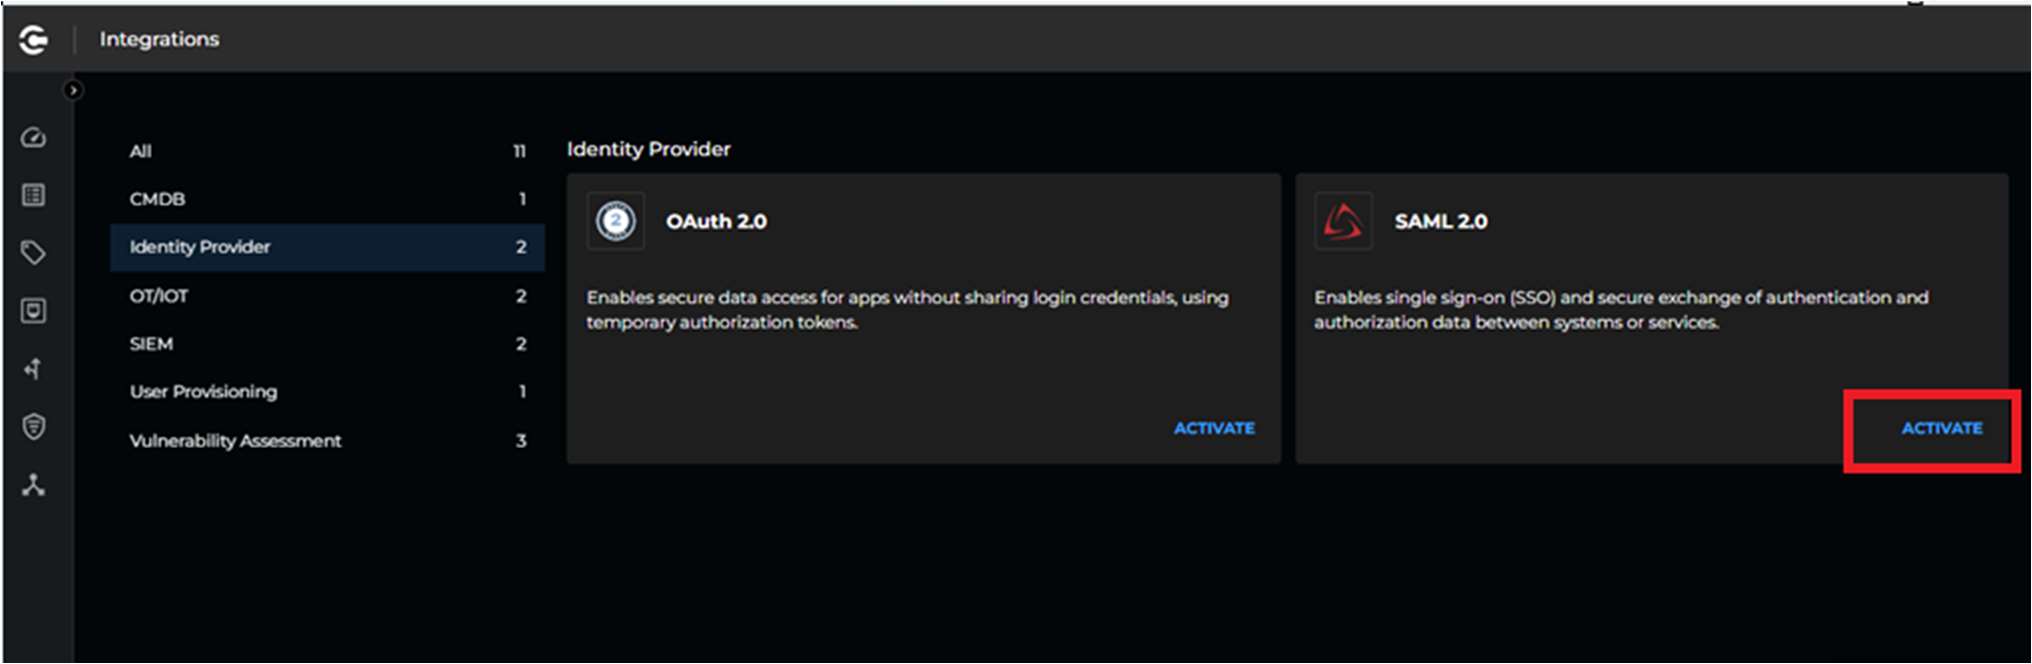
Enabling SAML 2.0 in Xshield
- Log into the Xshield tenant and navigate to Settings > Integrations > Identity Provider > SAML 2.0 and click on Activate
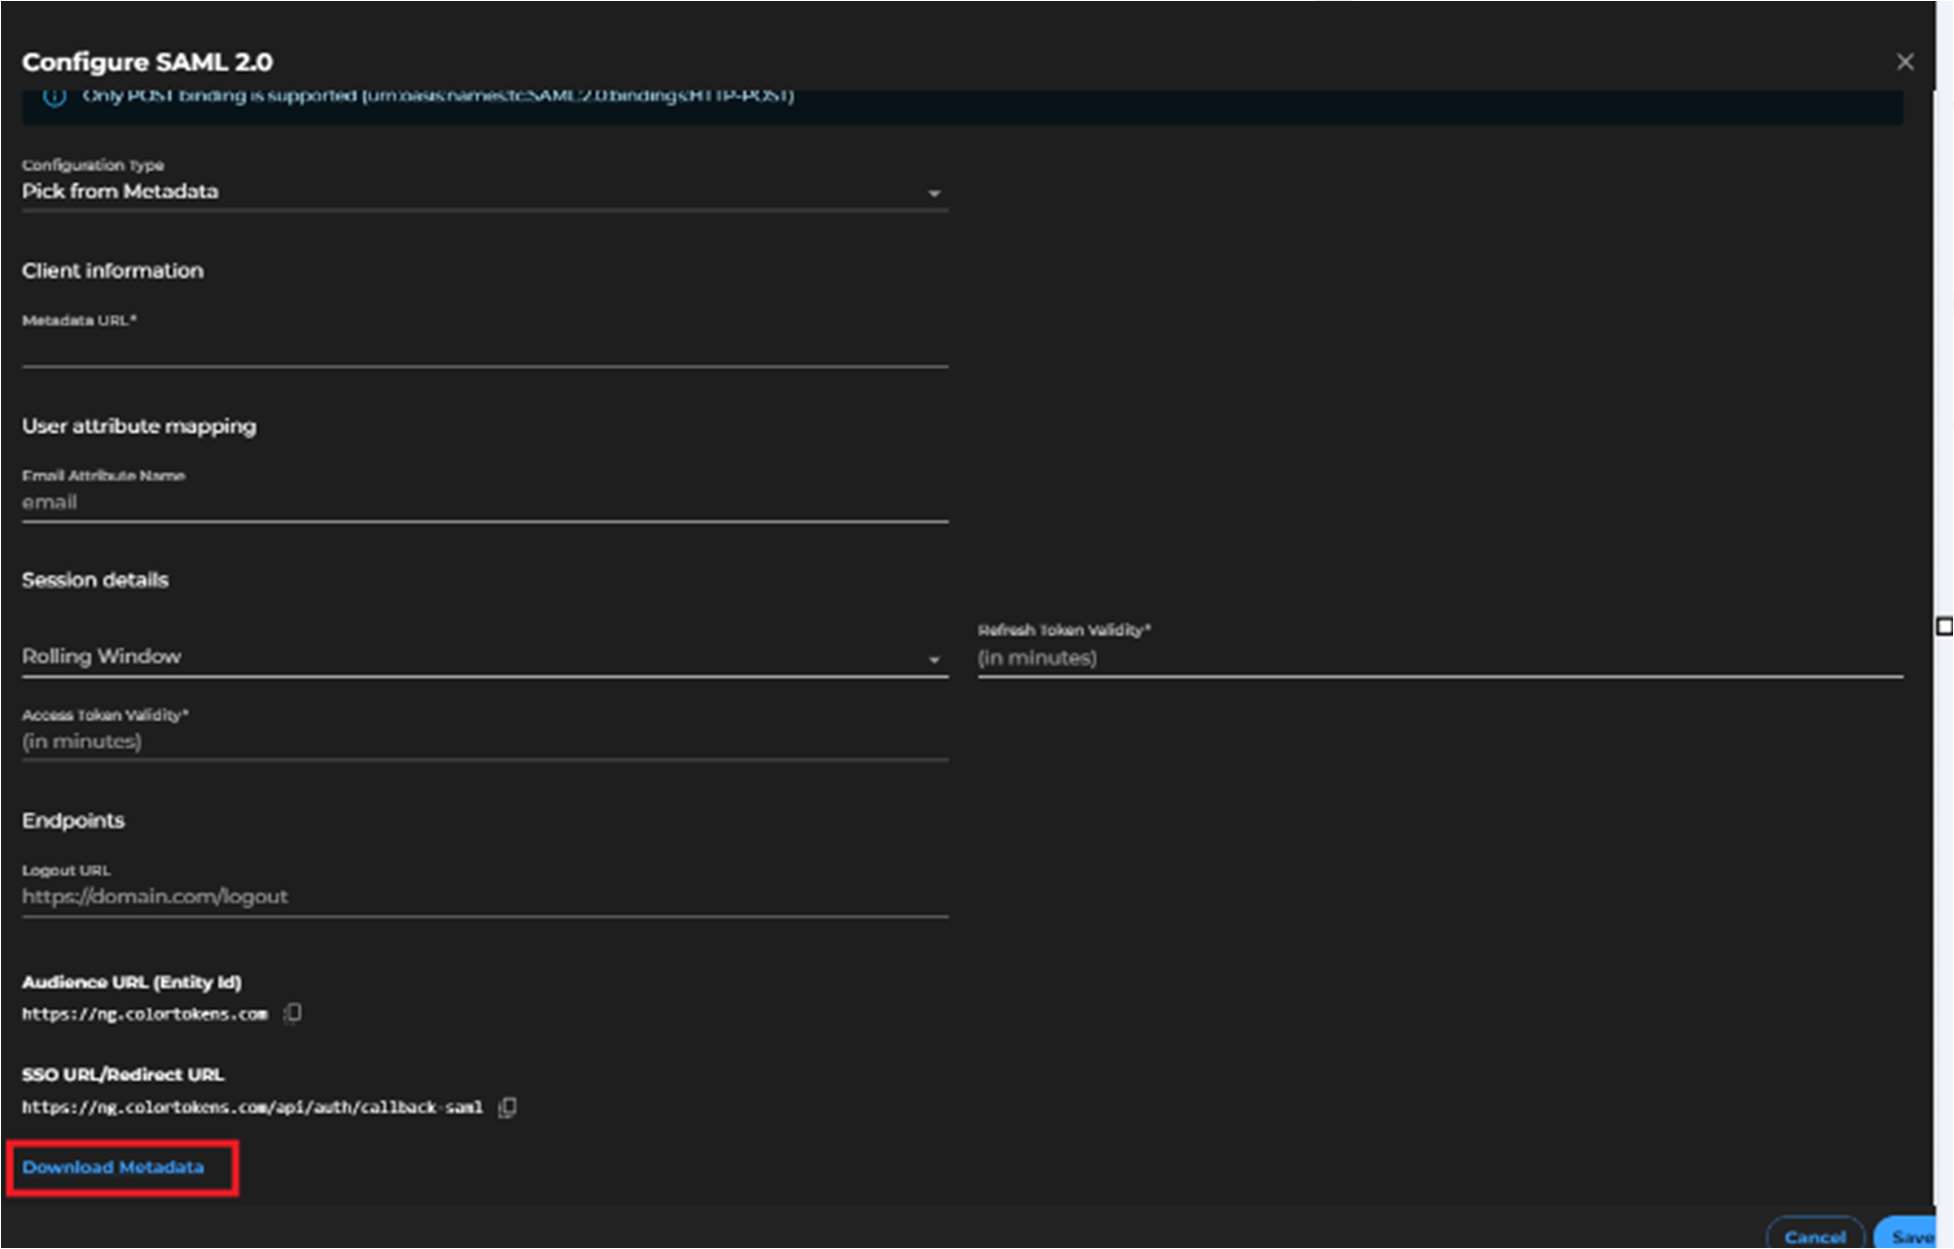
- By default, configuration type is set to Pick from Metadata as shown below

- Click on Download Metadata, this will be used to configure Azure application in the next steps
Configuring Azure
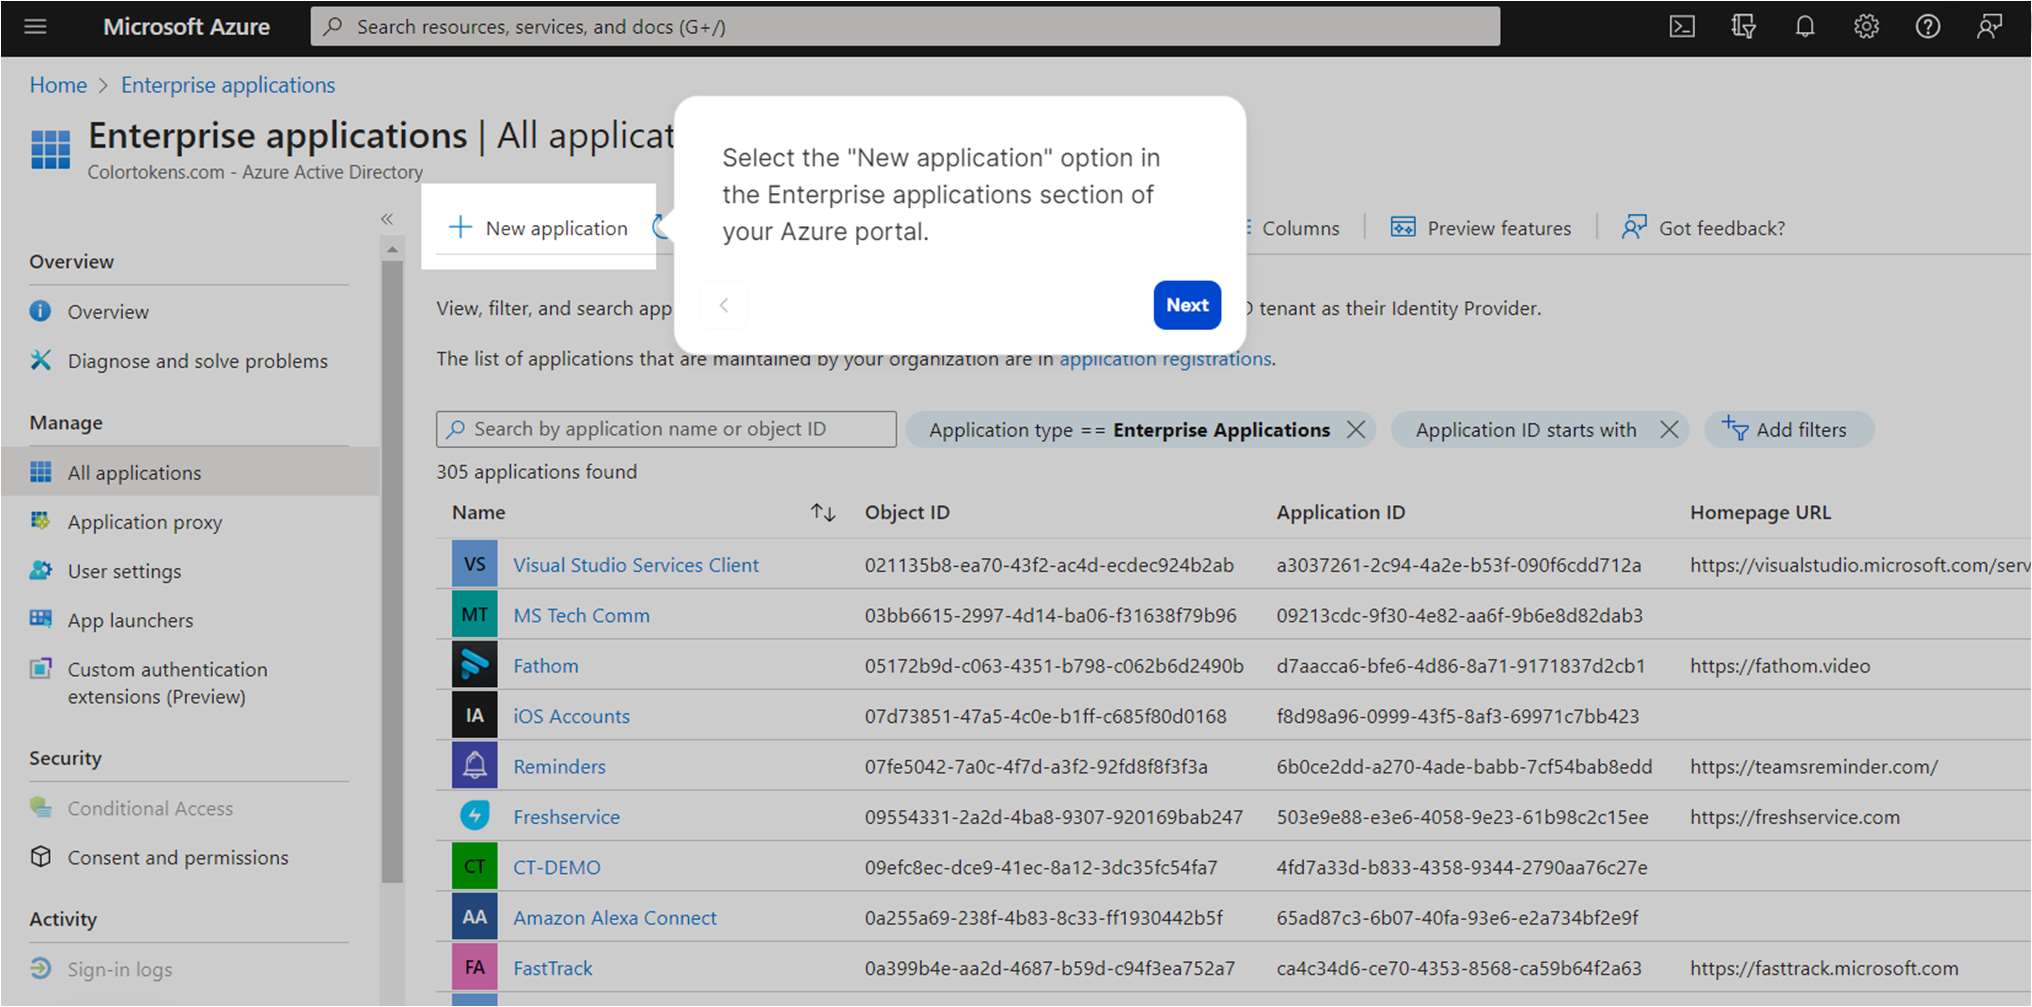
- Login to the Azure portal and navigate to Enterprise applications
- Select New application option in the enterprise applications section of your Azure portal
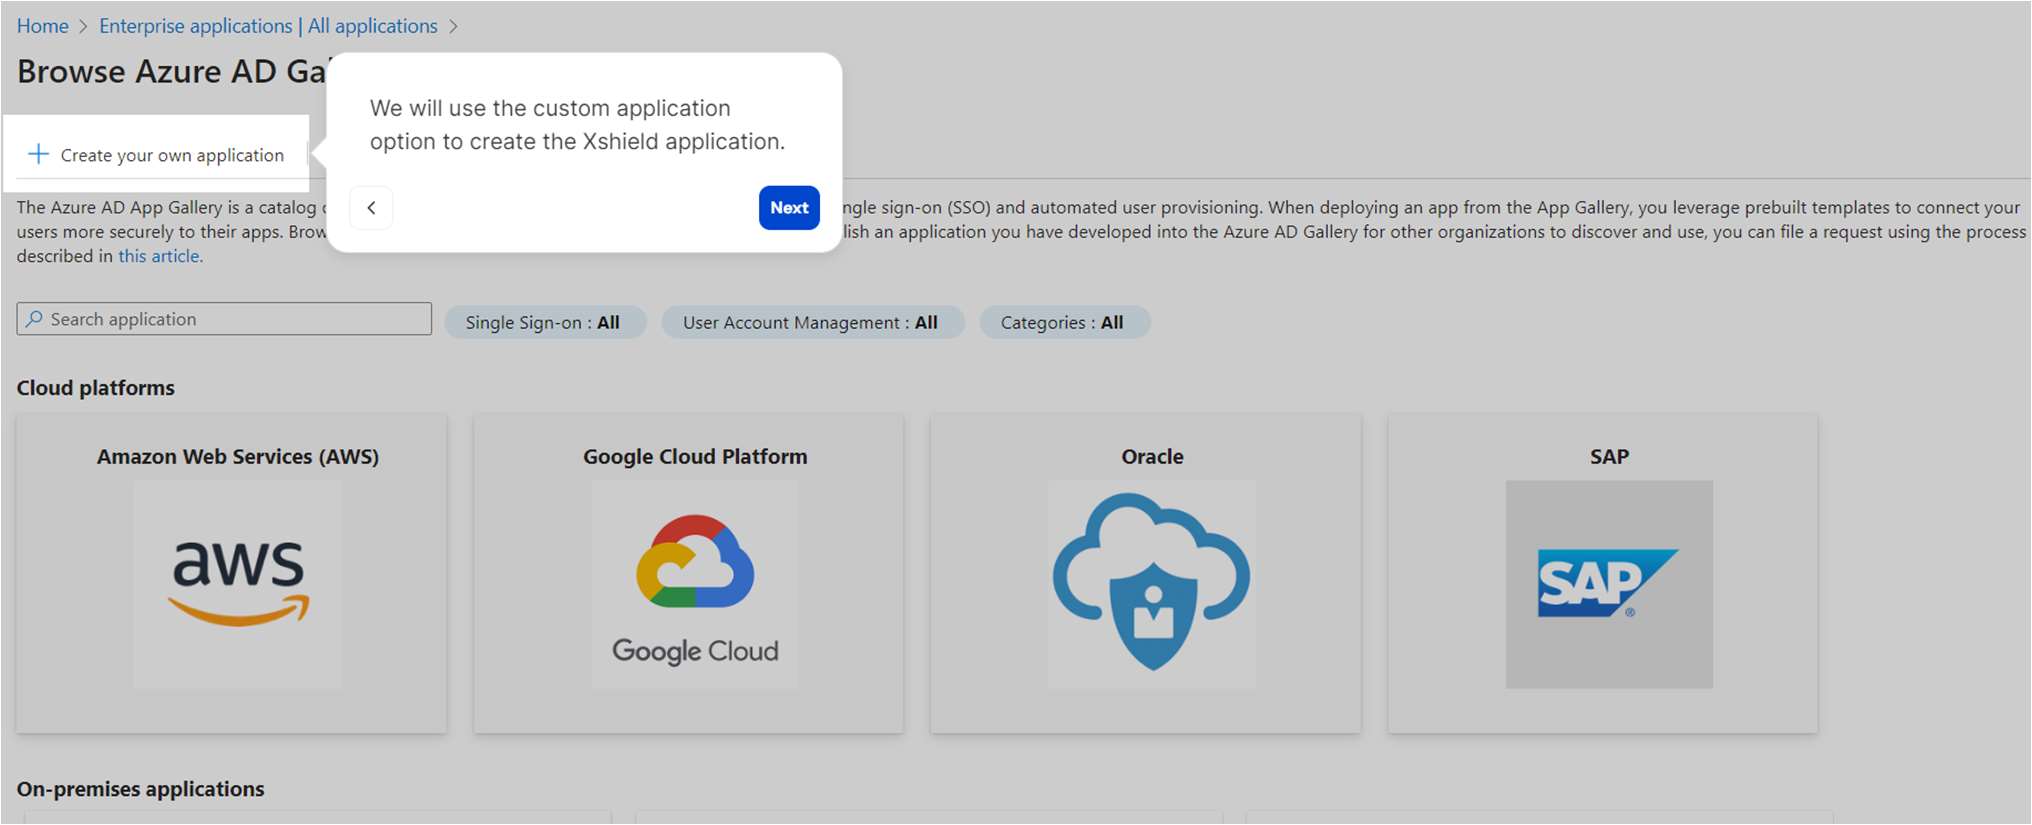
- We will use Create your own application option to create an application for Xshield SSO
- Type in a suitable name for the application, preferably ColorTokens XShield
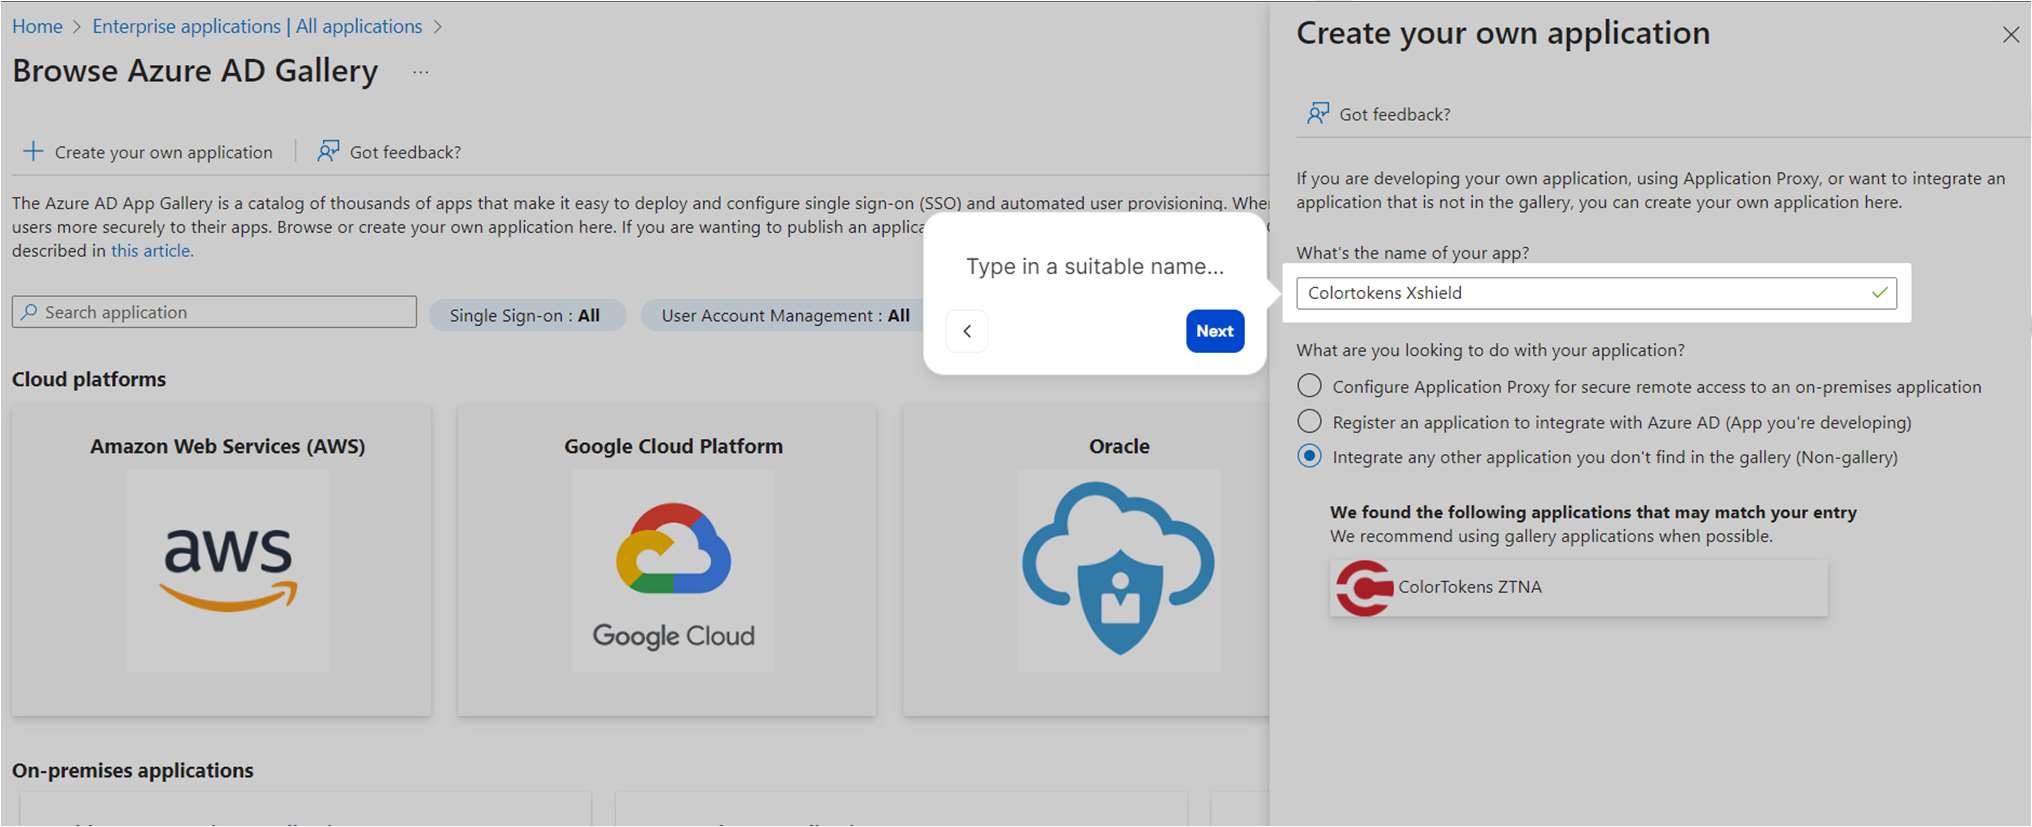
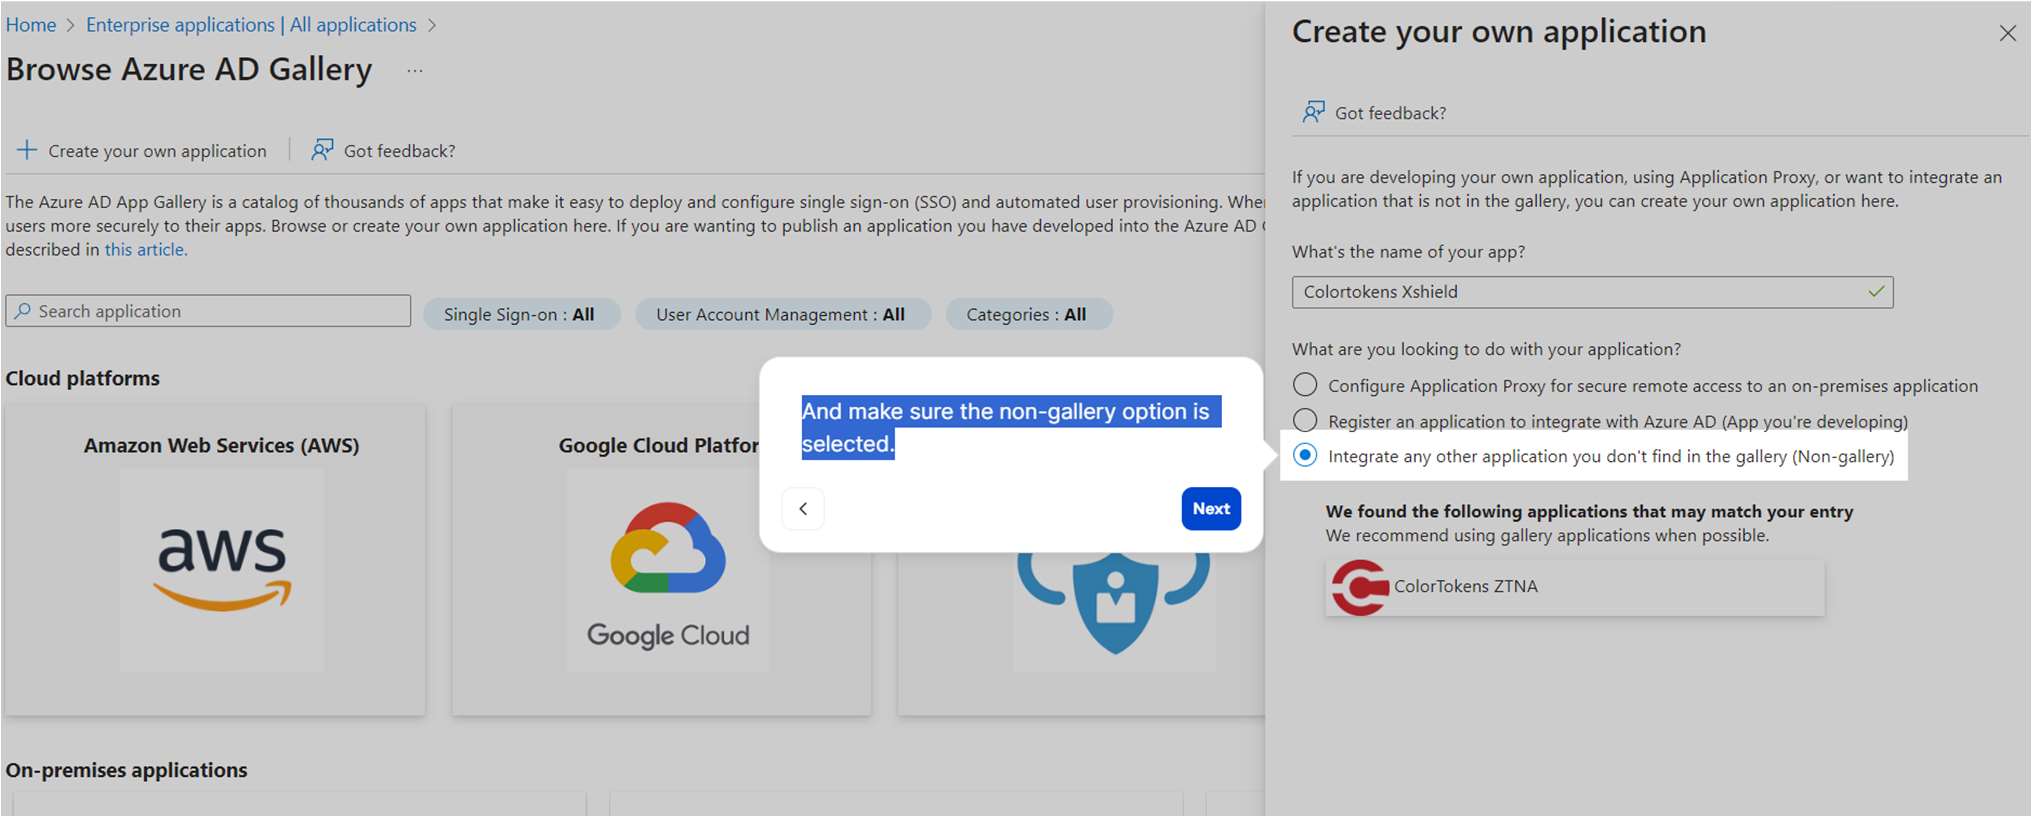
- Make sure the Non-gallery option is selected.
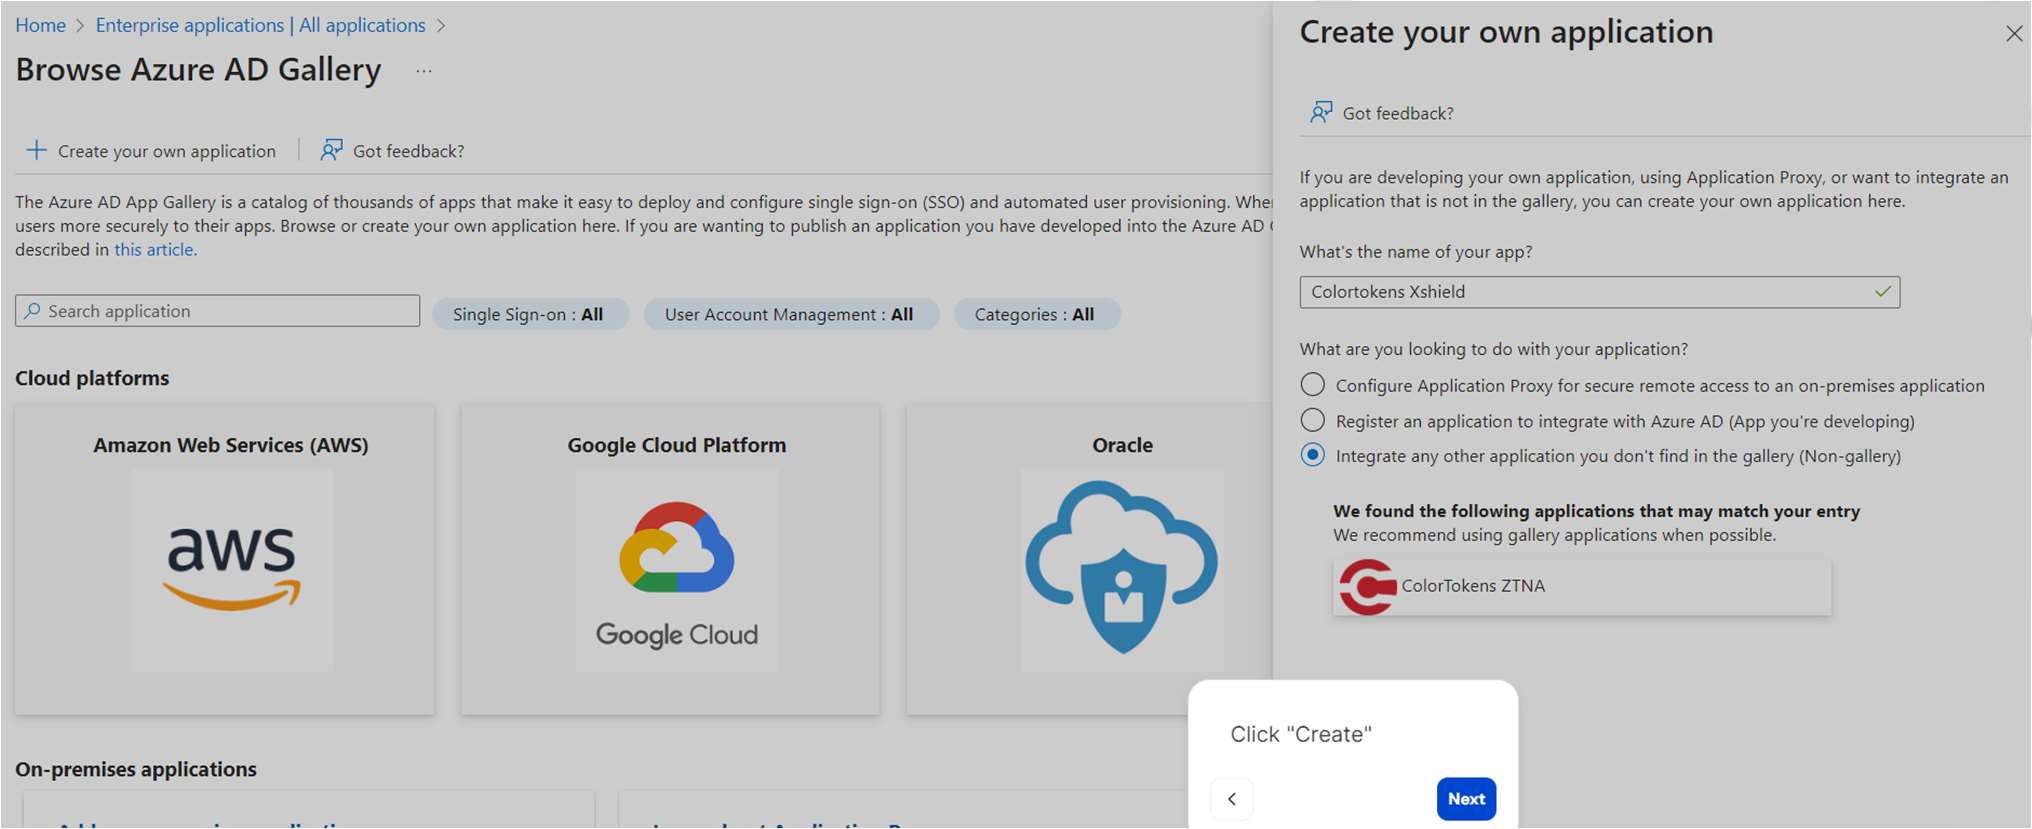
- Click on Create
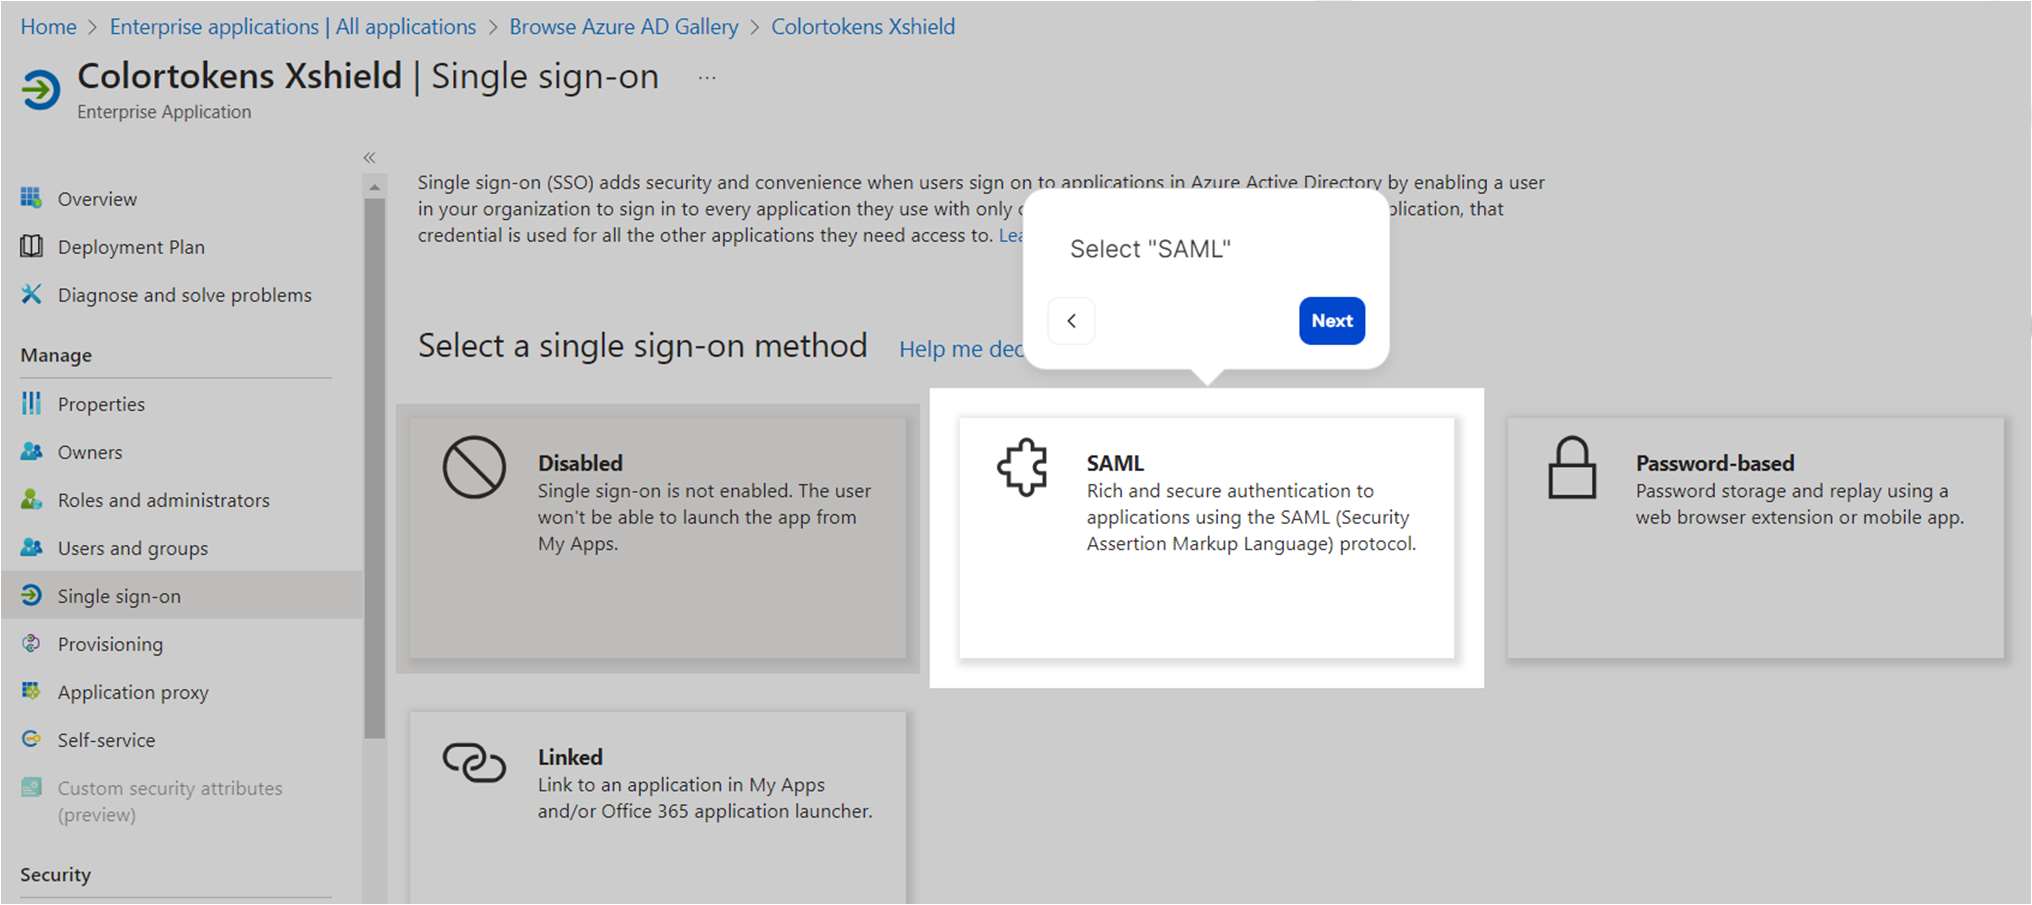
- Once the application has been created, select the Single sign-on menu option

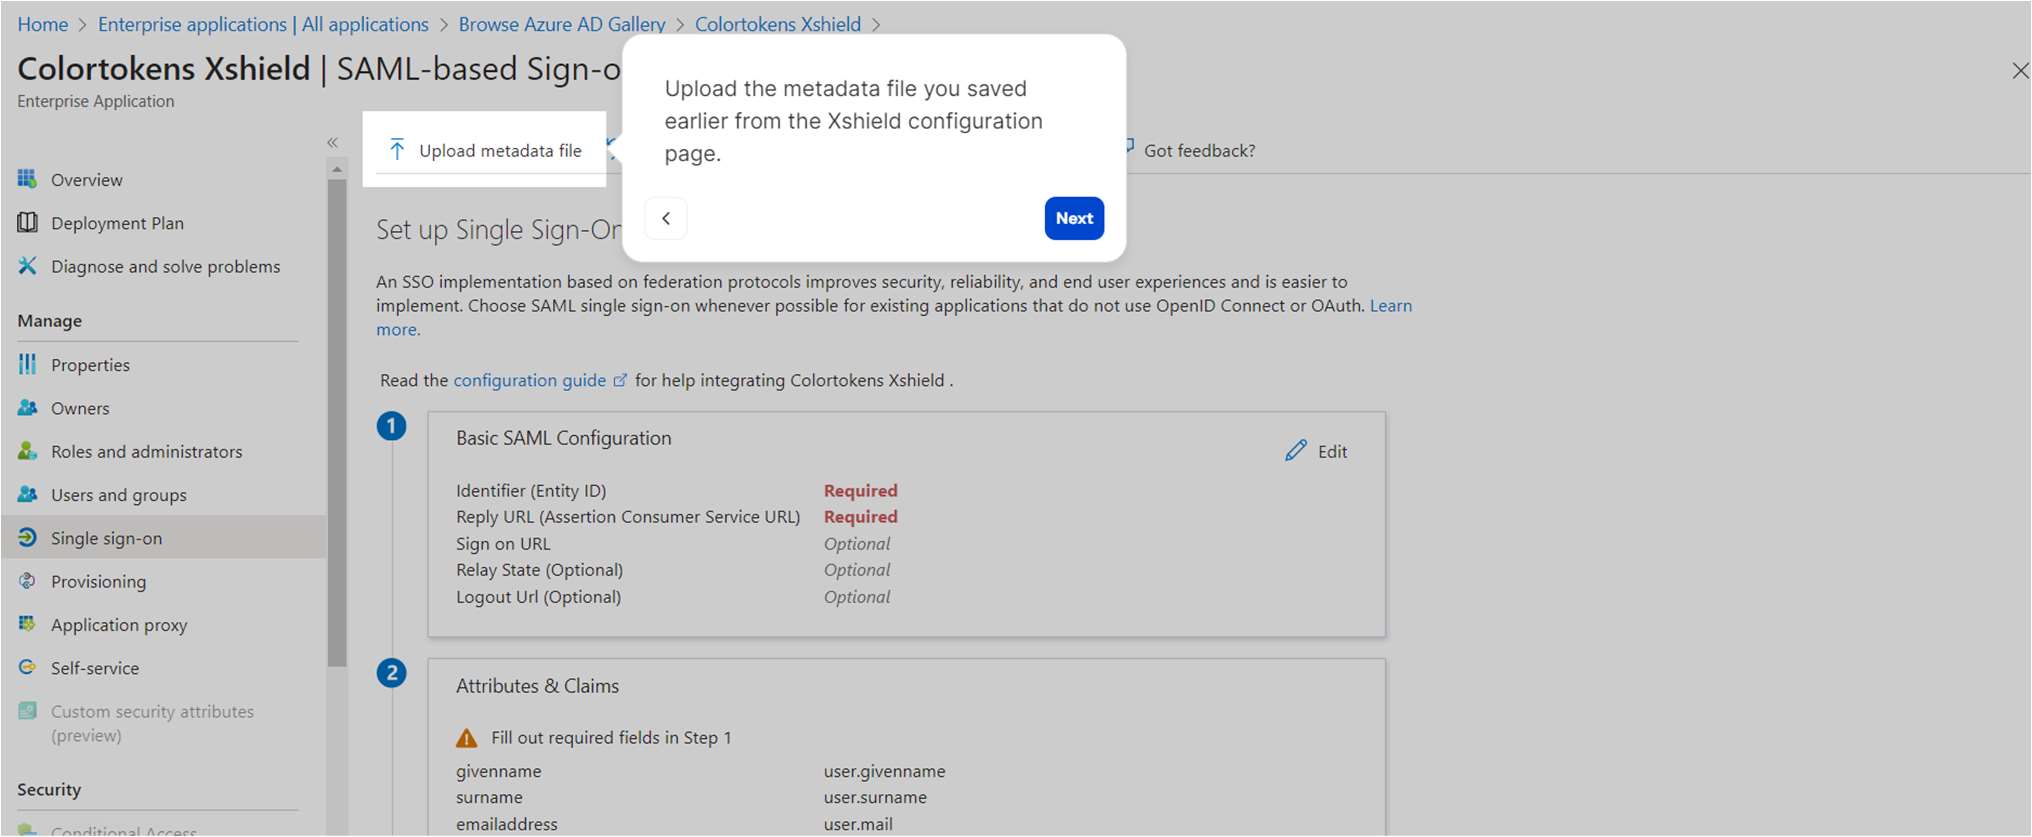
- Select SAML
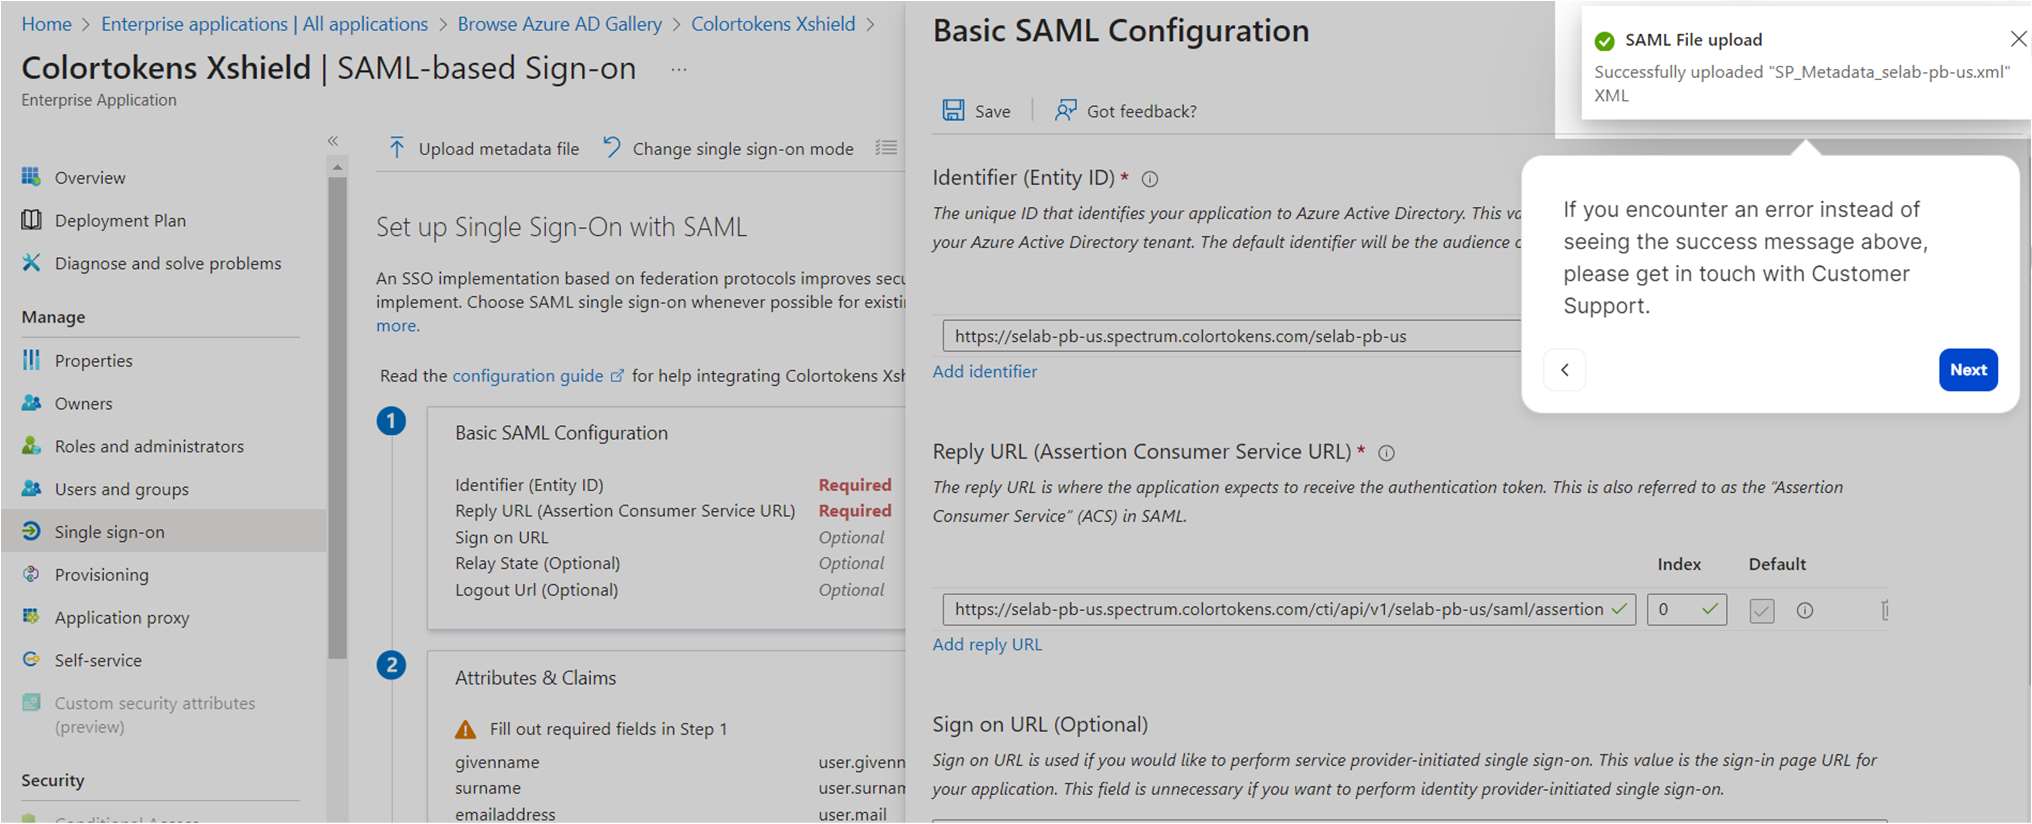
- Upload the metadata file you saved earlier from the Xshield SAML 2.0 configuration page
- If you encounter an error instead of seeing the success message above, please get in touch with Azure customer support
note
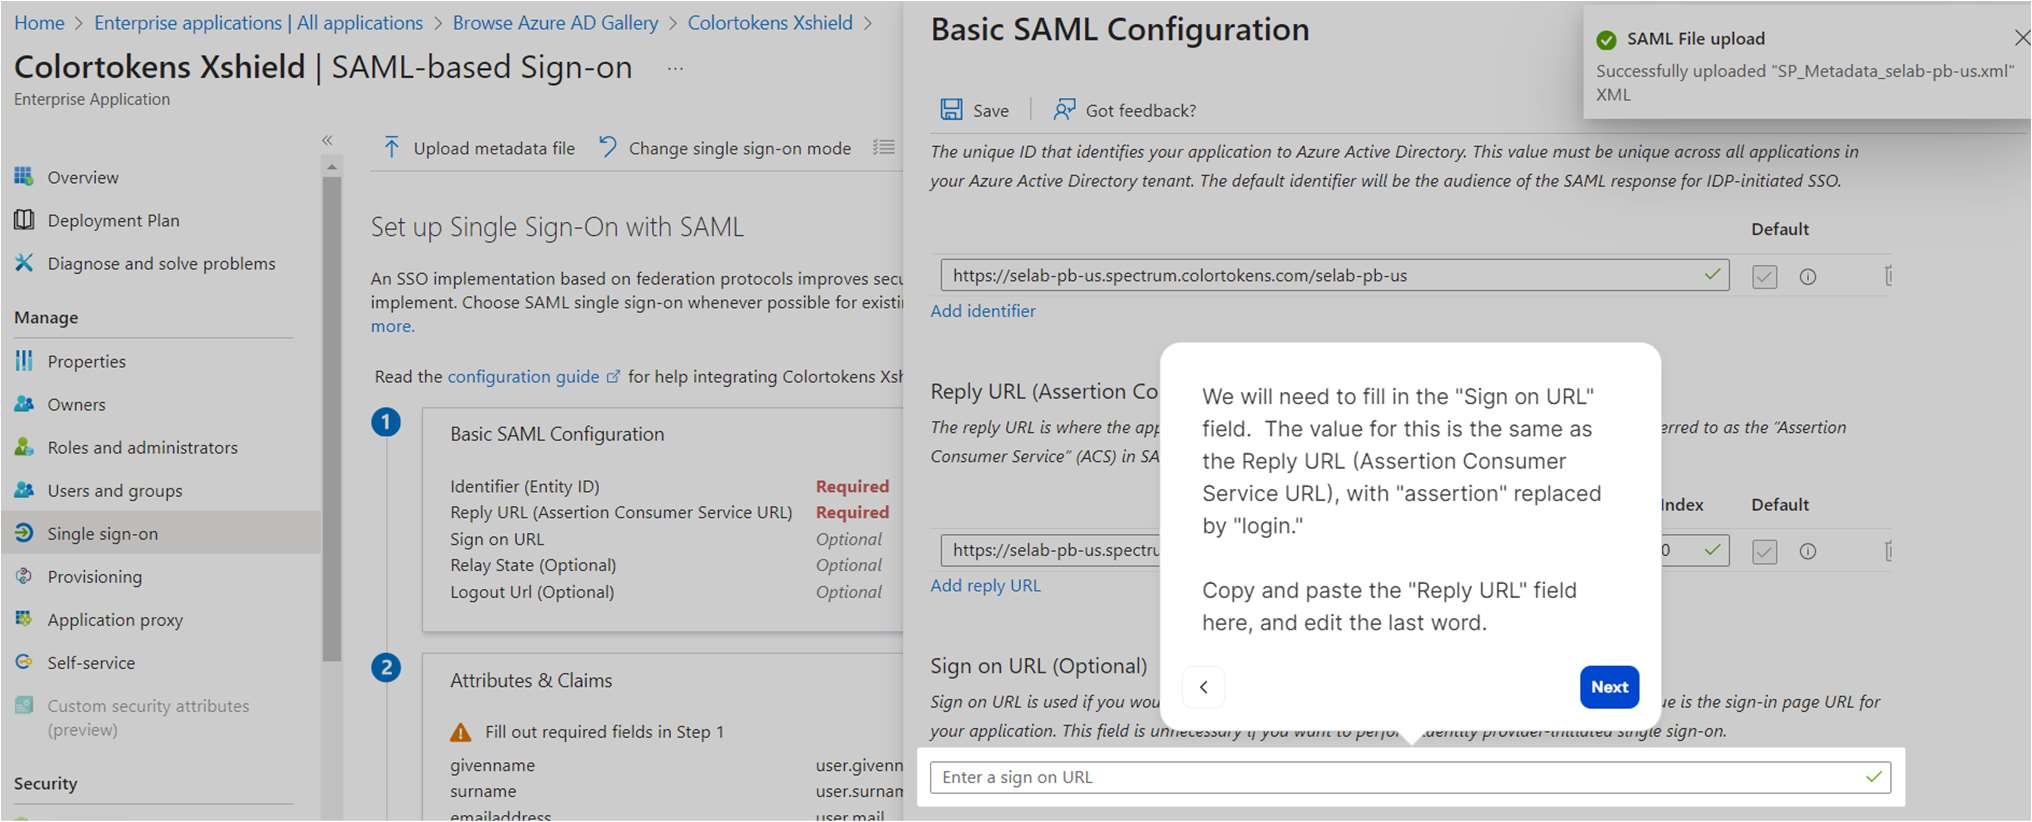
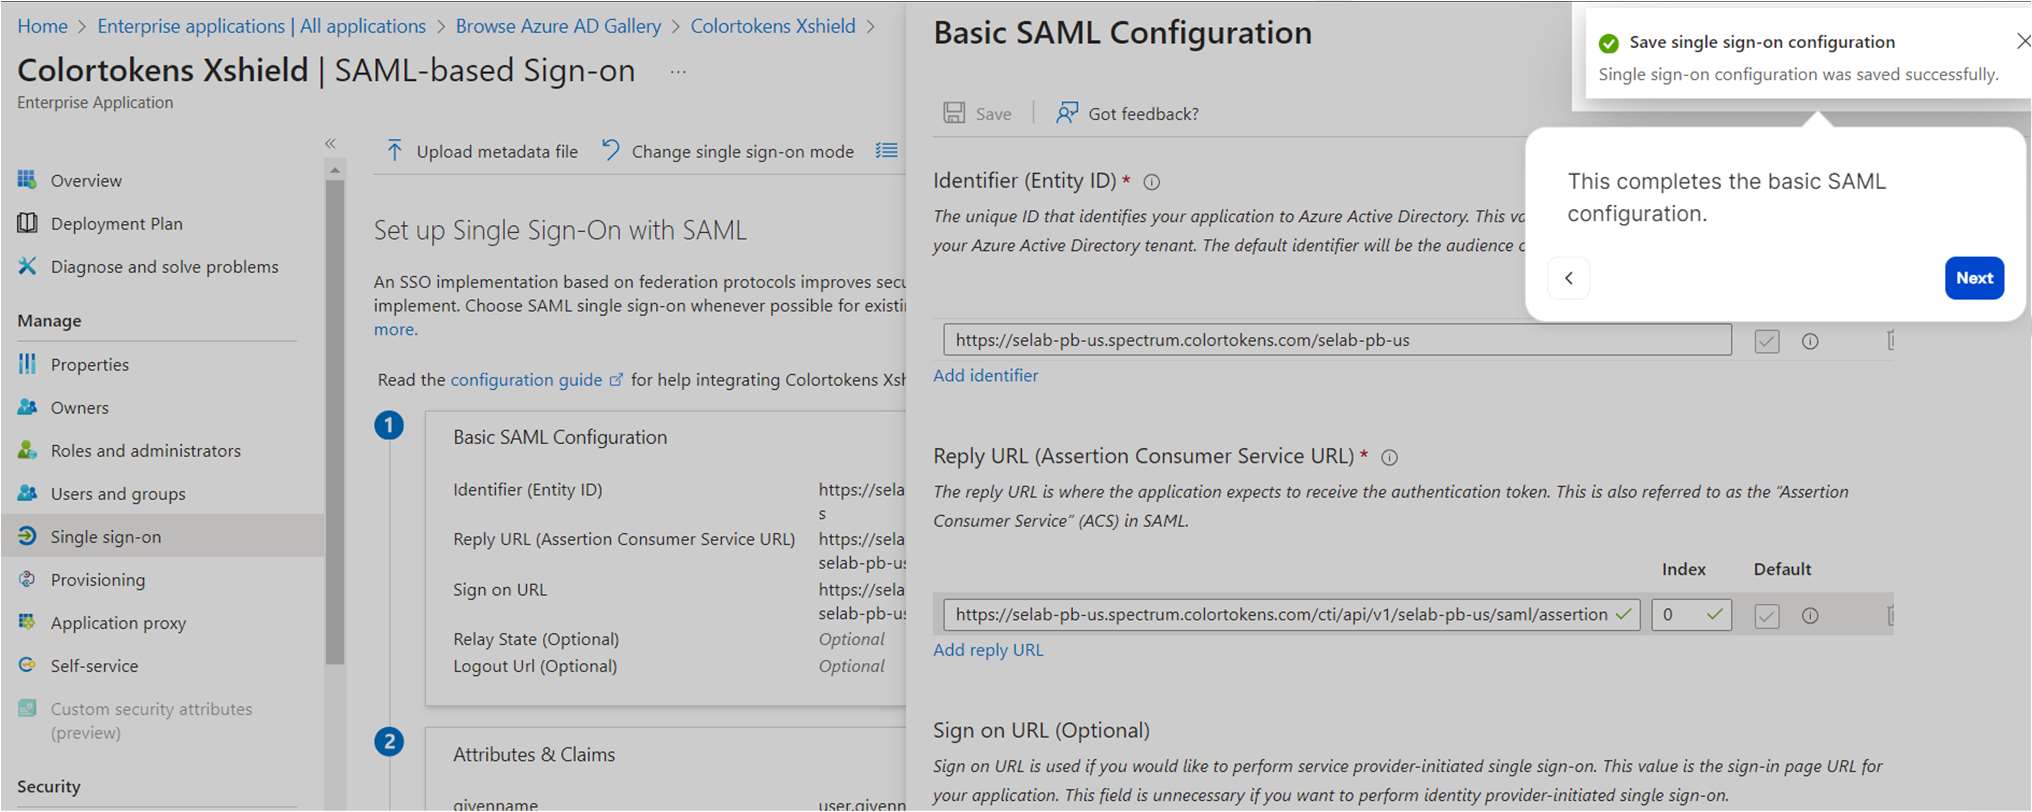
We will need to fill in the Sign on URL field. The value of this is the same as the Reply URL (Assertion Consumer Service URL), with “assertion” replaced by “login”
Copy and paste the Reply URL field here and edit the last word
- Please confirm that the Sign-on URL field is filled in correctly

- Save the configuration
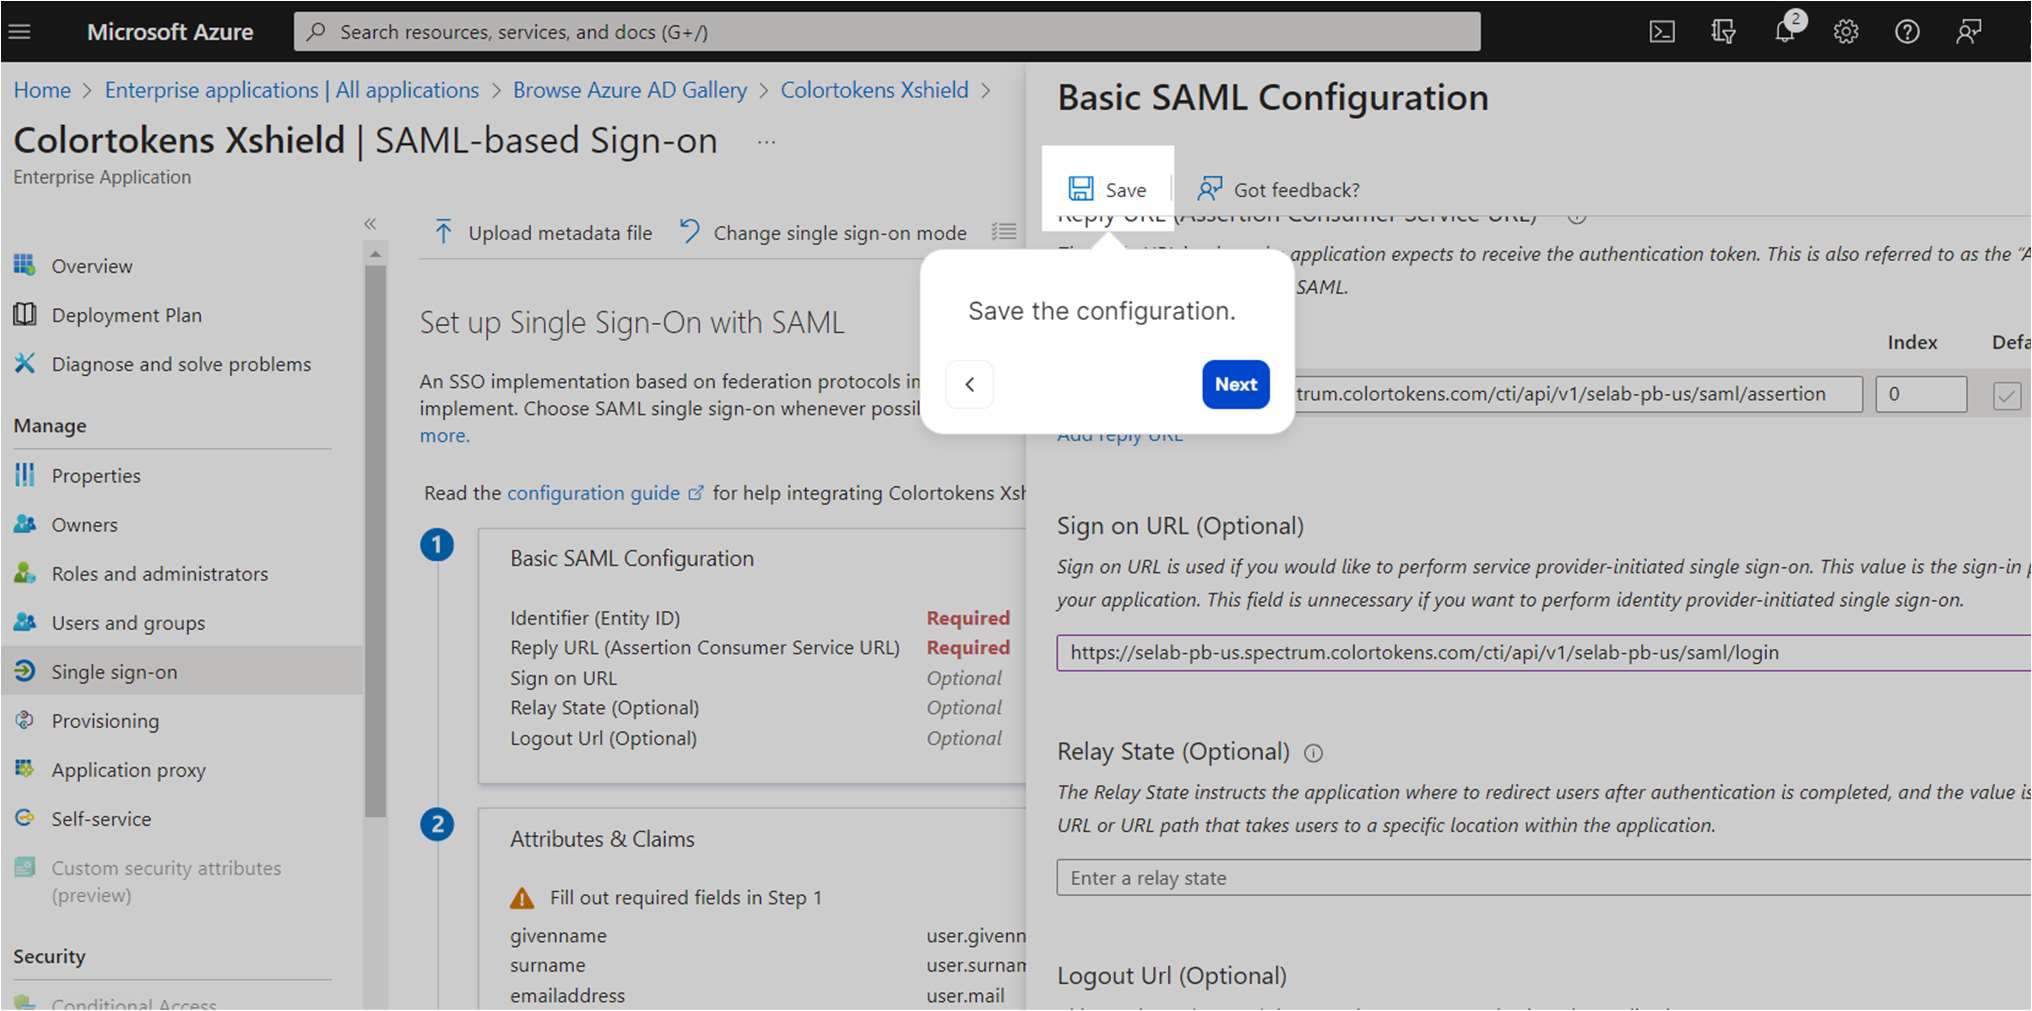
- This completes the basic SAML configuration
- We will skip the test for now
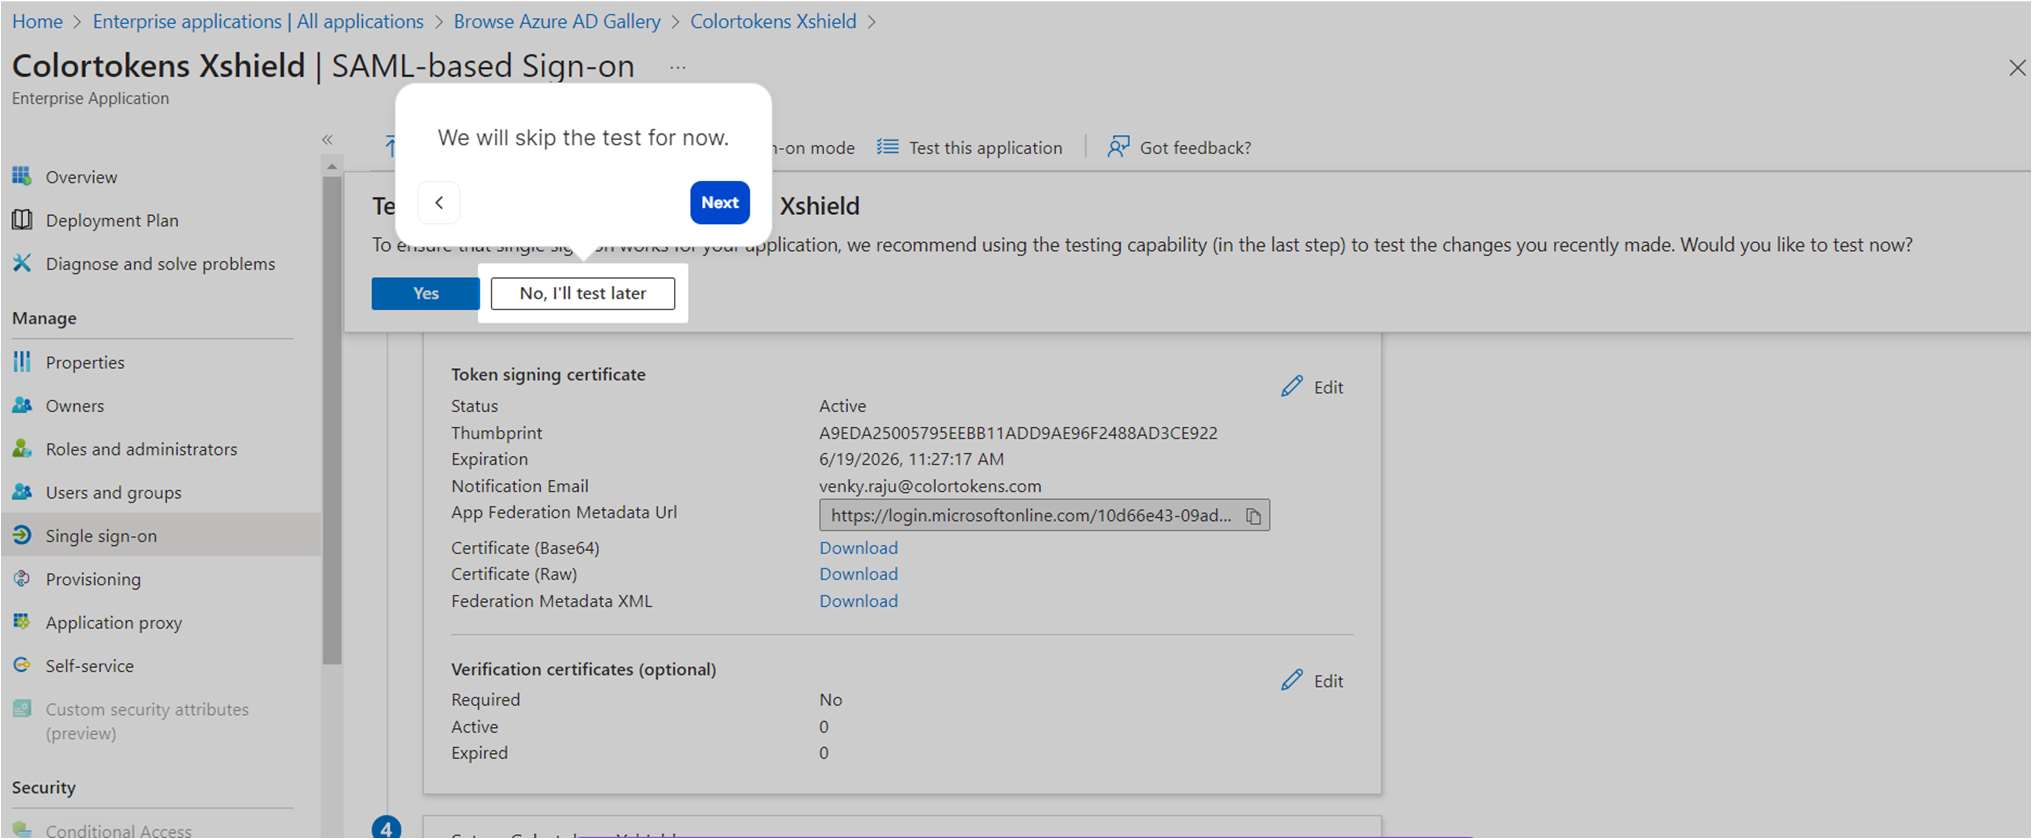
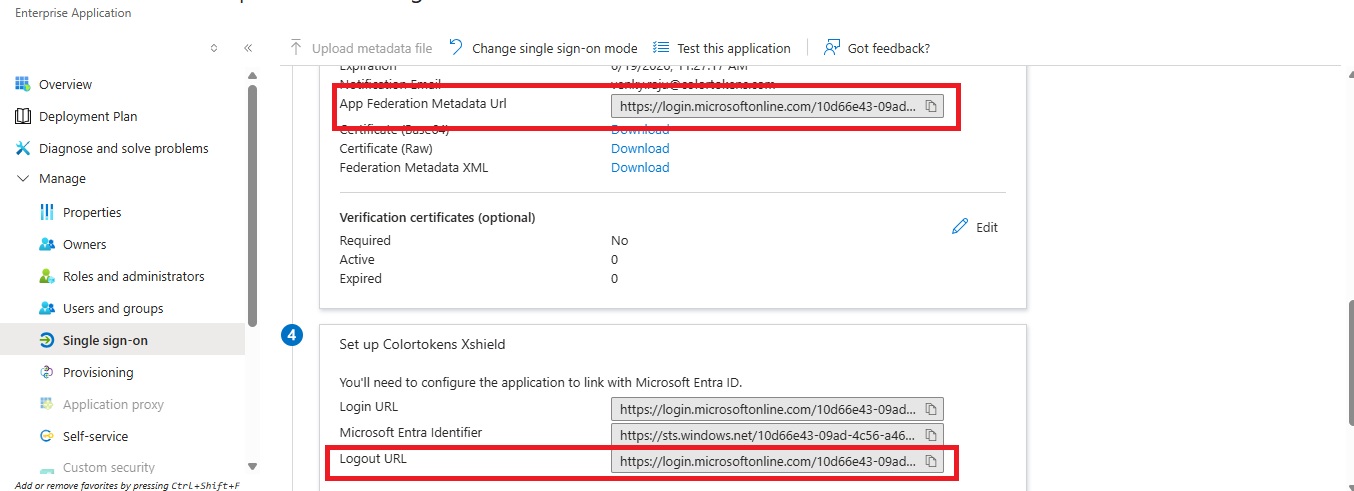
- Now copy the App Federation Metadata URL & Logout URL which we will use later
- Next, we will customize the attribute and claim, Click on edit in the attributes and claims section
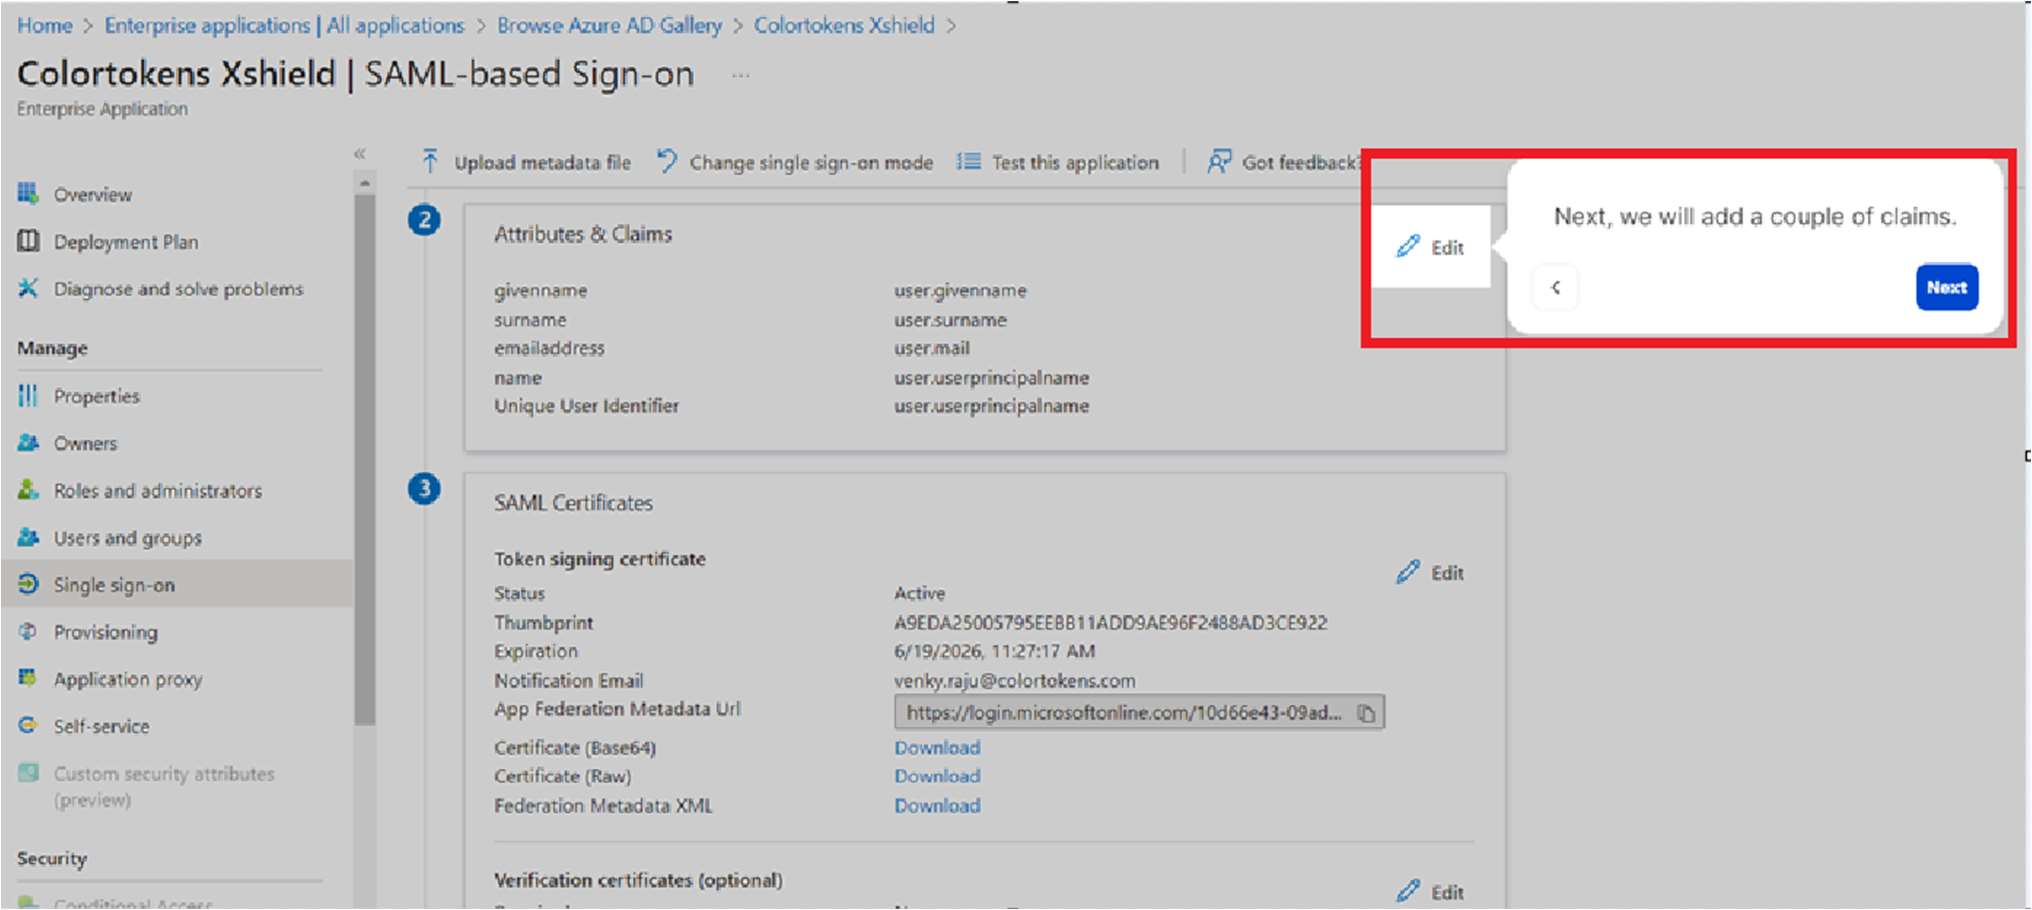
- Let’s add a new claim
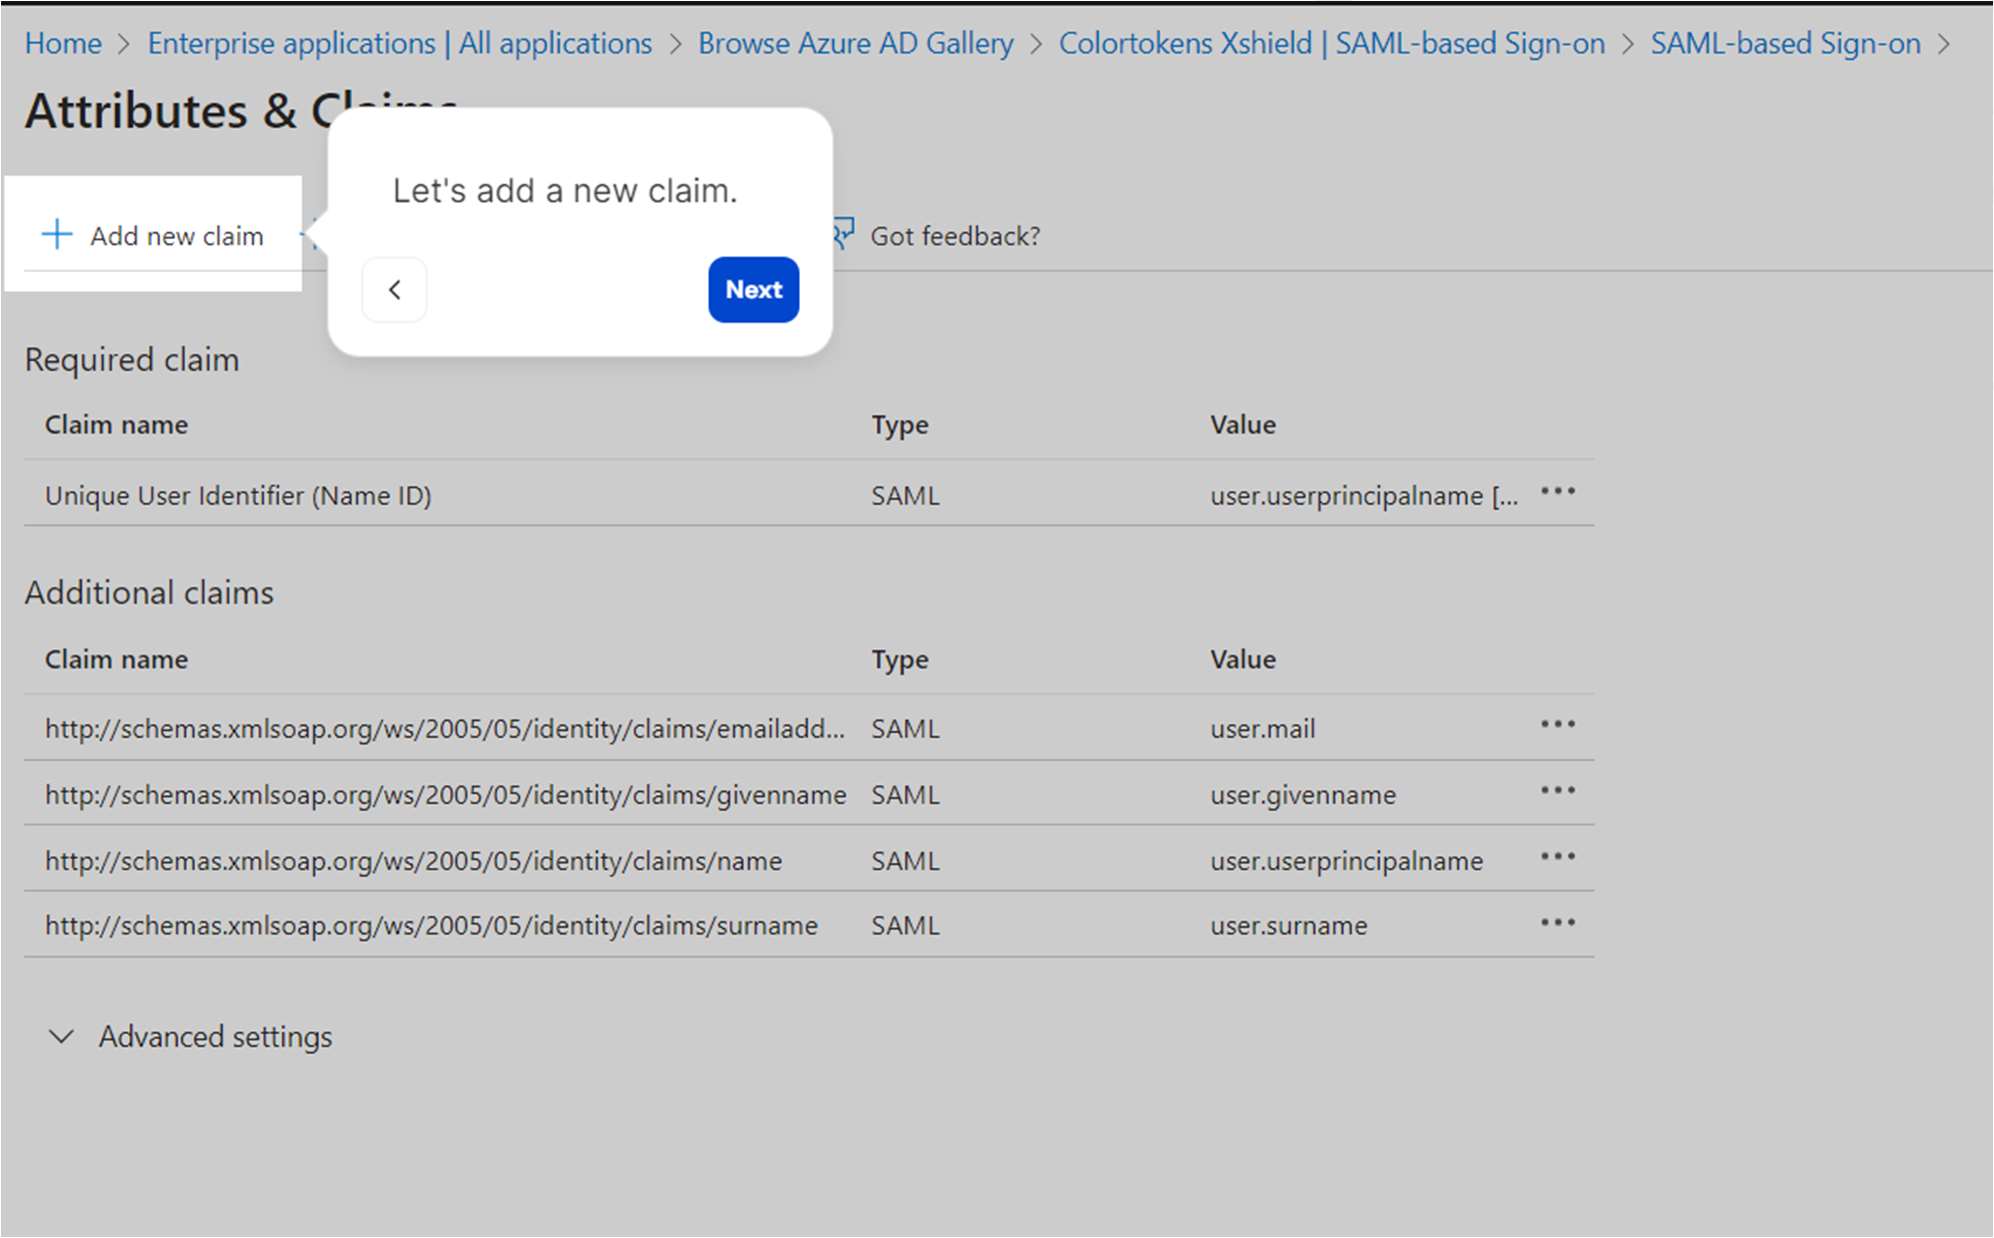
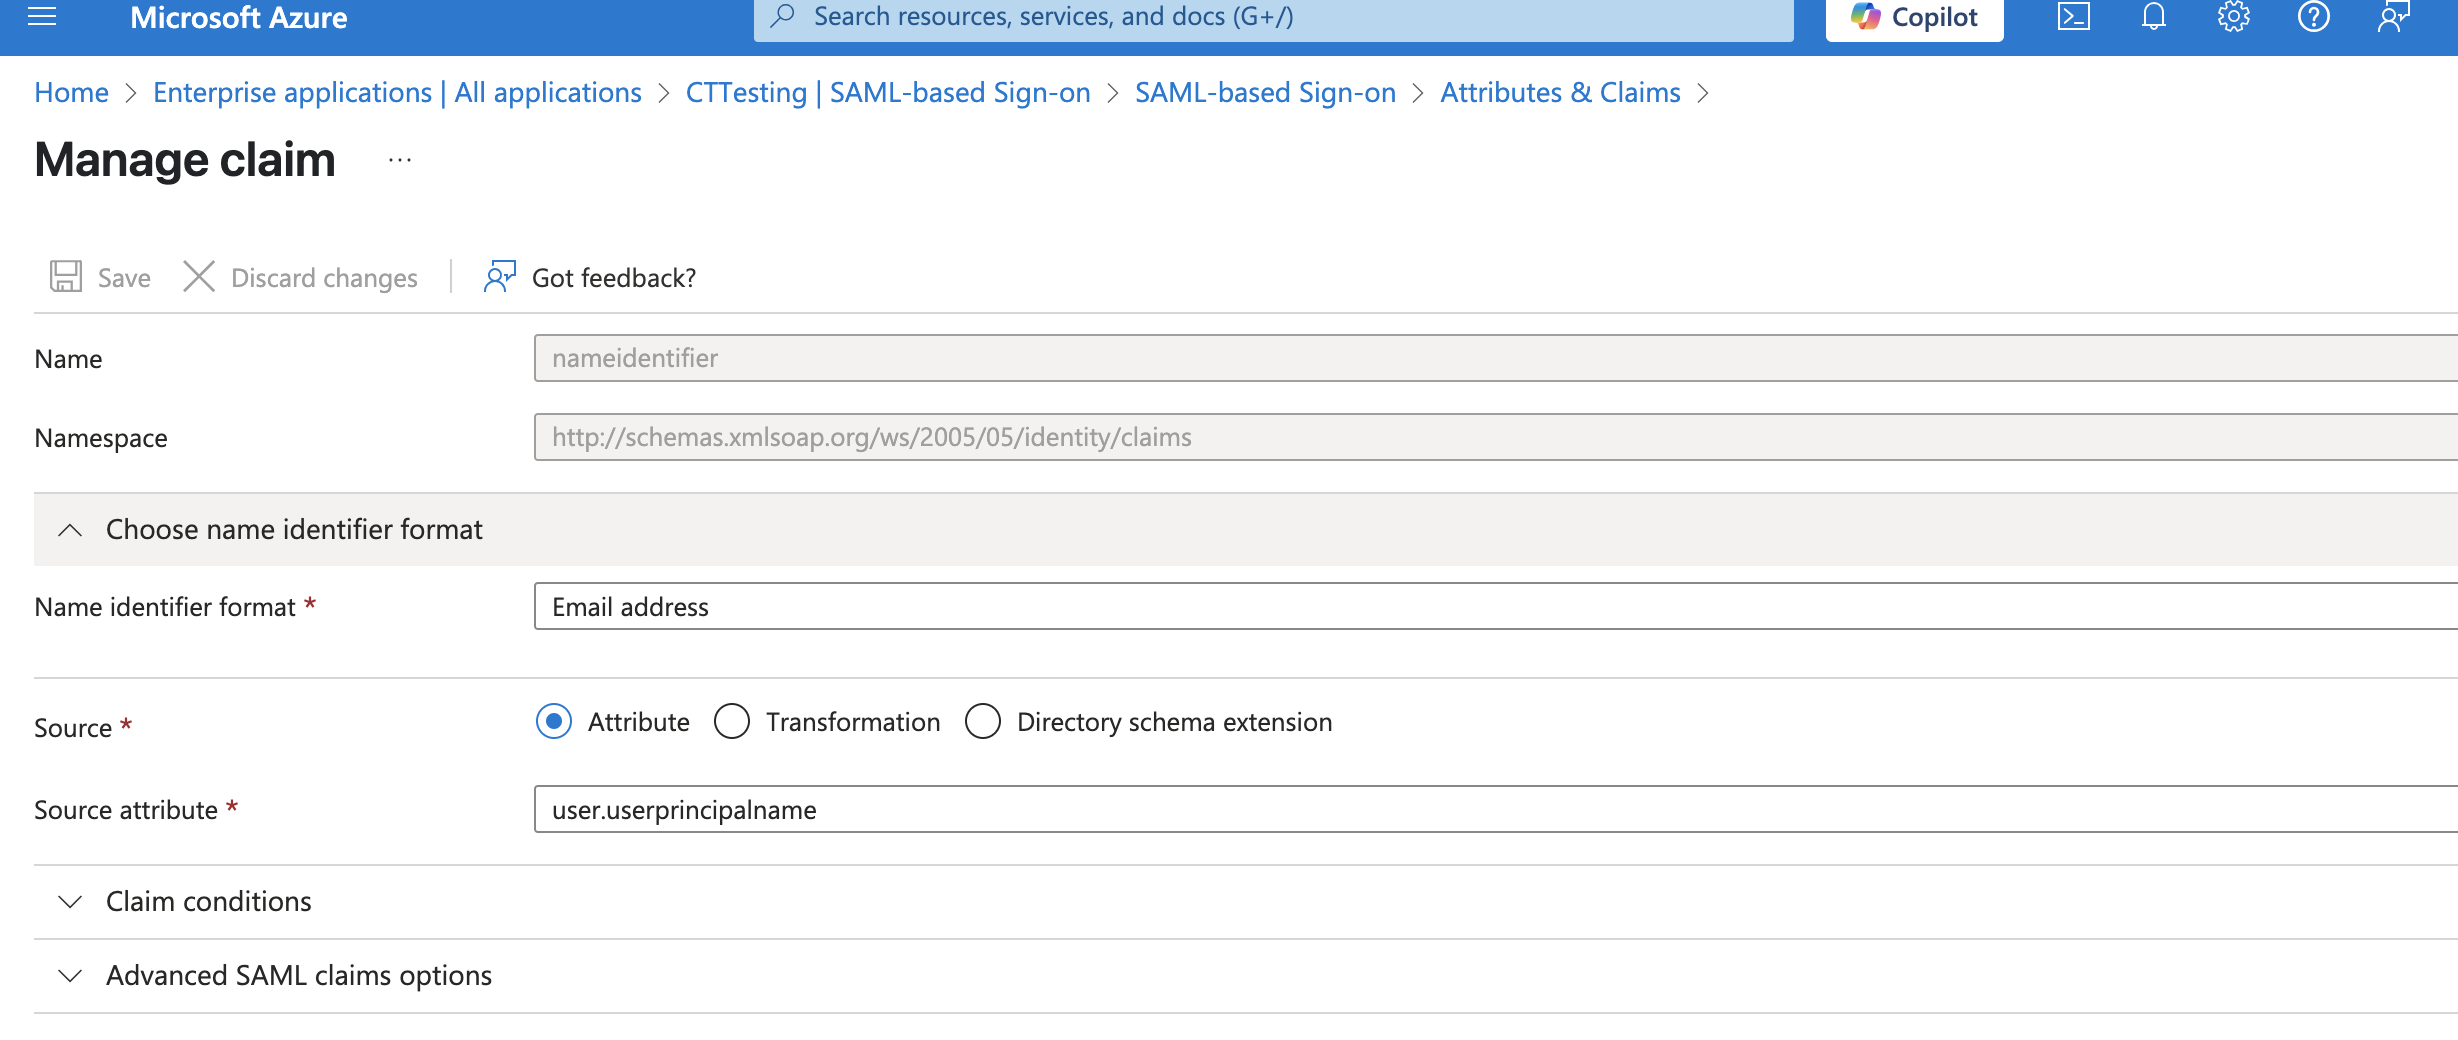
- Enter Name Identifier format as Email address and Source attribute as user.userprincipalname
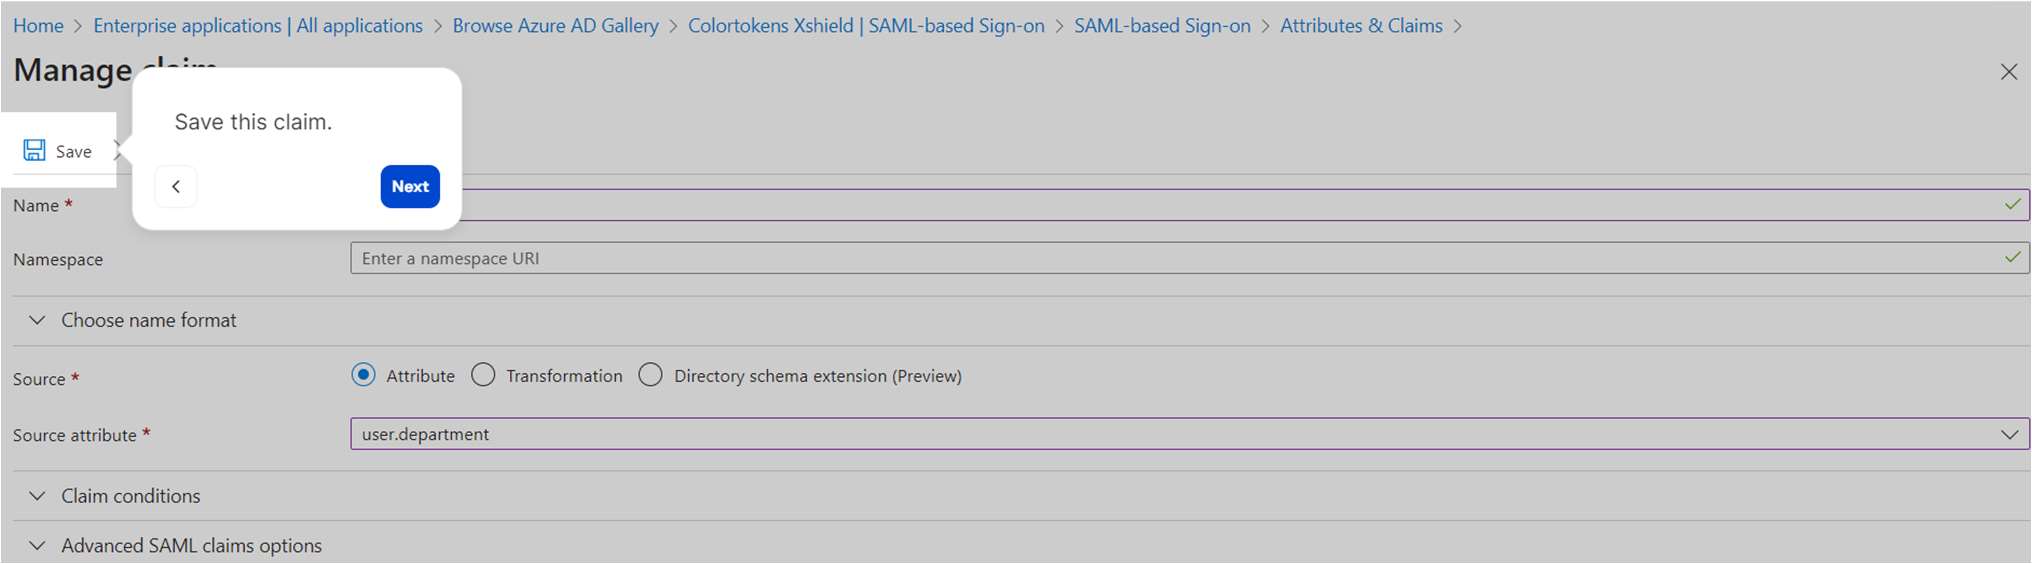
- Save the claim and confirm that the new claim has been added
Activate Azure AD SSO in Xshield
- Navigate back to the SAML 2.0 integrations page in Xshield where we left off
- Ensure Pick from Metadata is selected
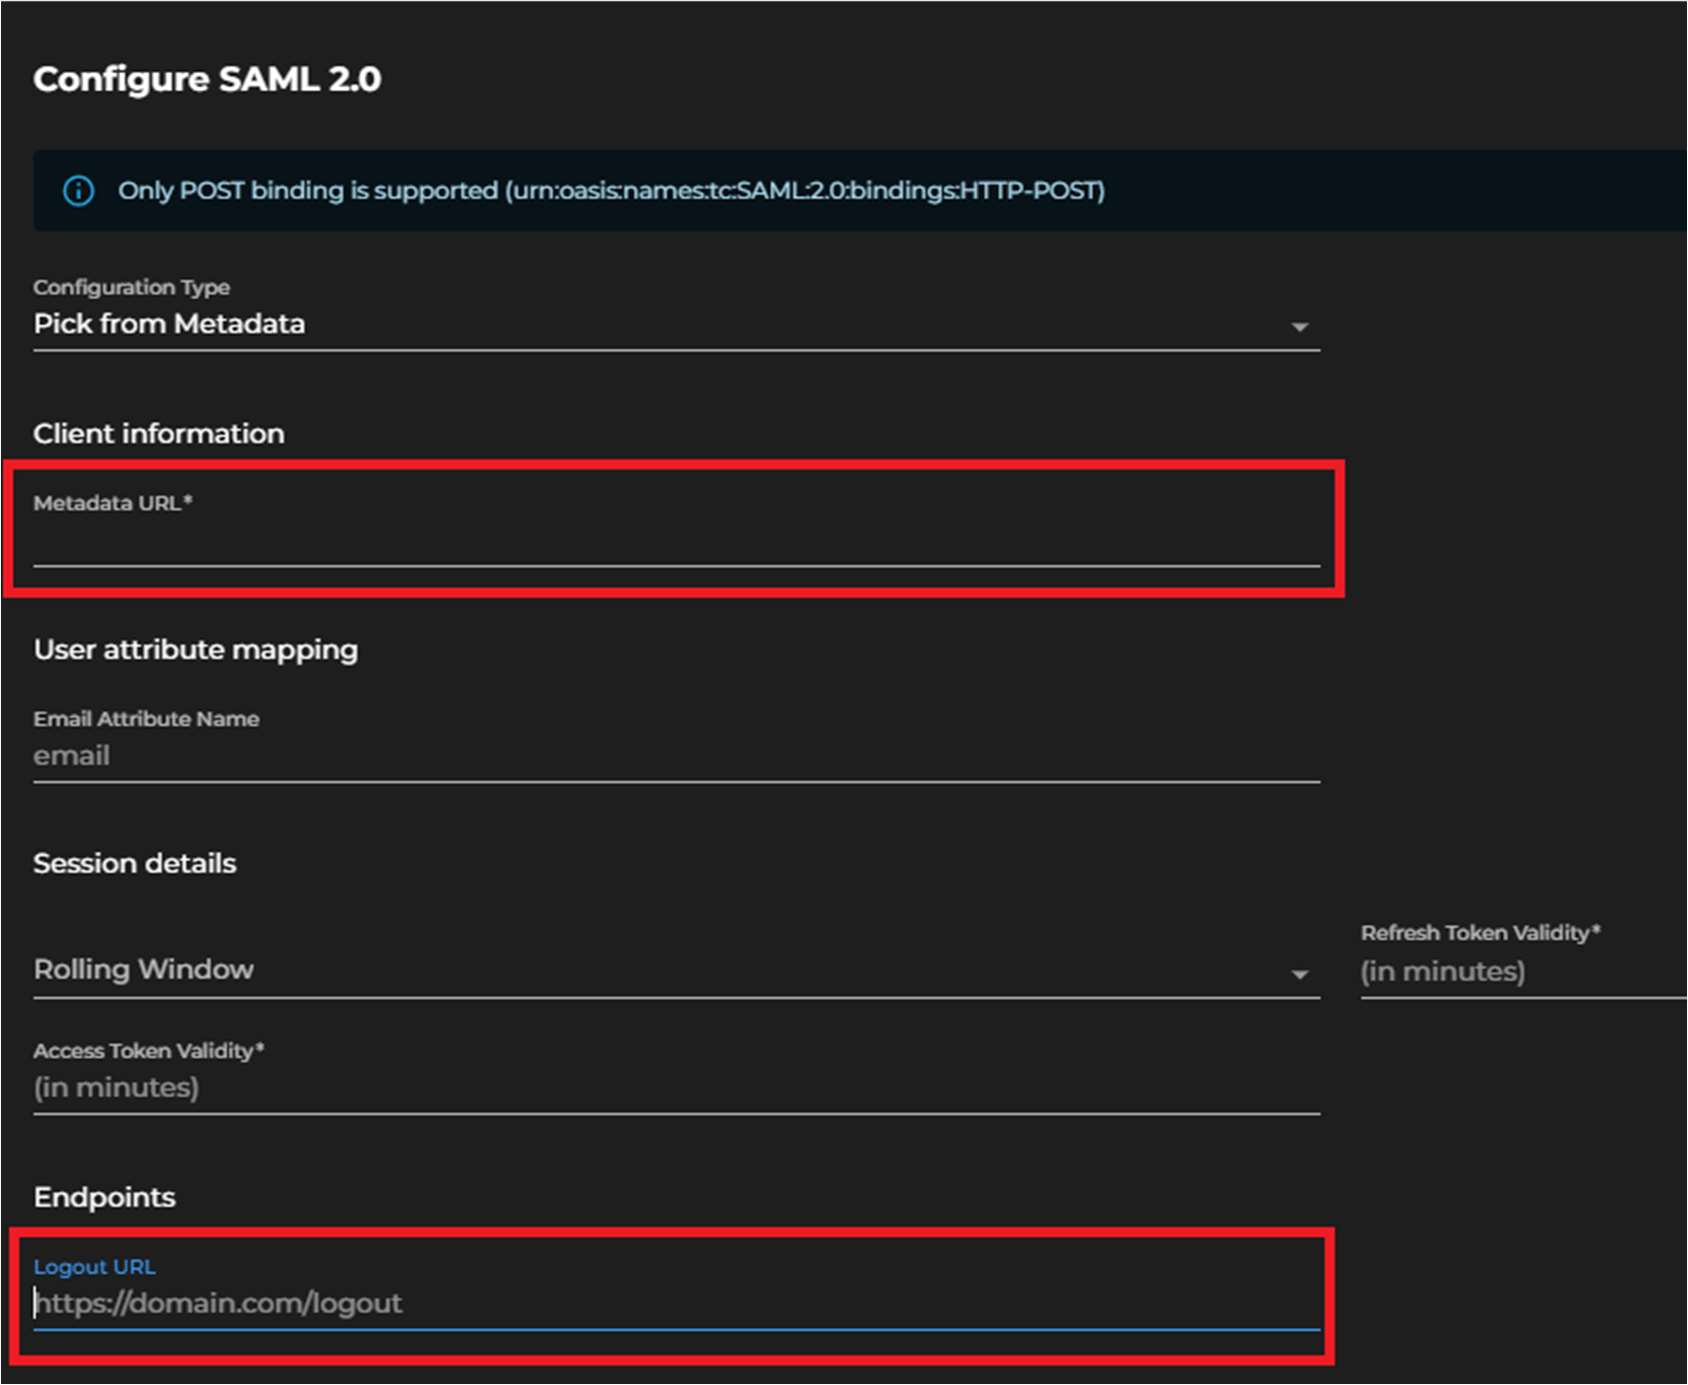
- Add the configuration data copied from Azure app you created earlier (Step 15 in Configuring Azure)
- Fill the App federation Metadata URL in the Metadata URL text box
- Fill the Logout URL in the Logout URL text box
- Click Save to complete the integration.
note
A log entry will be generated under Monitoring > Logs to confirm that the integration is activated