User Management
Role-Based Access Control (RBAC)
Role-Based Access Control (RBAC) establishes a framework for managing user access based on their designated roles within the system. This approach ensures that users only have the permissions necessary to perform their tasks effectively, minimizing security risks and unauthorized access to sensitive data.
Importance of RBAC
- Enhanced Security: By restricting access based on roles, you significantly reduce the risk of accidental or malicious data manipulation.
- Improved Efficiency: RBAC simplifies access management by grouping users with similar responsibilities under predefined roles.
- Streamlined Administration: Adding, removing, or modifying user permissions becomes easier when associated with roles rather than individual users.
- Compliance: RBAC helps meet industry regulations and internal security policies by demonstrating a structured approach to access control.
Roles and Permissions
What is a Role
A Role is a collection of permissions that defines what actions a user is allowed to perform within the platform.
Once a role is assigned to a user, the user inherits all the permissions associated with that role.
The Xshield platform supports both system defined roles as well as customized roles that can be assigned to tenant users.
1. Admin
The Admin role has the highest level of access and can perform all actions within XShield. This role is typically reserved for system administrators with full visibility and control. An Admin has the ability to view, edit, and create all data.
Special Privileges:
-
Agent/Asset Management
- Upgrade Agent
- Run agent diagnostics
- Recover agent
- Delete Agent
- Decommission Agent
- Delete Asset
- Manage agent tampering controls and secrets
-
Tenant Administration
- Manage custom tags
- Manage integrations
- Manage connectors
- SCIM management
-
Authentication
- Manage authentication configuration/SSO integration
- Manage org profile (Name, Logo, website, and other details)
- Issue and manage user invites
- Manage users and change roles
- Manage custom roles
- View all API keys of the tenant
-
Policy Control
- Serve and manage policy patches
2. Read Write User
This role allows users to view, edit, and create all data within XShield. It is ideal for users requiring full access for data manipulation but without special administrative privileges.
3. Read Only User
This role provides the most restricted access, allowing users to only view all data within XShield. It is suitable for users who need to stay informed but should not modify data.
4. Security Policy Admin
This role focuses on managing security policies for assets.
Privileges:
- Read-only access for general information.
- Modify and apply security policy templates to a group of assets based on matching tags.
- Annotate policy changes for transparency, visible to asset owners.
- View annotations left by asset owners regarding security policies.
5. Asset Owner
This role restricts the user to perform selective asset based operations. Also, the user has access to all the assets in the enterprise and there is no mechanism today to selectively restrict the access to selected assets (based on ownership). This may be available somewhere down the road.
Privileges:
- Read-only access to general asset information.
- Review all security policies applied to the owned assets only.
- Identify assets with pending policy changes or requiring updates.
- Push security policy changes to owned assets or adjust their security level.
- View and respond to annotations left by security policy admins regarding policies.
6. Custom Role
Custom role is a user-defined role that allows a tenant administrator to tailor the access based on specific needs. A custom role is created per tenant and is not part of the above four default roles Example use case: You may want to create a "NetworkOperator" role with only the ability to: Create and update assets View segmentation rules Read analytics dashboards
Expand to view the steps to create custom roles
Custom roles
Custom roles can be created only using the API and the Xshield Utility. There is no UI support for creating or deleting custom roles at this time. However, once the custom roles are created, it can be assigned to tenant users like any other roles either from the Xshield tenant. These custom roles will show up in the drop down menu while assigning a role to a user in the Xshield user management page.
Prerequisites
- You must be an Admin user of the tenant.
- Valid
auth_tokenmust be available for API authentication. - You must have the Tenant ID where the role will be created.
Steps to Create Custom Roles
In the below example, we shall create a new custom role - "Custom role" where the role allows the user to create and delete assets. Later we will assign it to a user in the Xshield tenant and verify the permissions of the user
Step 1: Create a Custom Role
Creating a Custom Role in the tenant allows for logical grouping of permissions and ensures scalable management of privileges
Endpoint:
POST /api/auth/admin/tenant/role
Headers:
Cookie: auth_token={{admin_token}}
Payload:
{
  "roleName": "CustomRole",
  "displayName": "Custom Role"
}
Response:
202 Accepted
Step 2: List Roles in the tenant
Retrieve the complete list of roles within the tenant as part of the validation and reference process for custom role creation. This ensures that the custom role has been successfully created. Be sure to note the roleID, as it will be required in Step 4.
Endpoint:
GET /api/auth/roles
Headers:
Cookie: auth_token={{admin_token}}
Response:
[
  {
    "roleID": 5,
    "roleName": "CustomRole",
    "tenantID": "enter_your_tenant_id",
    "displayName": "Custom Role",
    "user_created_role": true
  }
]
Step 3: Fetch available Permissions
Provides a comprehensive list of all available actions that can be managed within the Xshield platform, allowing you to select only the necessary permissions.
Endpoint:
GET /api/auth/permissions
Headers:
Cookie: auth_token={{admin_token}}
Response:
[
  {
    "permissionName": "CREATE_ASSET",
    "displayName": "Create Asset"
  },
  ...
]
Step 4: Assign Permissions to custom role
A Role is only an empty container, By assigning permissions to a role, you can define what actions the role is allowed to perform. This is the core of what makes RBAC work and ensures least privilege
You can find the role ID collected from step 2
Endpoint:
POST /api/auth/admin/permissions/roles
Headers:
Cookie: auth_token={{admin_token}}
Payload:
[
  {
    "permissionName": [
      "CREATE_ASSET",
      "DELETE_ASSET"
    ],
    "roleId": 5
  }
]
Response:
202 Accepted
Step 5: Assign Custom Role to User
By assigning the role to a user, you define what that user can do within the Xshield platform
The role can be assigned to a user from the Xshield tenant UI.
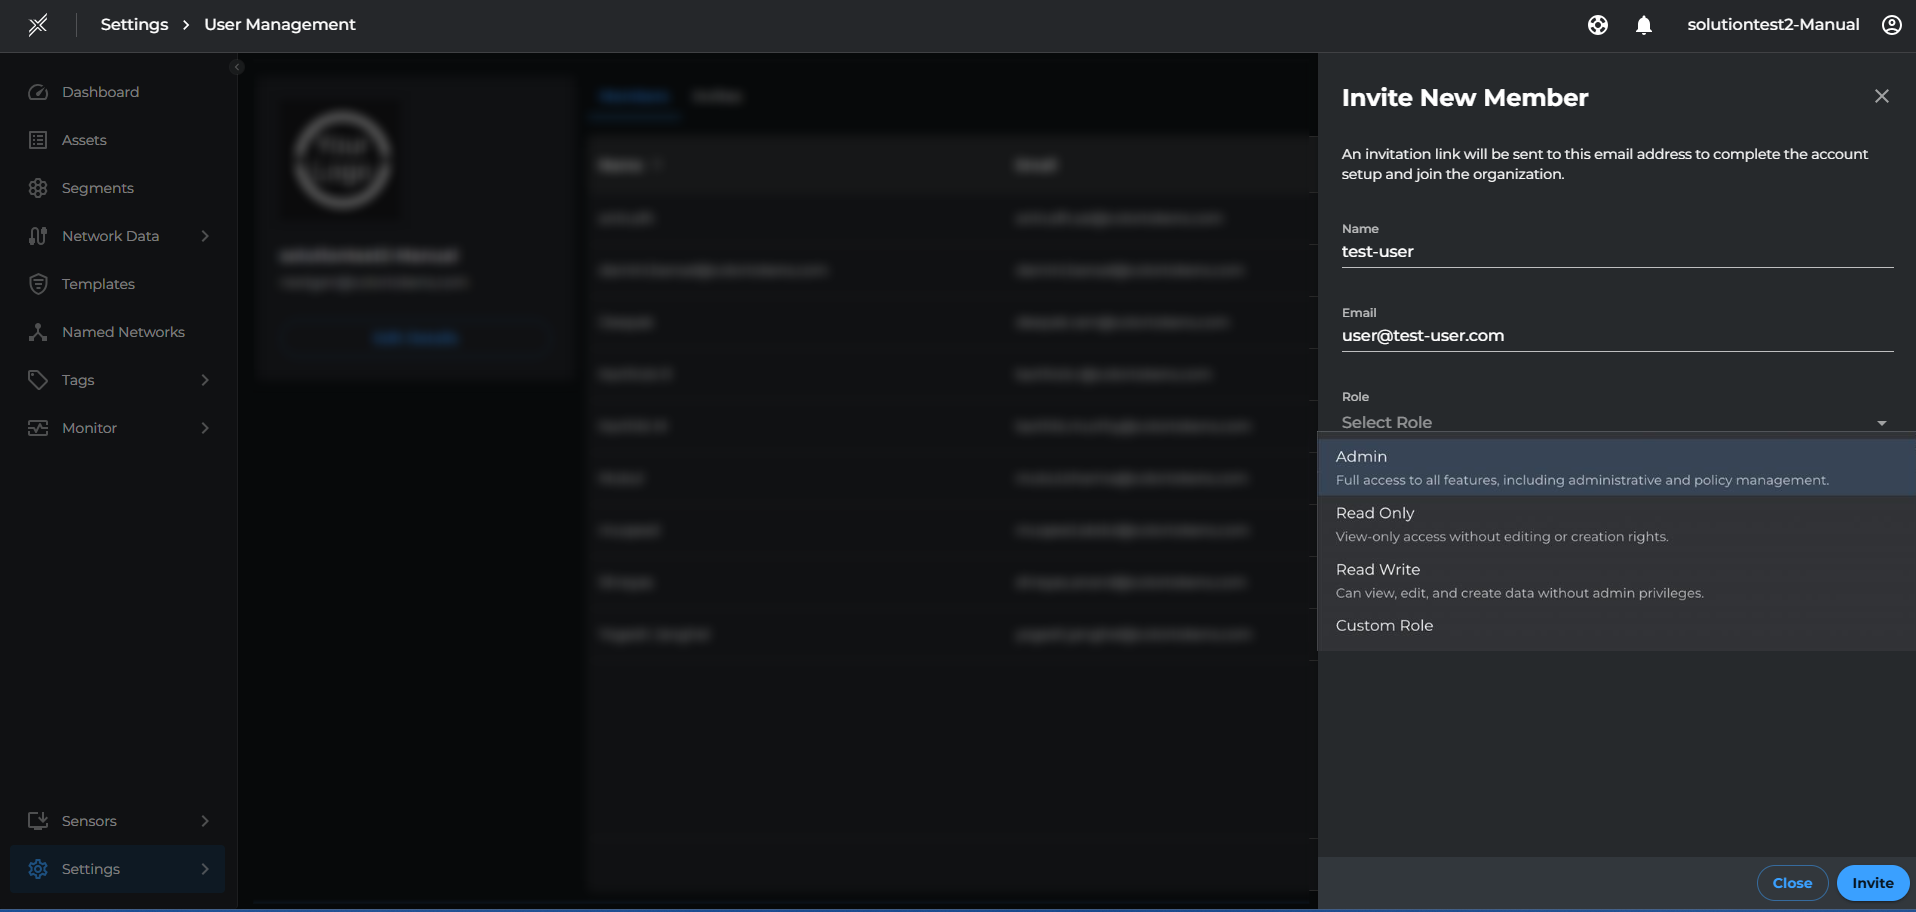
Log into the Xshield tenant and Navigate to Settings - User Management - Click on Invite Member. Enter the Name, email id and select the role from dropdown
Step 6: List Assigned Permissions for a User
This step shows the real, effective access the user has — it's the final check that your RBAC setup is working as intended and essential for verifying and auditing what access a user actually has.
Endpoint:
GET /api/auth/user/permissions
Headers:
Cookie: auth_token={{user_token}}
Note: The token here has to be from the user whose permissions need to be checked.
Response:
[
  "CREATE_ASSET",
  "DELETE_ASSET",
  ...
]
Note:
- Assigning a new role replaces any existing role for that user
- You can assign multiple permissions to multiple roles in one go.
- Xshield does not currently support defining new permissions or modifying existing ones. Custom roles must be created using the predefined set of permissions available via the platform. Advanced models like hierarchical RBAC or user-defined permissions are not supported at this time.
Scope Based RBAC
Scope-Based RBAC allows administrators to control what assets a user can see and what actions they can perform — based on two factors:
- Role → determines what the user is allowed to do
- Scope (Tag Constraints) → determines which resources the user is allowed to access
Each user is assigned a Role and, optionally, a Scope (tag-based constraints). These constraints are used to automatically filter resources such as Assets, Segments and Tag Rules, ensuring users only interact with resources relevant to them.
User Scopes (Tag Constraints)
Users can be assigned one or more core tags that define the boundaries of the assets they are allowed to access.
Tag Examples
| Tag | Description |
|---|---|
| environment | Production, Development, Testing |
| application | Name of the application |
| type | Asset type (server, container, etc.) |
| location | Region / datacenter |
| department | Owning or responsible department |
| owner | Asset owner |
| businessvalue | Criticality / business value |
Scopes define which assets a user sees or can interact with.
A user with environment=production and location=us-west will only see assets matching those tags.
If a user tries to access an asset outside their scope, Xshield returns: 404 Not Found (Since asset does not exist for that user’s scope) This enforces least privilege while keeping the system intuitive.
Admin and Auditor roles do not support scope-based RBAC, as these roles inherently require full visibility.
Security Benefits
- Granular Access Control: Permissions depend on both user role and asset scope.
- Least Privilege by Design: Users only see and act on assets relevant to them.
- Operational Scalability: Scopes (tags) remove the need to create dozens of custom roles.
Best Practices for user management
- Use default roles (Admin, Read-Only, Read-Write) when applicable to standardize access.
- Always validate role-permission mappings and user permissions.
- A user can have only one role at a time in Xshield. If you assign a new role to a user, it will replace any previously assigned role.