VPC Flow Logs
Enable VPC Flow Logs, send them to S3, and grant Xshield access so you get network traffic visibility. Choose the setup that matches your architecture:
- Per-account flow logs — Flow logs stay in the same AWS account as your workloads (the account you already onboarded as a Resource account). You enable flow logs to S3 there and grant the existing cross-account role access to the bucket.
- Centralized flow logs — Flow logs from multiple resource accounts go to one S3 bucket in a dedicated flow log account. You onboard that account as Flow Logs and create a dedicated IAM role for bucket (and optional KMS) access.
Choose your setup: Per-account flow logs · Centralized flow logs
Prerequisites (both paths)
Before you begin, ensure you have:
- Active AWS account(s) with administrative access (or equivalent permissions) to create and manage IAM roles, S3, and VPC flow logs as needed
- An S3 bucket to receive VPC Flow Logs (per-account: in the same account as your resources; centralized: in your dedicated flow log account)
Each section below adds any path-specific requirements.
Enable VPC Flow Logs and deliver to S3 (both paths)
The steps below are the same for both per-account and centralized setups. The only difference is which bucket you use as the destination: per-account — a bucket in the same account as the VPC; centralized — the ARN of the bucket in your flow log account (you create or use that bucket there, then use its ARN when enabling flow logs in each resource account).
Step 1: Create or select an S3 bucket for flow logs
If you don't already have a bucket for flow logs, create one (or select an existing bucket):
- Open Amazon S3 in the AWS Console.
- Create a new bucket (recommended) or select an existing bucket.
- Per-account: Use a bucket in the same account as the VPC you're monitoring.
- Centralized: Create or use the bucket in your flow log account (the account that will store flow logs from all resource accounts). When you enable flow logs in each resource account (Step 2), you'll use this bucket's ARN as the destination.
Step 2: Enable VPC Flow Logs and deliver to S3
-
Open VPC in the AWS Console in the account that has the VPC you want to monitor. (For centralized: do this in each resource account that will send flow logs to the central bucket.)
-
Select Your VPCs.
-
Select the VPC you want to monitor.
-
Open the Flow logs tab.
-
Click Create flow log.
-
Configure the flow log:
- Filter: choose
All(recommended) orRejectdepending on your requirements. - Destination: select Send to an Amazon S3 bucket.
- S3 bucket ARN: select or paste the ARN of your flow logs bucket (same account for per-account; flow log account bucket ARN for centralized).
- Log record format: Select Customise format.
- Log format: In the AWS Console, select all version 2 fields and add
tcp-flagsfrom version 3. - Note: The default format is version 2, which does not include
tcp-flags. Thetcp-flagsfield is required for connection count tracking.
- Filter: choose
-
Click Create flow log.
Step 3: Confirm log delivery
- After the flow log is created, wait a few minutes for delivery to start.
- In S3, confirm that new objects are being written under the prefix used by VPC Flow Logs.
Per-account flow logs
Use this section when flow logs are in the same account as your workloads (the account you already onboarded as a Resource account). You enable flow logs to a bucket in that account and grant the existing cross-account role access to it.
The flow logs bucket can be unencrypted or encrypted with SSE-KMS (customer-managed key). If you use KMS, the cross-account role must also have kms:Decrypt and kms:DescribeKey on that key. For the Manual (console-based) path, Step 4 below includes an optional KMS policy statement. For Interactive or Script-based, ensure the template or stack includes KMS decrypt permissions for the flow logs bucket key, or add them manually in IAM.
Before you begin (per-account)
In addition to the prerequisites above:
- AWS onboarding (resource discovery) completed so the cross-account role exists in this account
- A target VPC where you want to enable flow logs
- An S3 bucket in this account for flow log objects (you can create one during Step 1 above)
Step 4: Grant Xshield access to the flow logs bucket
Xshield must be able to read the flow log objects in your bucket. Choose the method that matches how you onboarded your AWS account.
4.1 Interactive
If during resource discovery (interactive onboarding) you already granted Flow Logs Access to all buckets (or to this bucket), you do not need to repeat this step. Continue to the next steps to confirm visibility.
If you have not yet granted access to this bucket, grant access by returning to the Xshield portal and then signing in to the AWS Console to update the stack. Steps below:
-
In the Xshield portal, go to Sensors → Cloud Connectors.
-
Select the AWS account you want to grant storage access to.
-
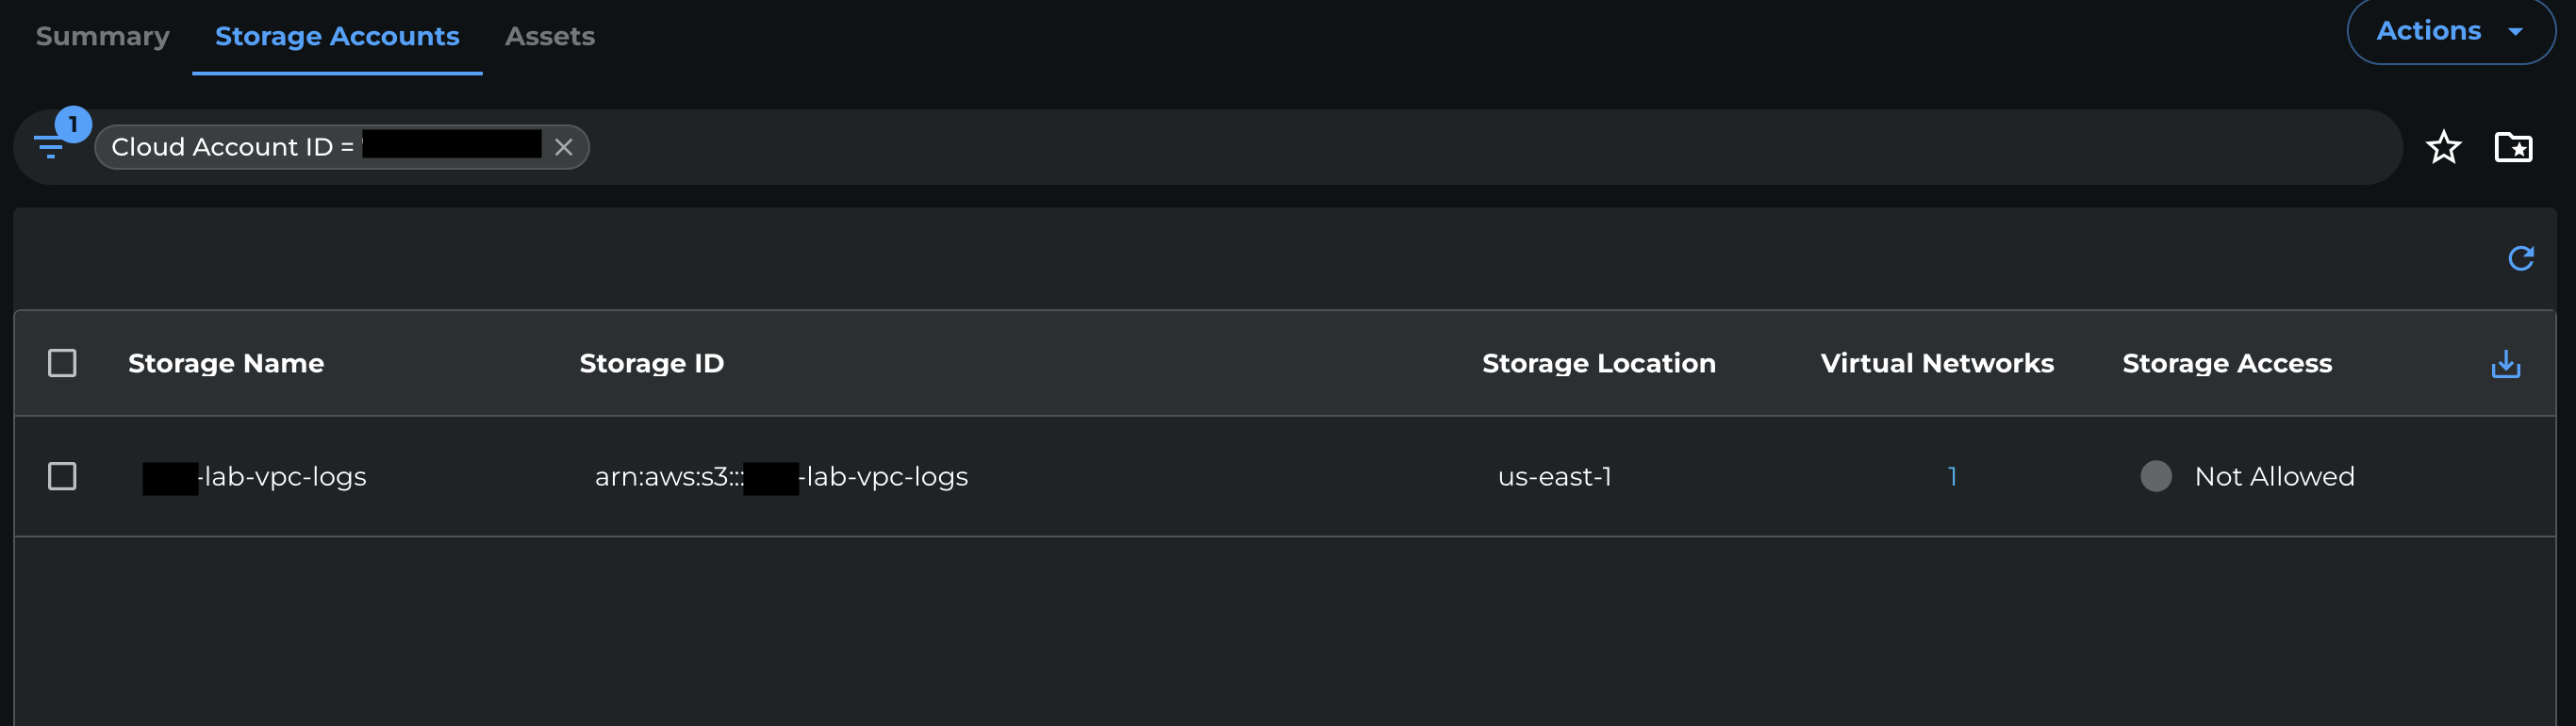
Open the Storage Accounts tab.
-
Select the S3 bucket you want to grant access to.
-
From the Storage access dropdown, select Grant.

-
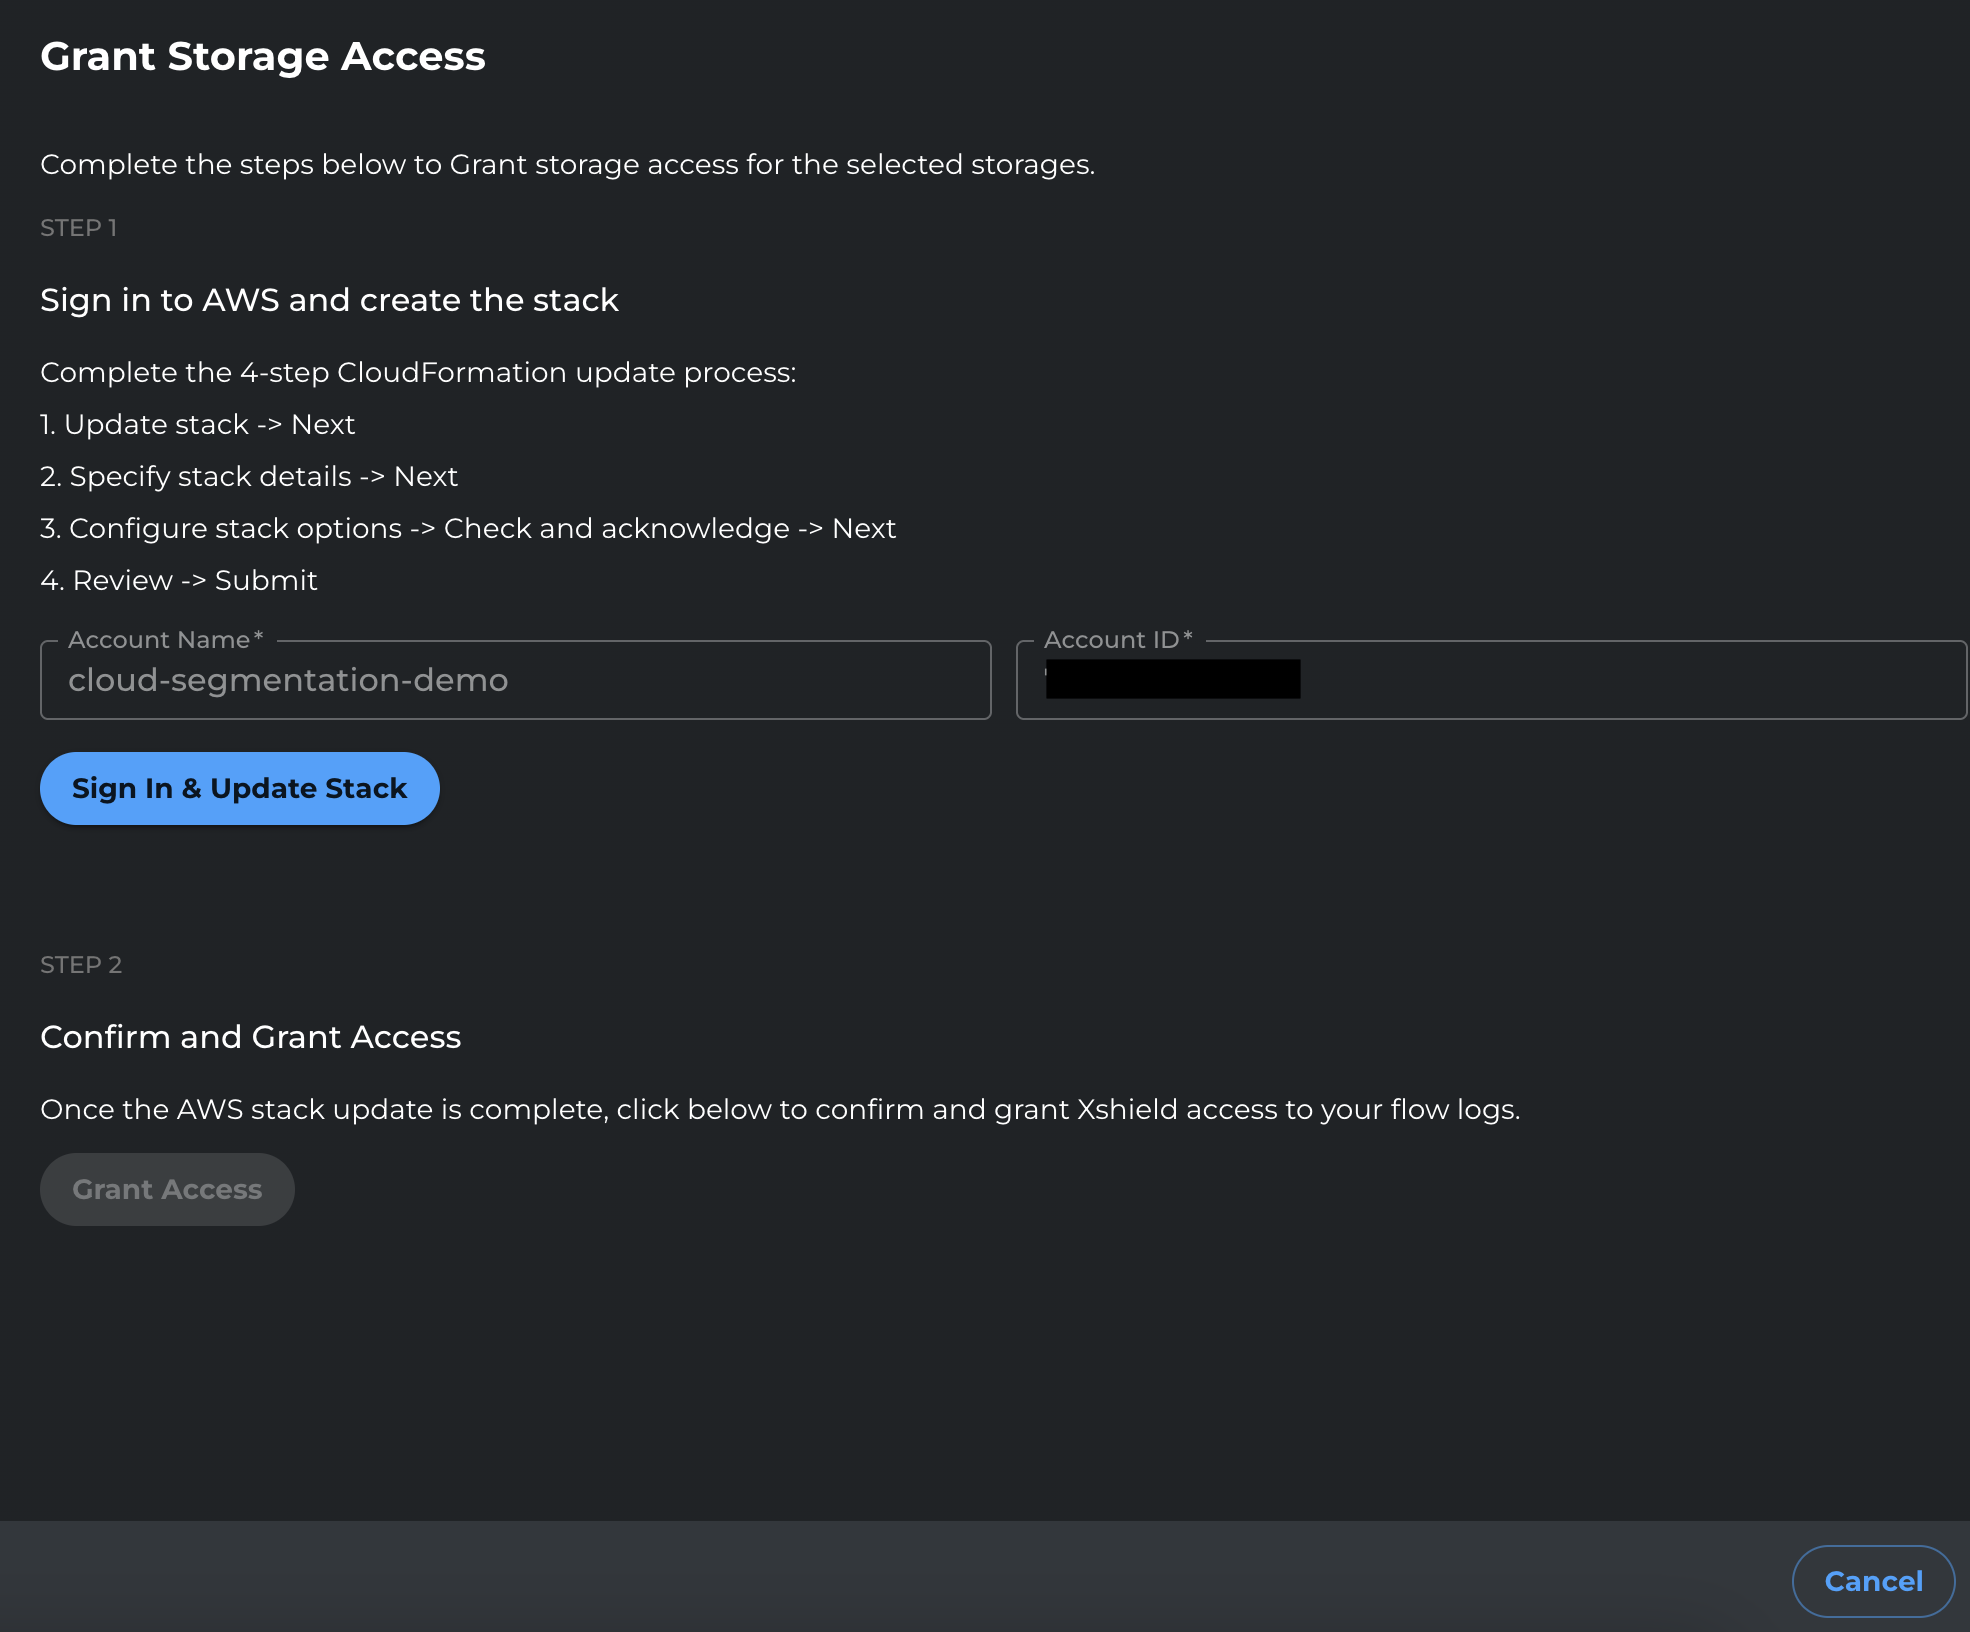
Click Sign in and update stack.
-
You will be redirected to AWS. Sign in with credentials that can update the CloudFormation stack.
-
In CloudFormation, click Next through the stack update pages.
-
On the final review page, review the changes, select the I acknowledge checkbox, and click Submit.
-
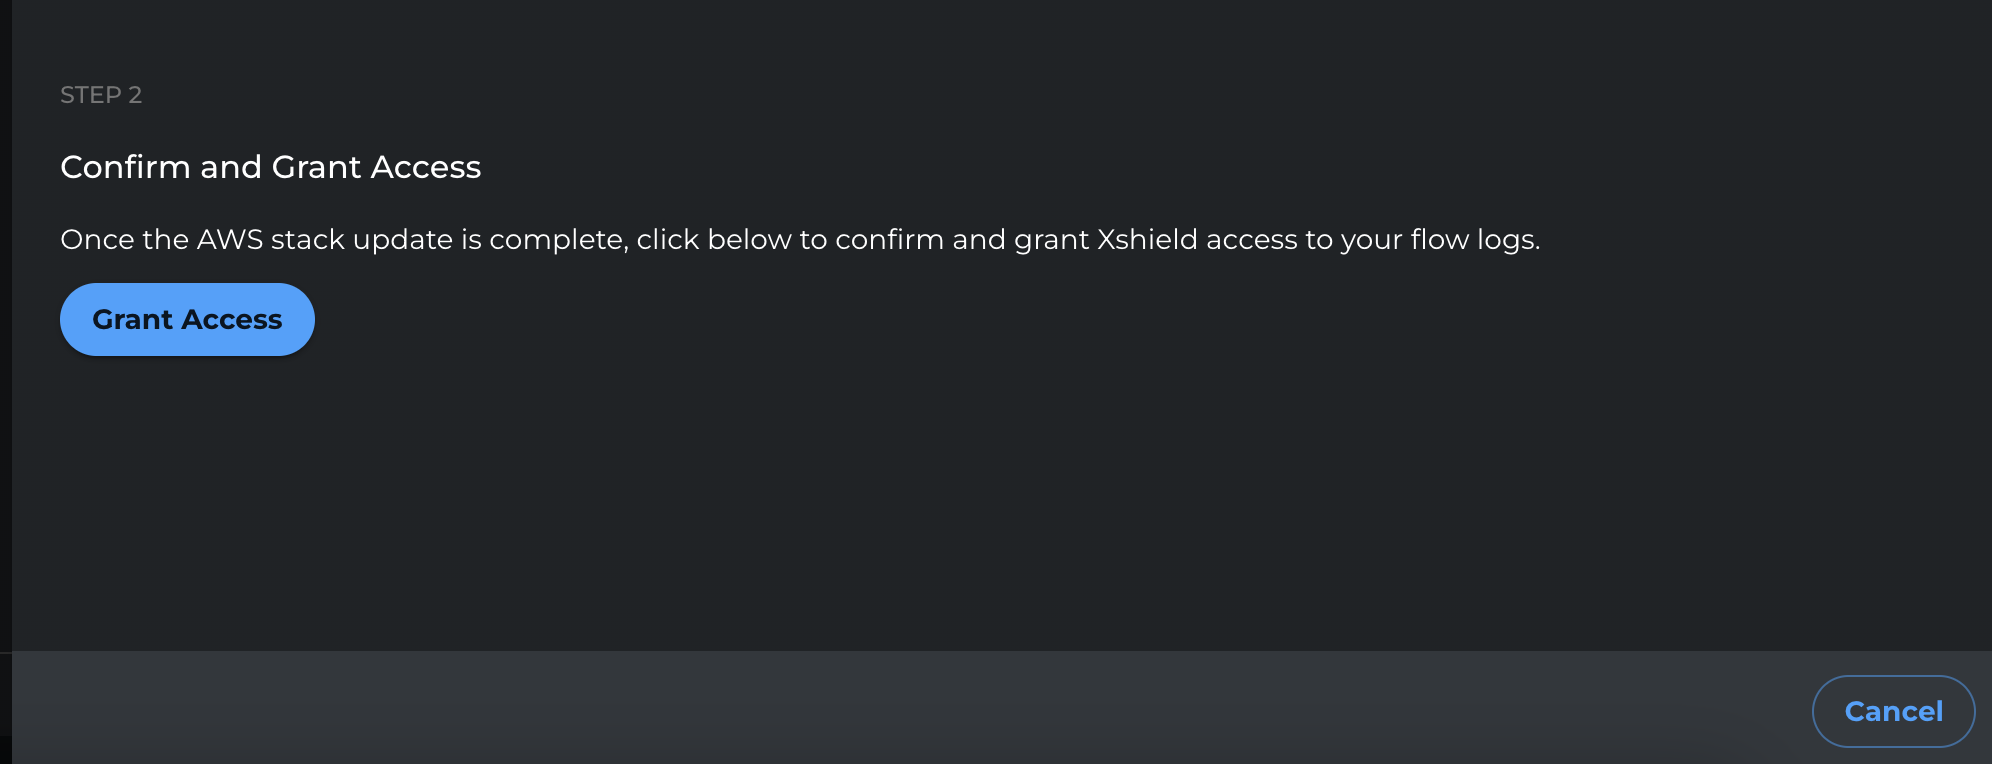
After the stack update completes, return to the Xshield portal and click Grant Access to finalize the change.
4.2 Script-based
If you onboarded using the deployment script, run the script again with the --storage-access flag:
-
In the Xshield portal, open the AWS onboarding flow and download the latest deployment script (the same script used during onboarding).
-
In your terminal, ensure your AWS CLI is authenticated to the target AWS account.
aws sts get-caller-identity --profile <AWS_PROFILE> -
Run the deployment script with the
--storage-accessflag to update the CloudFormation stack and enable S3 read access for flow log analysis.Optional flags (depending on your onboarding settings and use case):
--read-write
--no-deploy-xcloud
If your downloaded script supports it, you can target specific storage accounts with
--storage-idsand a comma-separated list of IDs:--storage-ids <ID_1,ID_2,ID_3>Example:
./deploy-colortokens-aws-stack.sh \
  --aws-profile <AWS_PROFILE> \
  --target-account <TARGET_AWS_ACCOUNT_ID> \
  --colortokens-account <COLORTOKENS_AWS_ACCOUNT_ID> \
  --xcloud-account <XCLOUD_AWS_ACCOUNT_ID> \
  --region <AWS_REGION> \
  --storage-access
Example with targeted storage IDs:
./deploy-colortokens-aws-stack.sh \
  --aws-profile <AWS_PROFILE> \
  --target-account <TARGET_AWS_ACCOUNT_ID> \
  --colortokens-account <COLORTOKENS_AWS_ACCOUNT_ID> \
  --xcloud-account <XCLOUD_AWS_ACCOUNT_ID> \
  --region <AWS_REGION> \
  --storage-access \
--storage-ids <ID_1,ID_2> -
Wait for the stack update to complete.
-
In the Xshield portal, re-run Verify / Connect (if available) and confirm storage-related functionality is enabled.
4.3 Manual (console-based)
If you created the cross-account role manually in the AWS Console (or via the manual onboarding flow), update the role's IAM policy:
-
Open the AWS Console and go to IAM → Roles.
-
Open the cross-account role you created for Xshield (for example,
ColorTokensCrossAccountAccessRole). -
Go to the Permissions tab.
-
Edit the inline policy that contains the S3 permissions (in the manual onboarding guide, the statement that includes
s3:ListBucket).- If you used an inline policy: click the policy name → Edit.
- If you used a managed policy: open the policy → Edit policy.
-
In the S3 statement, replace the wildcard resource (
"Resource": "*") with the ARN of your flow logs bucket and the ARN of objects in that bucket.-
Bucket ARN format:
arn:aws:s3:::YOUR_BUCKET_NAME -
Object ARN format:
arn:aws:s3:::YOUR_BUCKET_NAME/*
-
-
Add an S3 statement that allows reading objects in the bucket. Example (replace
YOUR_BUCKET_NAMEwith your flow logs bucket name):{
"Sid": "ColorTokensS3SpecificReadAccess",
"Effect": "Allow",
"Action": [
"s3:GetObject"
],
"Resource": [
"arn:aws:s3:::YOUR_BUCKET_NAME",
"arn:aws:s3:::YOUR_BUCKET_NAME/*"
]
} -
If you use more than one bucket for flow logs, add additional bucket and object ARNs to the
Resourcearray (one pair per bucket). -
If your bucket uses SSE-KMS or a customer-managed key, add a statement so Xshield can decrypt the objects. Replace the placeholders with your KMS key ARN (e.g.
arn:aws:kms:<REGION>:<ACCOUNT_ID>:key/<KEY_ID>):{
"Sid": "ColorTokensFlowLogKMSDecrypt",
"Effect": "Allow",
"Action": [
"kms:Decrypt",
"kms:DescribeKey"
],
"Resource": "arn:aws:kms:<REGION>:<ACCOUNT_ID>:key/<KEY_ID>"
}tipIf the bucket is not encrypted with a customer-managed KMS key, skip this step.
-
Save the policy.
After this step, Xshield can read the flow log objects and network traffic visibility is available.
Notes (per-account)
- Bucket encryption: The flow logs bucket can be unencrypted or encrypted with SSE-KMS (customer-managed key). If KMS is used, the role must have
kms:Decryptandkms:DescribeKeyon that key (see Step 4, Manual path, for the policy statement). - The VPC Flow Logs service must be able to write to the bucket. If your bucket policy is restrictive, ensure your configuration allows VPC Flow Logs delivery.
- Step 4 grants the cross-account role
s3:GetObject(and optionally KMS decrypt) so Xshield can read flow log objects. Without it, traffic analysis is not available for the data in that bucket.
Centralized flow logs
This section is for organizations that use a centralized logging model for VPC Flow Logs. In this architecture:
- Resource Accounts – Host workloads such as EC2, RDS, and Lambda. These are onboarded as Resource account type. In each resource account you enable VPC Flow Logs using the same steps above and set the destination to the central bucket ARN (in your flow log account).
- Flow Log Account – A dedicated account that stores VPC Flow Logs from all resource accounts in a single S3 bucket. This account is onboarded as Flow Logs account type. The steps below create the IAM role and onboard this account so Xshield can read that bucket.
Use this method when:
- Your organization forwards all VPC Flow Logs to a dedicated logging account
- Flow logs are stored in a single S3 bucket in a central flow log account
- You need to maintain strict separation between workload accounts and logging infrastructure
Before you begin
The steps below create an IAM role in your flow log account and onboard that account in the Xshield portal so Xshield can read the central bucket. You will use the same values in Step 1 (trust policy and permissions policy in AWS) and Step 2 (portal). Have them ready before you start.
Requirement specific to centralized: The resource accounts that will send flow logs to this bucket must already be onboarded as Resource accounts (see Manual (Console-based) Onboarding, or Interactive/Script-based as applicable).
| What you need | Where you use it |
|---|---|
| Account Name | Portal (Step 2) — any display label you choose |
| Account ID | Trust policy placeholder in Step 1.2; portal in Step 2. Find it in AWS Console (account dropdown or Support center). |
| IAM Role Name | You choose this in Step 1.4 when creating the role. Use the same name in the portal in Step 2. |
| External ID | Trust policy in Step 1.2; portal in Step 2. Xshield shows this in the portal when you add the flow log account. See AWS best practices for External ID. |
| S3 Bucket ARN | Permissions policy in Step 1.3; portal in Step 2. Your centralized flow logs bucket. |
| KMS Key ARN (if bucket is encrypted) | Permissions policy in Step 1.3 only. Omit if the bucket is not encrypted with a customer-managed key. |
| ColorTokens AWS account ID | Trust policy in Step 1.2 only. Shown in the Xshield portal when you add the account. |
Step 1: Create the IAM Role
You will create an IAM role in the flow log account that grants read-only access to the centralized S3 bucket and KMS key (if applicable).
Step 1.1: Sign in to AWS Console
- Sign in to the AWS Console for your flow log account.
- Navigate to IAM → Roles → Create role.
Step 1.2: Create the Trust Policy
-
Select Custom trust policy.
-
Paste the following trust policy. Replace
<ColorTokens Account ID>and<External ID>with the values shown in the Xshield portal (Xshield generates the External ID and provides it to you; use that same value in this trust policy and when entering account details in the portal):
{
    "Version": "2012-10-17",
    "Statement": [
        {
            "Effect": "Allow",
            "Principal": {
                "AWS": "arn:aws:iam::<ColorTokens Account ID>:role/ColorTokensFlowLogsCloudSecurityServiceRole"
            },
            "Action": "sts:AssumeRole",
            "Condition": {
                "StringEquals": {
                    "sts:ExternalId": "<External ID>"
                }
            }
        }
    ]
}
- Click Next.
Step 1.3: Create the Permissions Policy
-
On the Add permissions page, click Create policy (opens in a new tab).
-
Select the JSON tab.
-
Paste the following permissions policy:
{
    "Version": "2012-10-17",
    "Statement": [
        {
            "Sid": "HubFlowLogBucketListScoped",
            "Effect": "Allow",
            "Action": [
                "s3:ListBucket",
                "s3:GetBucketLocation"
            ],
            "Resource": "arn:aws:s3:::<FLOWLOG_BUCKET_NAME>"
        },
        {
            "Sid": "HubFlowLogObjectReadScoped",
            "Effect": "Allow",
            "Action": [
                "s3:GetObject"
            ],
            "Resource": [
                "arn:aws:s3:::<FLOWLOG_BUCKET_NAME>/AWSLogs/<RESOURCE_ACCOUNT_ID_1>/*",
                "arn:aws:s3:::<FLOWLOG_BUCKET_NAME>/AWSLogs/<RESOURCE_ACCOUNT_ID_2>/*"
            ]
        },
        {
            "Sid": "HubFlowLogKMSDecrypt",
            "Effect": "Allow",
            "Action": [
                "kms:Decrypt",
                "kms:DescribeKey"
            ],
            "Resource": "arn:aws:kms:<REGION>:<FLOWLOG_ACCOUNT_ID>:key/<KMS_KEY_ID>"
        }
    ]
}
- Replace the placeholders:
<FLOWLOG_BUCKET_NAME>– Name of your centralized S3 bucket<RESOURCE_ACCOUNT_ID_1>,<RESOURCE_ACCOUNT_ID_2>– AWS Account IDs of your resource accounts (add more as needed)<REGION>– AWS region where your KMS key is located<FLOWLOG_ACCOUNT_ID>– AWS Account ID of your flow log account<KMS_KEY_ID>– KMS key ID used to encrypt the flow logs
If your logs are not encrypted with a customer-managed KMS key, you can remove the HubFlowLogKMSDecrypt statement.
-
Click Next: Tags (optional), then Next: Review.
-
Enter a policy name (e.g.,
ColorTokensHubAccountAccessRole). -
Click Create policy.
-
Return to the Create role tab and refresh the policy list.
-
Search for and select the policy you just created (
ColorTokensHubAccountAccessRole). -
Click Next.
Step 1.4: Name and Create the Role
-
Enter a Role name (e.g.,
ColortokensHubFlowLogsRole). -
(Optional) Add a description.
-
Review the trust policy and permissions.
-
Click Create role.
-
Copy the Role ARN – you will need this in Step 2.
The IAM role name and External ID must match exactly what you enter in the Xshield portal in Step 2.
Step 2: Onboard Flow Log Account in Xshield Portal
After creating the IAM role in AWS, complete the onboarding in the Xshield portal.
Step 2.1: Navigate to Cloud Connectors
-
Sign in to the Xshield portal.
-
Navigate to Cloud Connectors → AWS → Add Account.
Step 2.2: Enter Flow Log Account Details
-
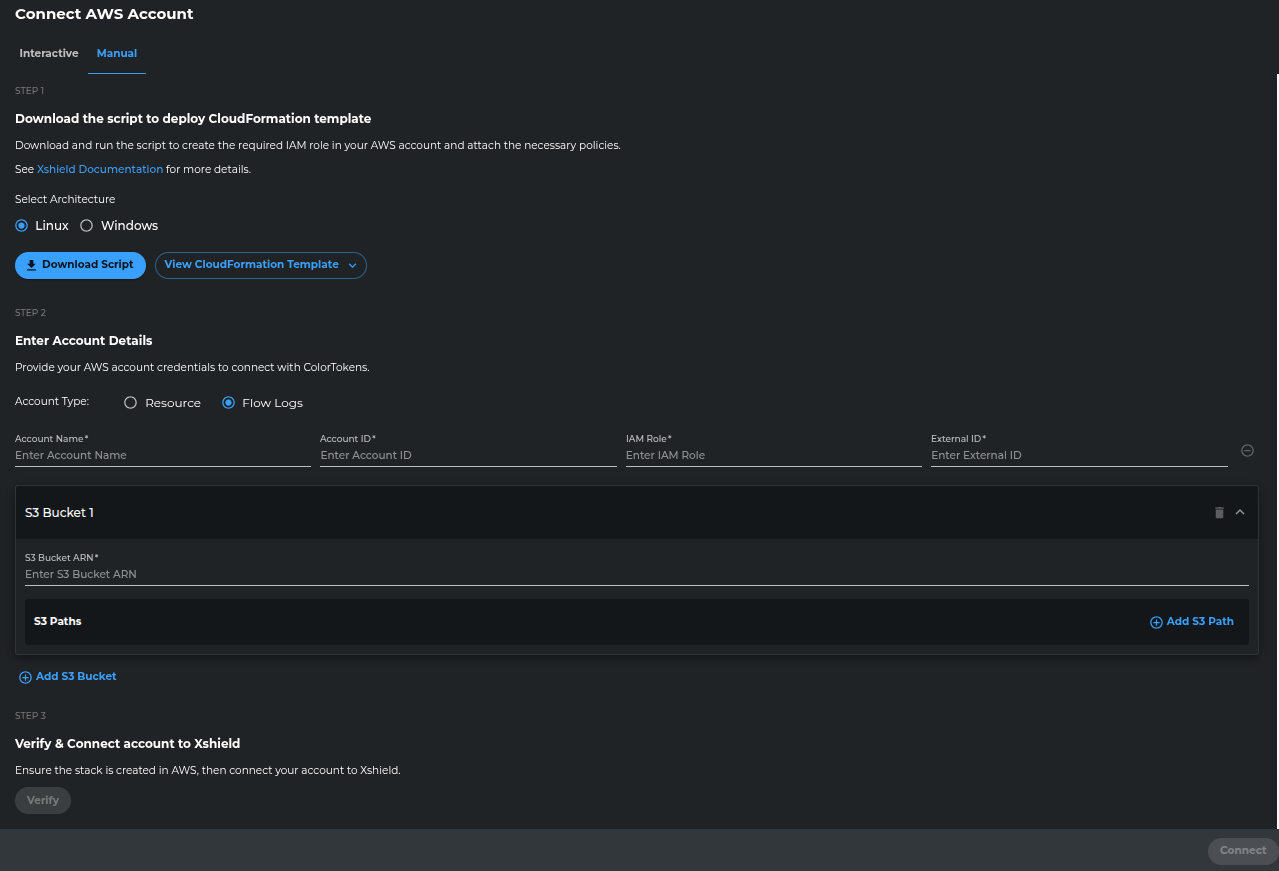
Select Account Type as Flow Logs.
-
Enter Account Name, Account ID, IAM Role Name, External ID, and S3 Bucket ARN (use the values from the table above).
-
Click Verify. Xshield will attempt to assume the IAM role in your flow log account. If it fails, confirm the IAM role name and External ID match exactly what you entered, and that the trust policy uses the correct ColorTokens Account ID and S3 Bucket ARN.
-
After verification succeeds, click Connect.
Revoke access to the flow logs bucket
When you want to remove Xshield access to a flow logs bucket (for example, when you stop sending flow logs to that bucket), use the steps below. Choose the method that matches how you onboarded the resource account.
Interactive
-
In the Xshield portal, go to Sensors → Cloud Connectors.
-
Select the AWS account you want to revoke storage access from.
-
Open the Storage Accounts tab.
-
Select the S3 bucket you want to revoke access from.
-
From the Storage access dropdown, select Revoke.

-
Click Sign in and update stack.
-
You will be redirected to AWS. Sign in with credentials that can update the CloudFormation stack.
-
In CloudFormation, click Next through the stack update pages.
-
On the final review page, review the changes, select the I acknowledge checkbox, and click Submit.
-
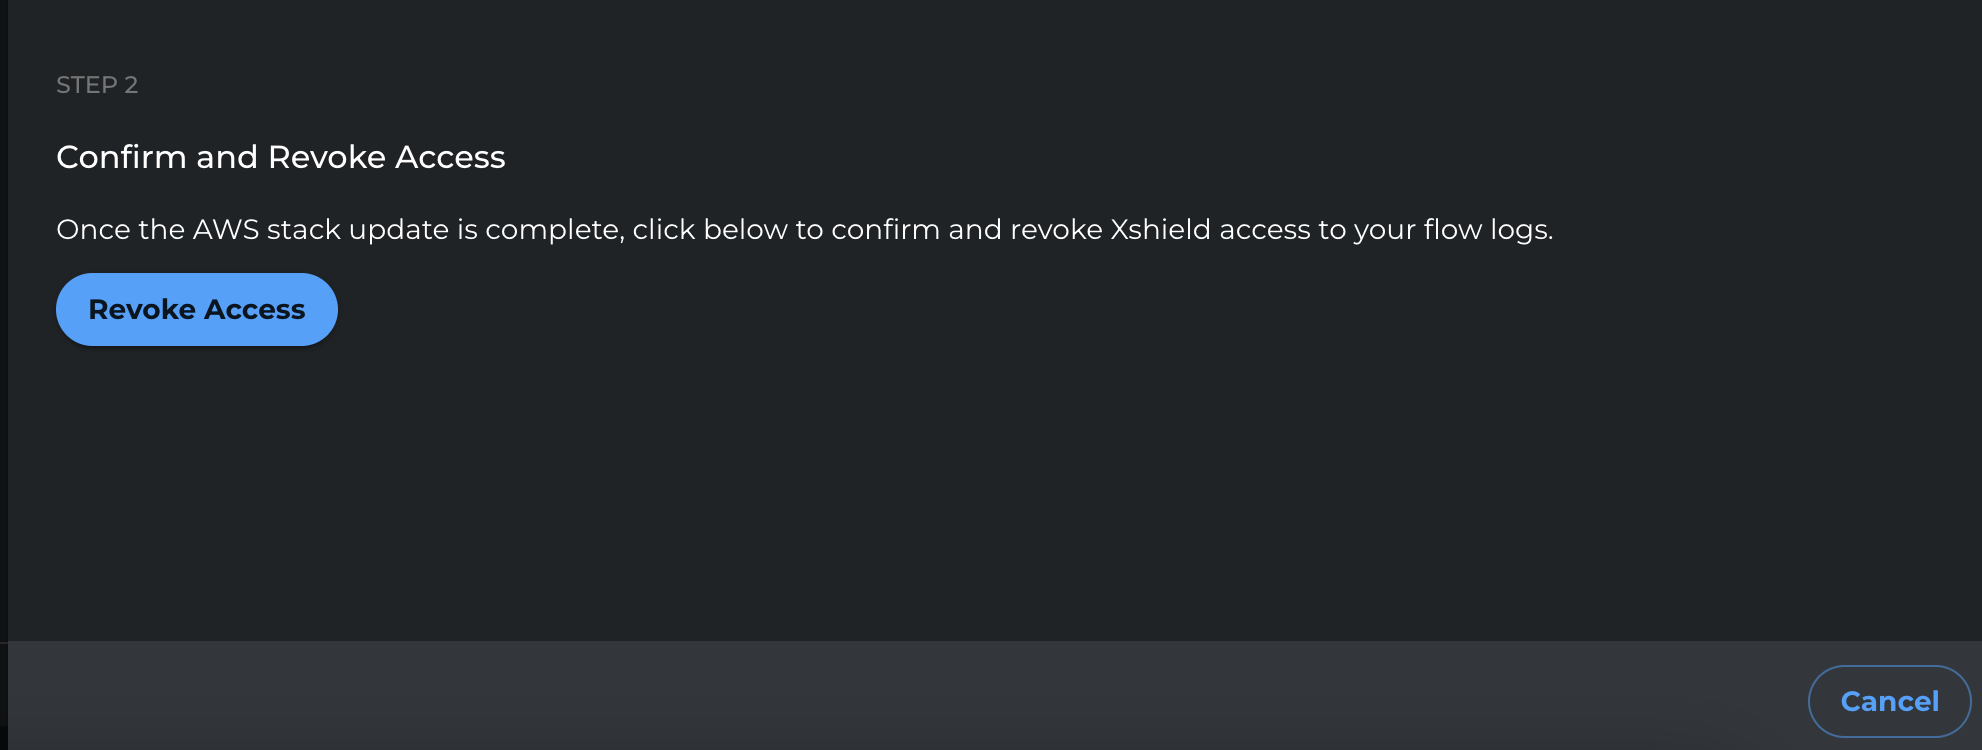
After the stack update completes, return to the Xshield portal and click Revoke Access to finalize the change.
Script-based
-
In the Xshield portal, download the latest deployment script again. (This ensures you are using the current template and parameters.)
-
Run the deployment script without the
--storage-accessflag to update the CloudFormation stack and remove storage access permissions../deploy-colortokens-aws-stack.sh \
--aws-profile <AWS_PROFILE> \
--target-account <TARGET_AWS_ACCOUNT_ID> \
--colortokens-account <COLORTOKENS_AWS_ACCOUNT_ID> \
--xcloud-account <XCLOUD_AWS_ACCOUNT_ID> \
--region <AWS_REGION> -
Wait for the stack update to complete.
-
Validate the change:
- In AWS, optionally use IAM Policy Simulator to confirm S3 read actions are denied (as expected).
- In the Xshield portal, re-run Verify / Connect (if available).
Manual (console-based)
-
Open the AWS Console and go to IAM → Roles.
-
Open the Xshield cross-account role (for example,
ColorTokensCrossAccountAccessRole). -
Go to the Permissions tab and open the policy that contains the S3 permissions.
-
Remove the bucket ARN(s) from the S3 statement's
Resourcelist.- To revoke access for a single bucket, remove both:
arn:aws:s3:::YOUR_BUCKET_NAMEarn:aws:s3:::YOUR_BUCKET_NAME/*
- To revoke all S3 read access for this role, remove the entire S3 statement that includes
s3:GetObject, or remove all bucket/object ARNs from itsResourcelist.
- To revoke access for a single bucket, remove both:
-
Save the policy.
To revoke access for only a specific bucket (instead of disabling storage access entirely), use the Interactive or Manual (console-based) steps above.
Reference: IAM permissions for flow logs access
Xshield needs the same IAM actions for both per-account and centralized flow logs; only the resource scoping differs. Use this table to understand what each permission is for, or to build Terraform, CloudFormation, or other IaC.
| Service | IAM action(s) | Resource | Why |
|---|---|---|---|
| S3 | s3:ListBucket, s3:GetBucketLocation | Per-account: flow logs bucket ARN. Centralized: central flow logs bucket ARN. | List the bucket and resolve its location so Xshield can discover flow log objects. |
| S3 | s3:GetObject | Per-account: flow logs bucket ARN and arn:aws:s3:::BUCKET_NAME/*.Centralized: arn:aws:s3:::BUCKET_NAME/AWSLogs/RESOURCE_ACCOUNT_ID/* for each resource account that sends logs to the bucket. | Read flow log objects for network traffic analysis. |
| KMS (optional) | kms:Decrypt, kms:DescribeKey | Customer-managed KMS key ARN used to encrypt the bucket (same for both setups). | Decrypt flow log objects when the bucket uses SSE-KMS. Omit if the bucket is unencrypted or uses default encryption. |
Where these apply: For per-account flow logs, these are added to the resource account’s cross-account role (by the stack when you grant storage access, or manually in Step 4). For centralized flow logs, they go on the role you create in the flow log account (Step 1).