Interactive
Introduction
This guide walks you through the interactive onboarding flow for connecting an AWS account to the Xshield Cloud Connector.
This method covers granting privileges to both Cloud Segmentation and Xcloud compliance.
Interactive Onboarding Process
-
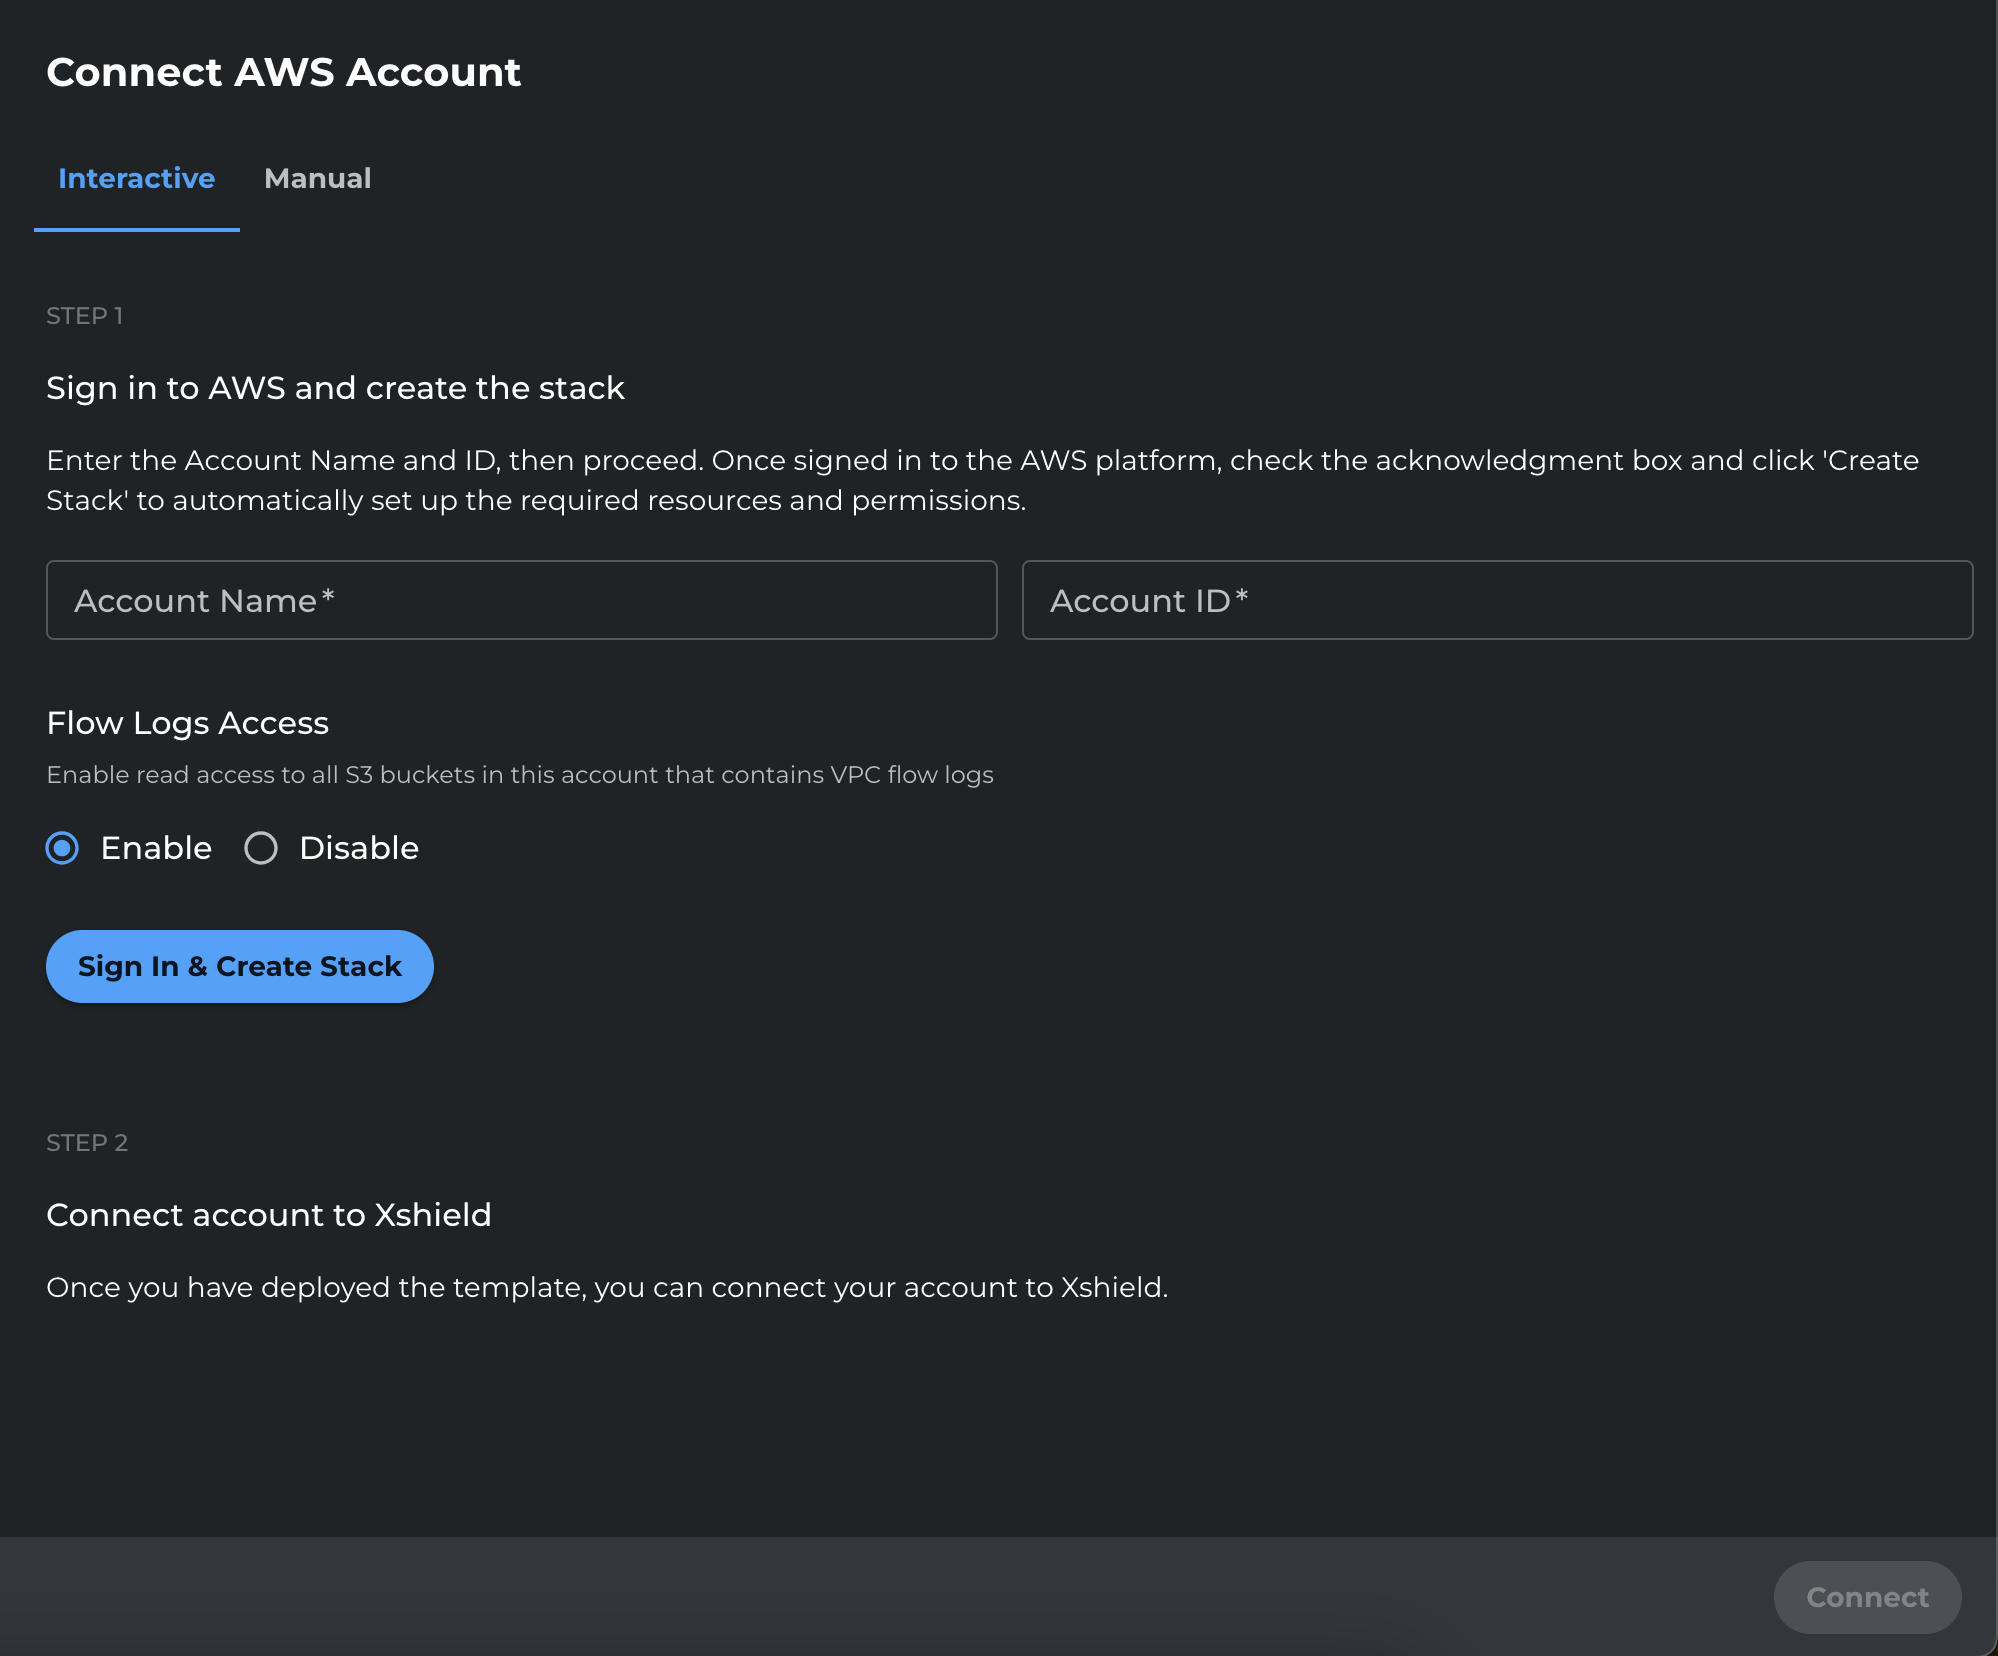
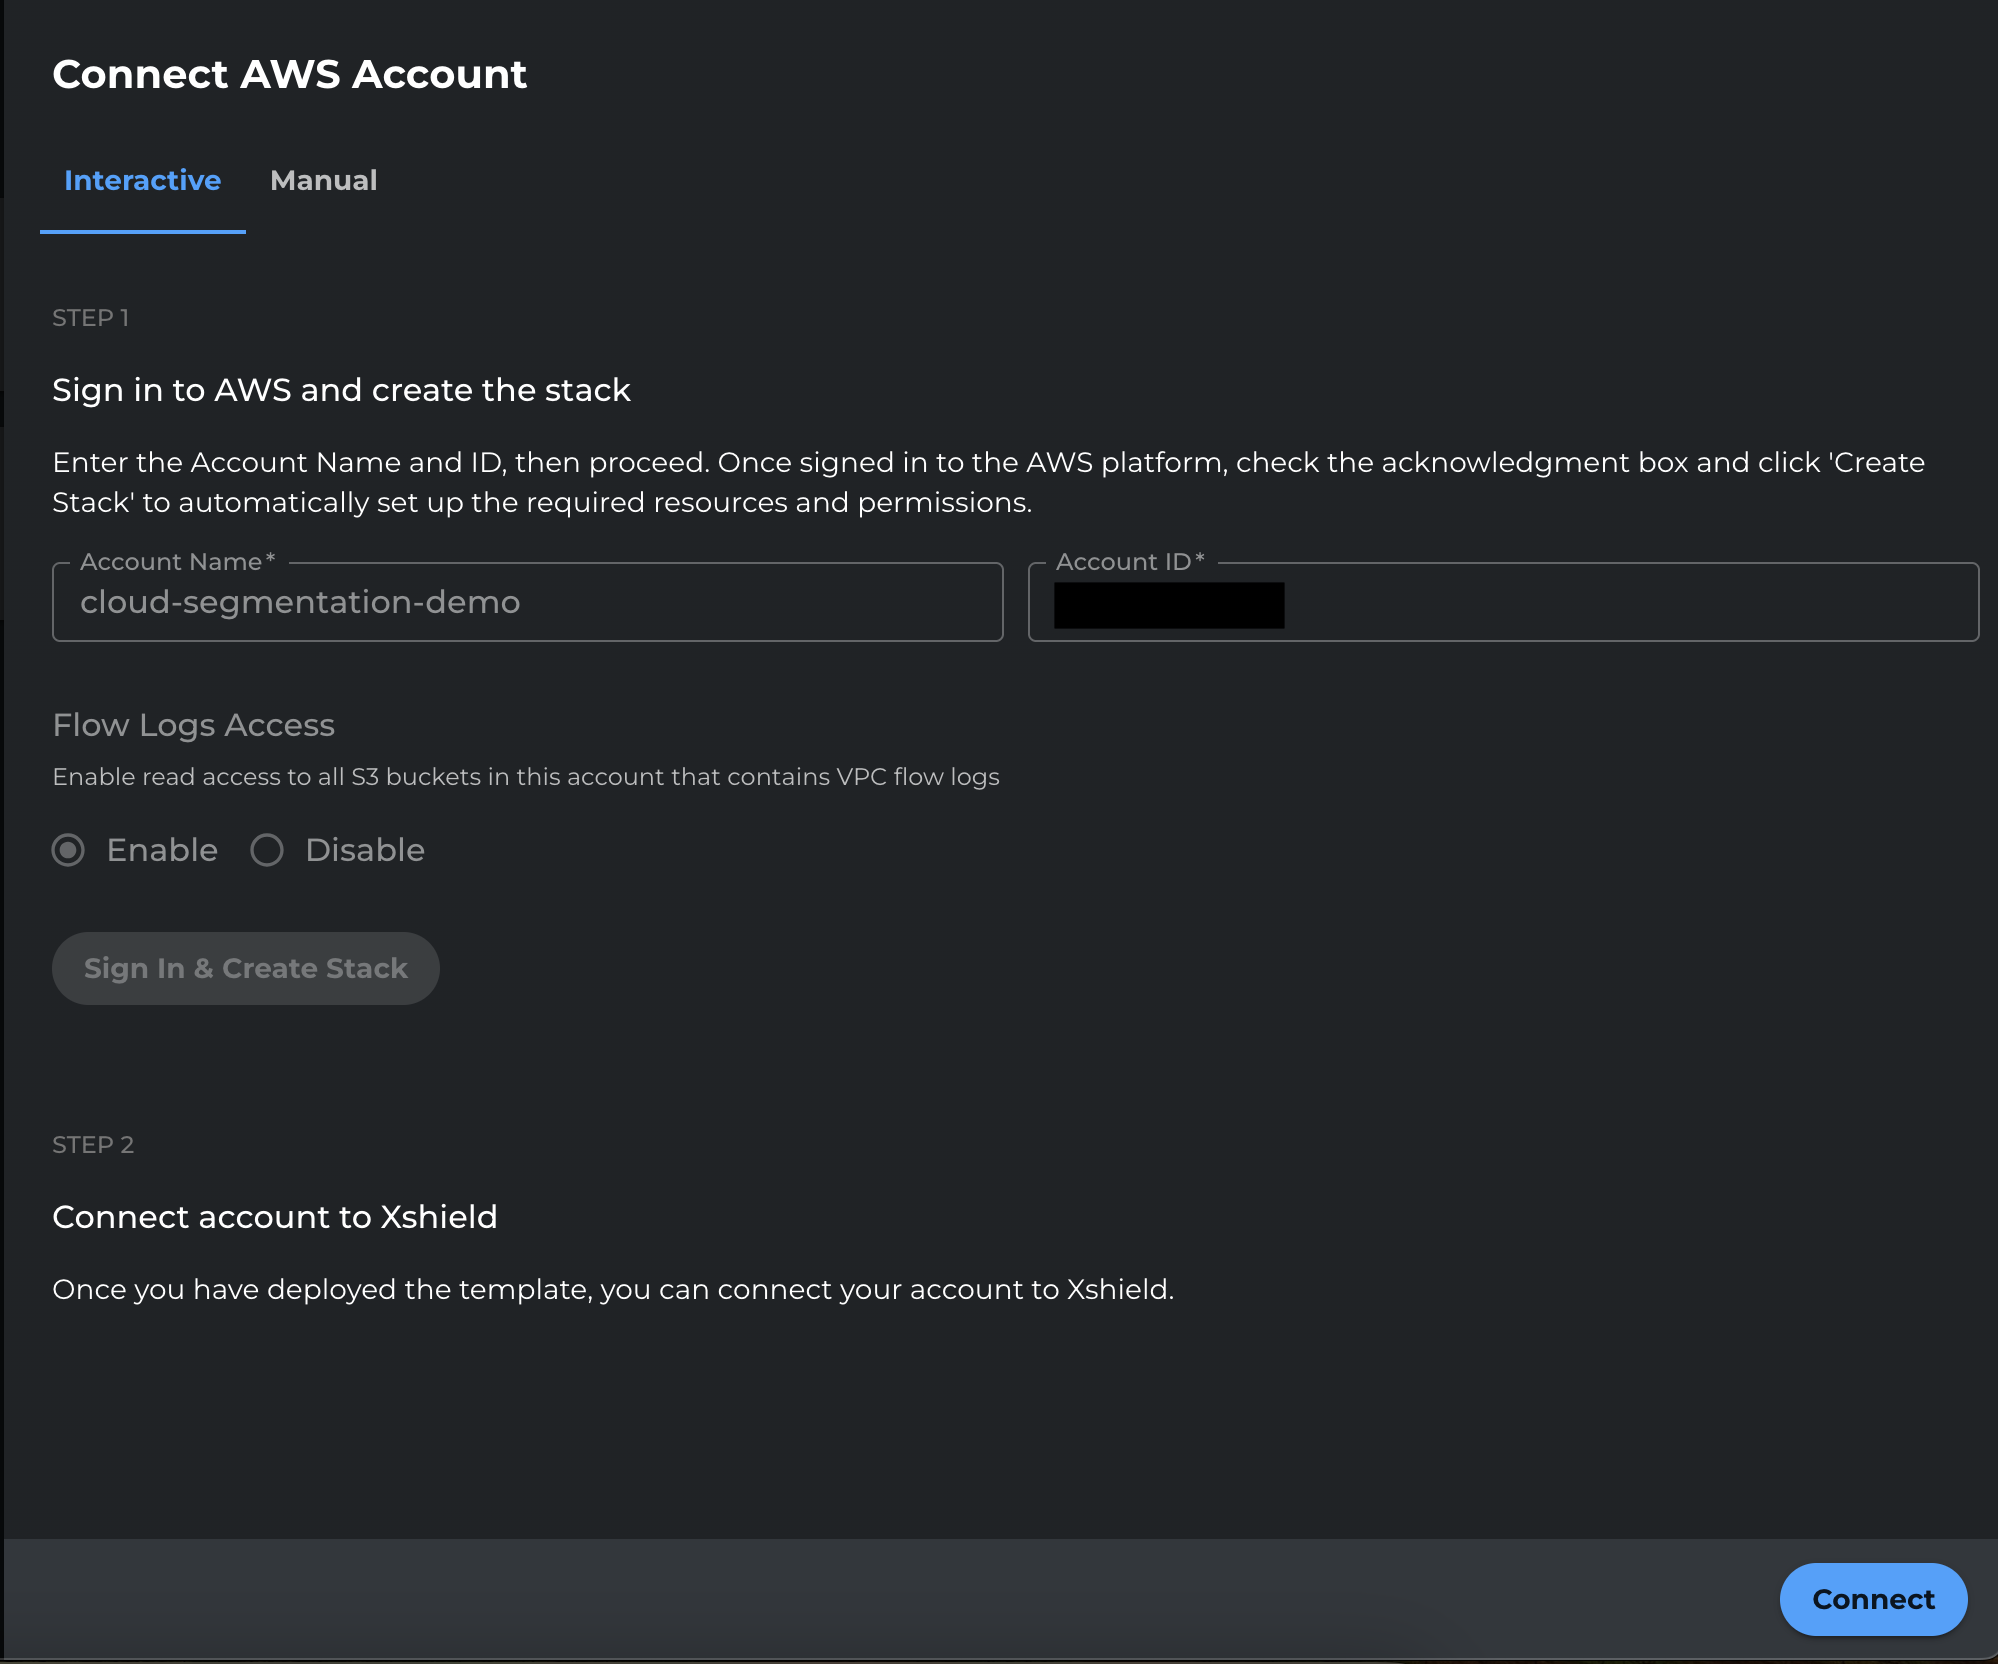
In the Xshield portal, enter the Account Name and Account ID, then click Sign In and Create Stack.

-
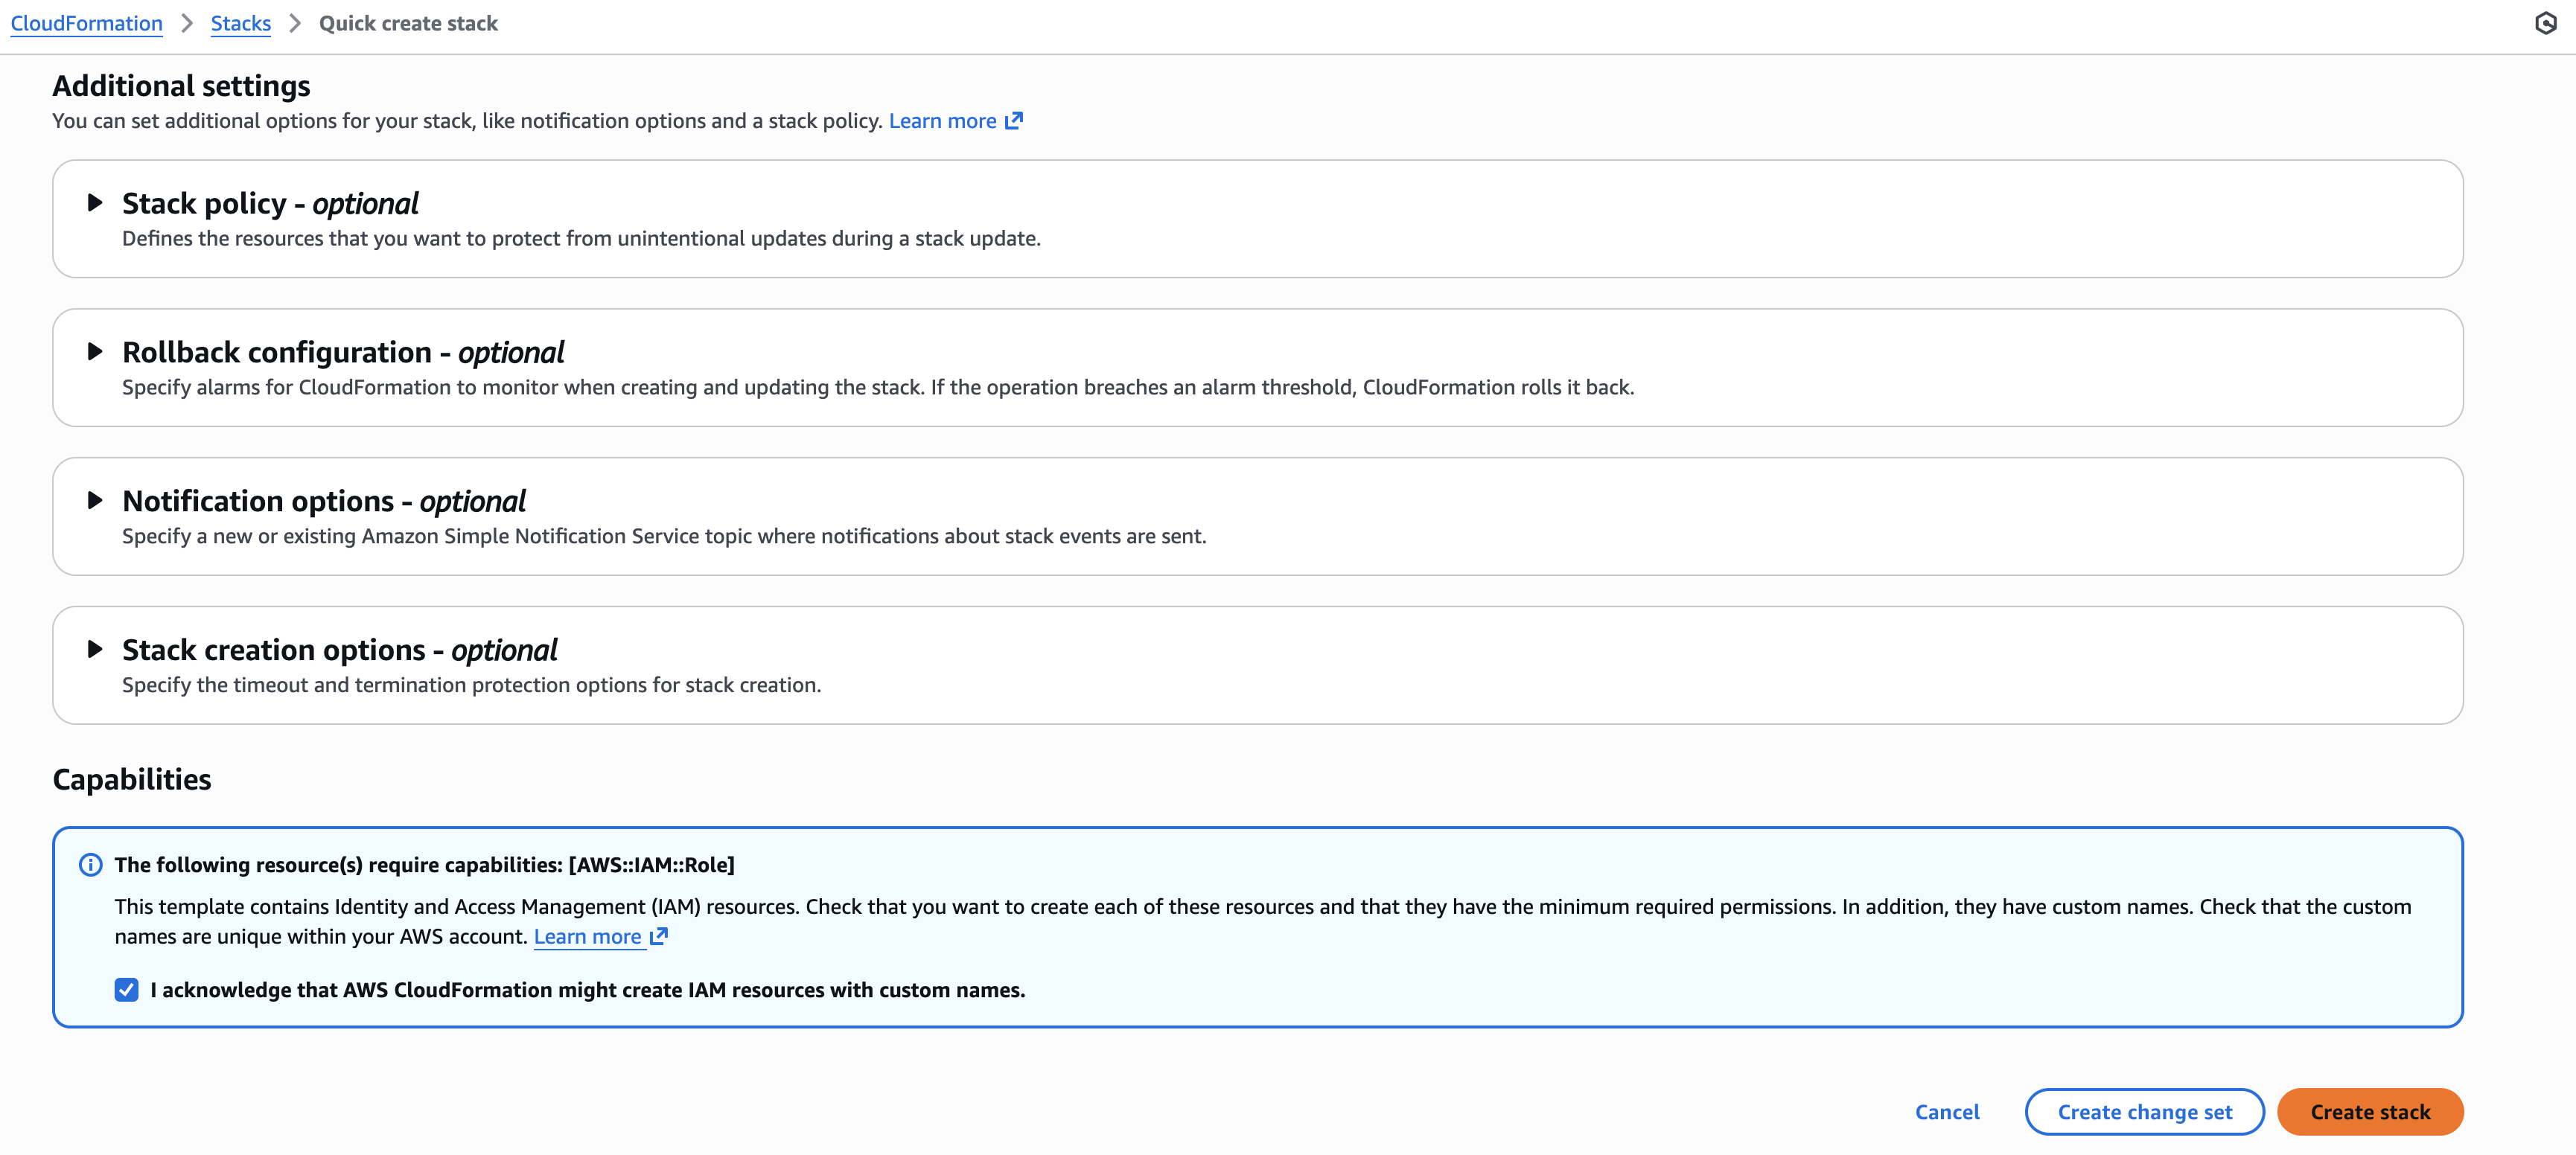
You will be redirected to the AWS Console.
- Sign in to the AWS account.
- Review the stack settings.
- Scroll down, select the checkbox to accept the cross account access request, and click Create stack.
-
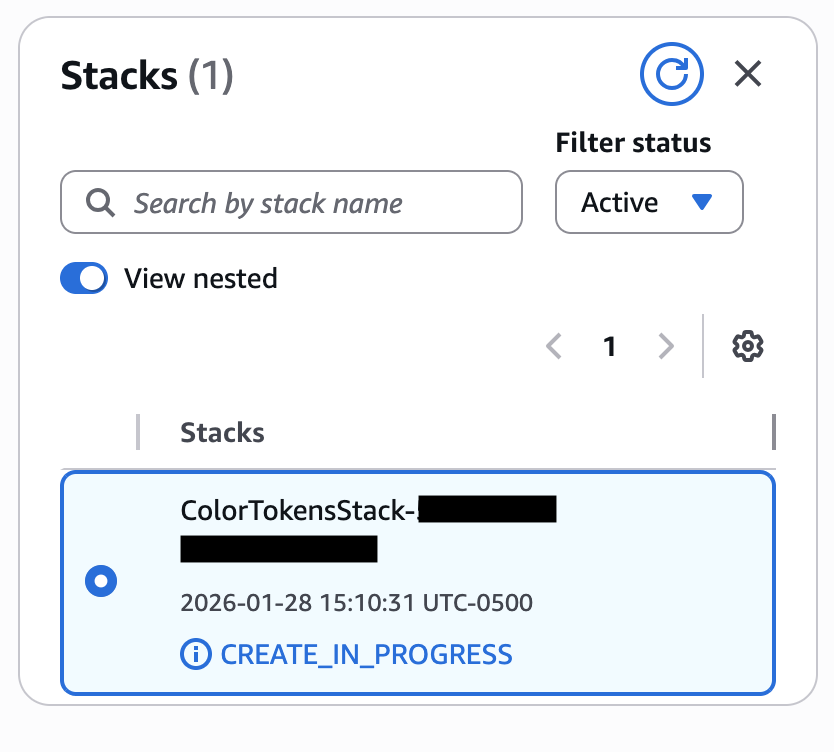
Wait for the CloudFormation stack creation to complete.
-
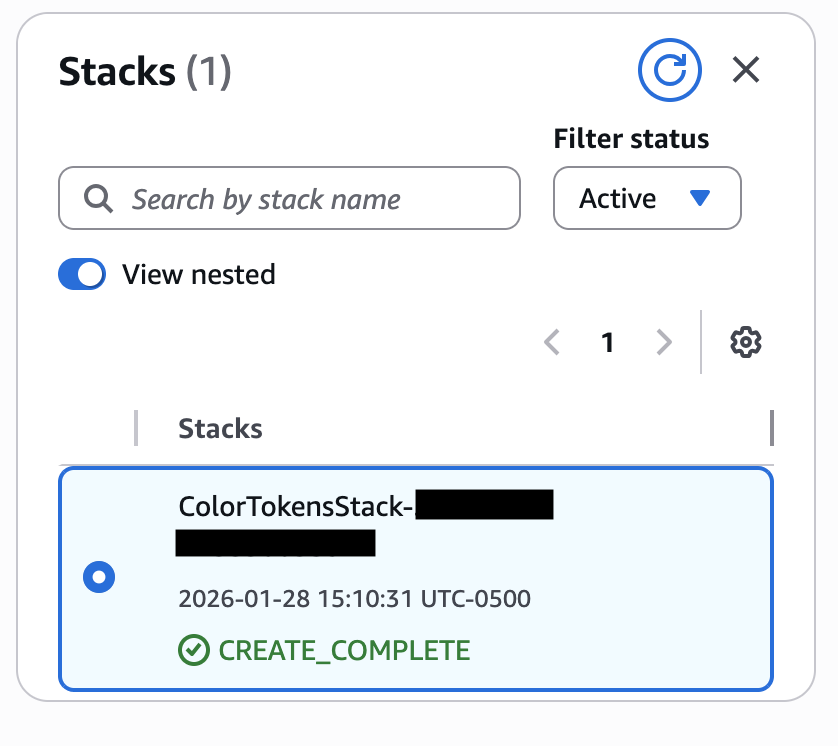
Click Refresh to update the stack status. Once complete, you will see the stack in a successful state.
-
Return to the Xshield portal. When the Connect button becomes available, click Connect.
-
Confirm the AWS account is connected and appears in the Xshield platform.

Next Steps
After the AWS account is connected:
- Your AWS resources will begin appearing in the Xshield platform
- Network traffic analysis will be available when VPC Flow Logs are enabled and accessible
- Application trace visibility will be available when AWS X-Ray is enabled and accessible
- To grant or revoke access to the flow logs bucket (for network traffic visibility), see VPC Flow Logs.