Okta (SAML 2.0)
Overview
Integrating ColorTokens Xshield with Okta for SSO enhances security and streamlines access management, ensures compliance with industry regulations and reduces password-related risks.
This guide outlines the steps to integrate Okta as a SAML identity provider with the ColorTokens Xshield platform.
Prerequisites to activate the integration
- An Azure user role with permissions to add Enterprise applications to Azure AD.
- Users or User group present in Okta who require SSO access to Xshield.
- Admin user role in Xshield to activate the integration.
Procedure
On a high level, the SAML Integration between Okta and Xshield are done in 3 phases:
- Activate SAML 2.0 in Xshield
- Create a new application in Okta by configuring the SAML metadata and claims
- Complete the setup by adding the configuration data from Okta application to Xshield
Follow the below step by step guide to complete the integration:
Enabling SAML 2.0 in Xshield
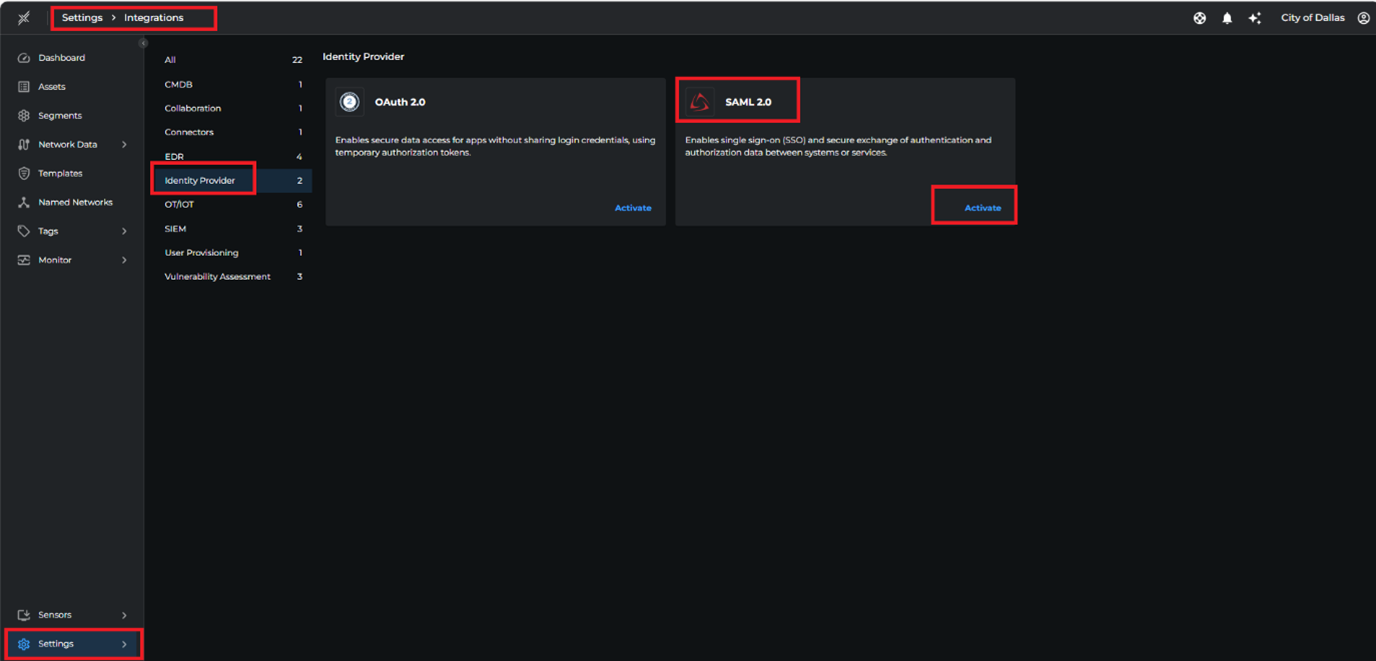
- Login to the Xshield 3.0 dashboard as an Admin and navigate to Settings at the bottom left and click on integrations.
Under Integrations -> Identity Provider choose SAML 2.0 and click activate.
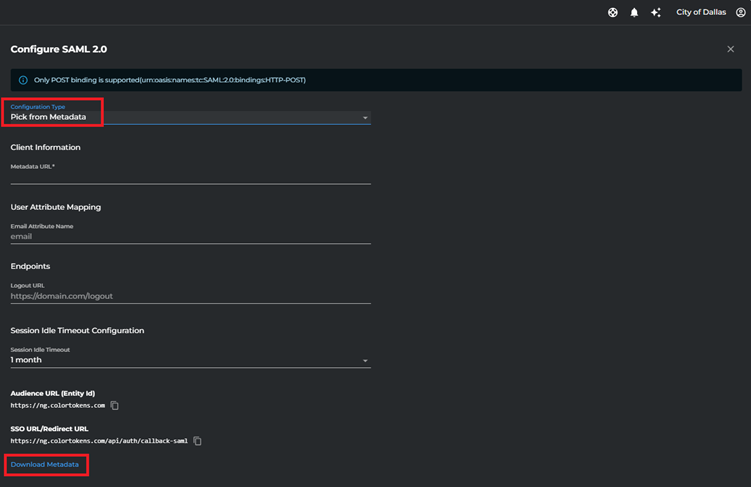
- By Default, the the configuration type is selected as “Pick from Metadata”, for now do not make any changes. Download the Metadata from the option provided at the bottom left as shown in the screenshot.
Configuration in Okta Dashboard
Create a new application
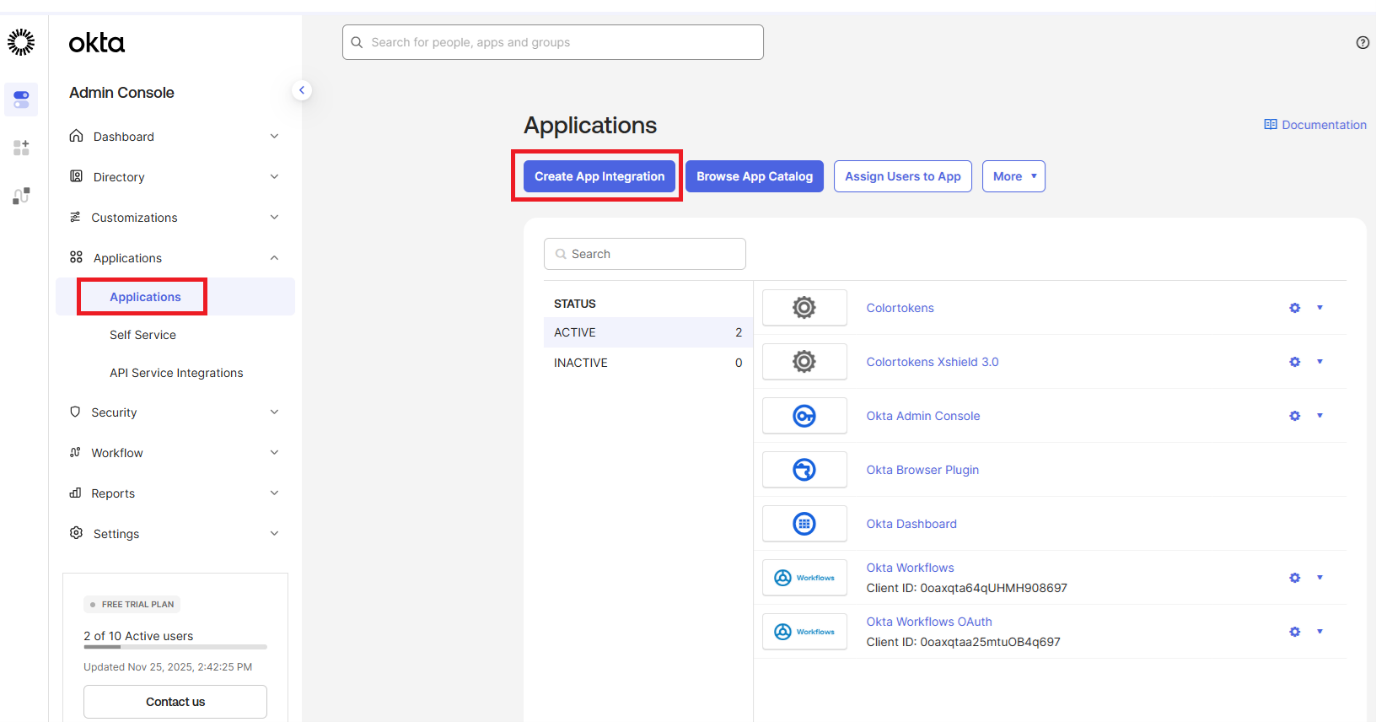
- Login to Admin console of the Okta Dashboard and navigate to applications in the left navigation bar. From the dropdown, select Applications and click on Create App Integration
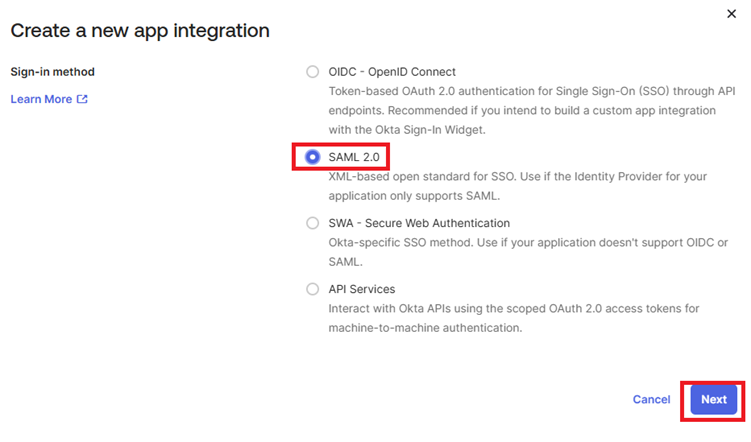
- Select SAML 2.0 option and click on Next
- Provide the name of the Application. example Colortokens Xshield 3.0 and click on next

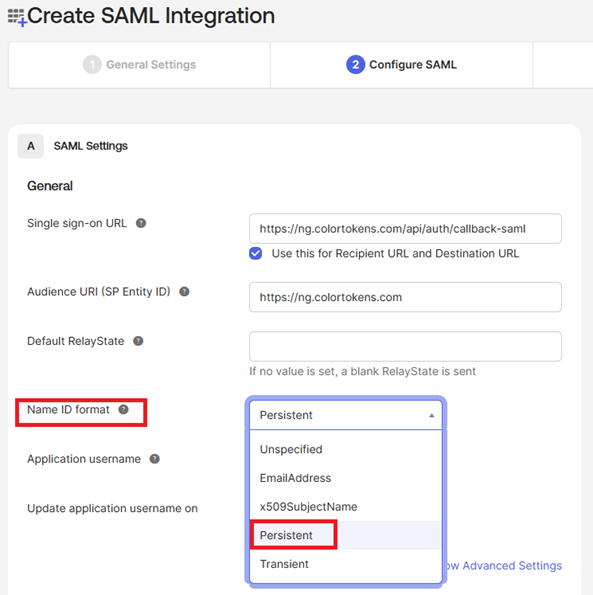
- Configure the SAML settings such as Single Sign-On URL, SP Entity ID. Fetch the details from Xshield integrations - SAML 2.0 integration page

- Select the Name ID format as Persistent
- Add the Attribute Statements mapping Name and click on Next

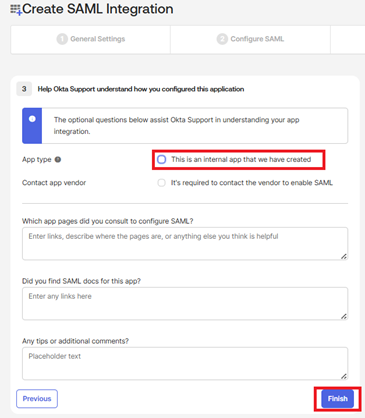
- Select the App Type as Internal App and click on Finish
- Navigate to the created Application in Okta and go to the Assignments tab and click assign to add the users/groups

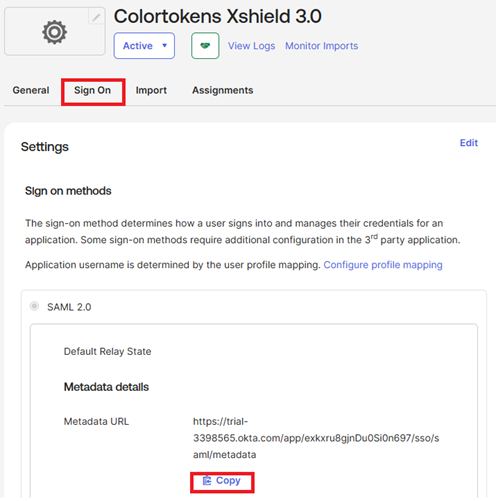
- Go to Sign On tab and copy the Metadata URL, which will be used to configure the Xshield SAML integration
Activate Okta in Xshield
- Navigate back to the SAML 2.0 integrations page in Xshield where we left off
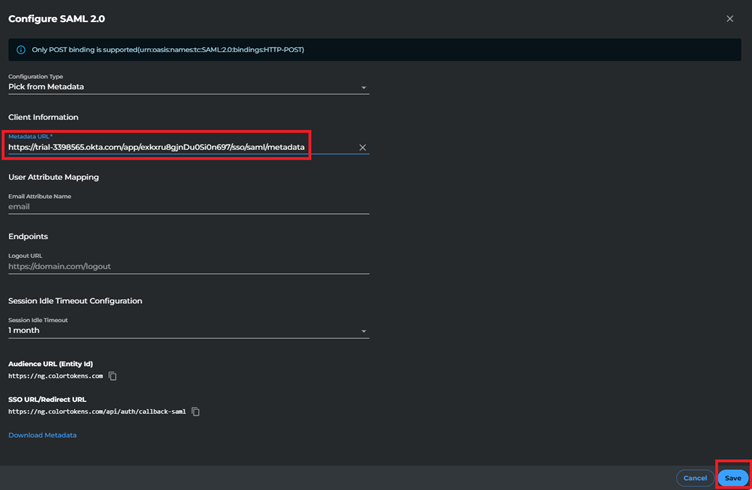
- Ensure Pick from Metadata is selected
- Paste the metadata copied from okta application you created earlier (Step 9 from above)
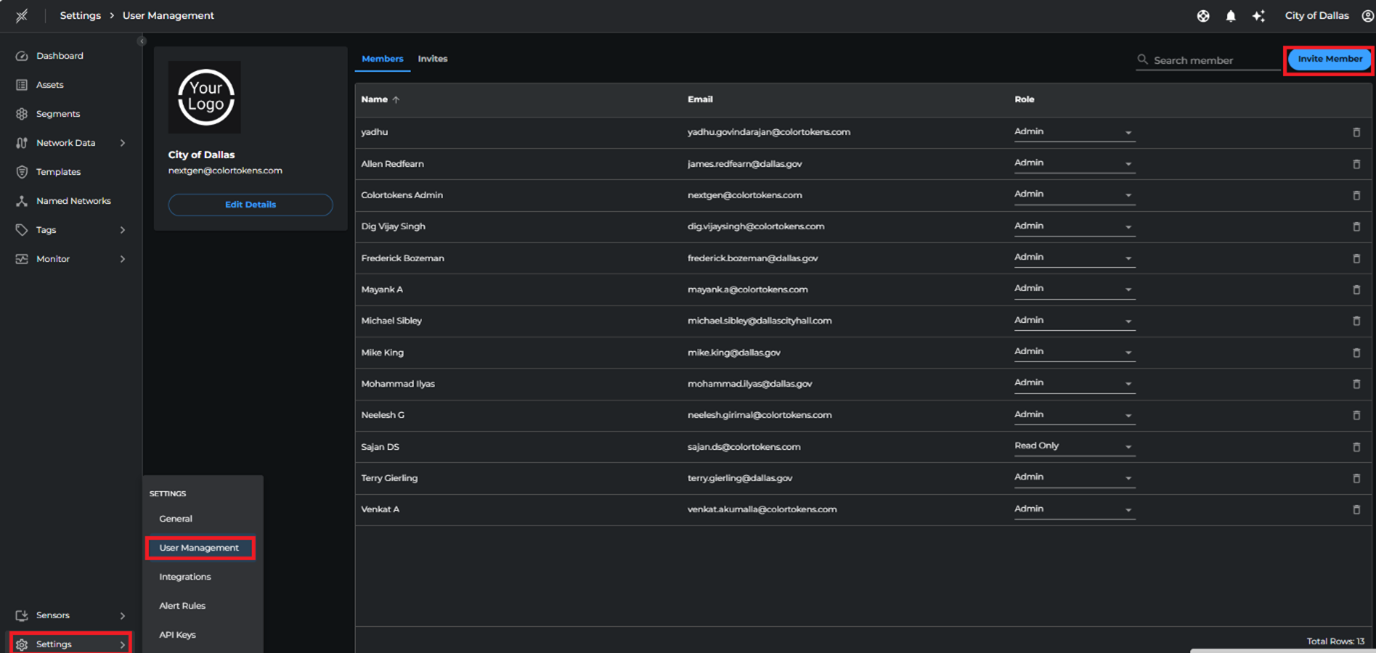
- Navigate to Settings -> User Management and add the users with required privilege to provide access to the Xshield dashboard.
- This completes the Integration
- Authentication requests will redirect users to Okta for login.
- Upon successful authentication, users are redirected to the Xshield Dashboard.
✅ Your Okta and Xshield SAML integration is now complete.