Script-based
Introduction
This guide walks you through the step-by-step process for onboarding the Xshield Cloud Connector to your Azure environment using the setup script.
This method uses a downloadable script that you run in your environment to create the required custom role and assign it to the Xshield Cloud Connector. The custom role grants the Colortokens Xshield Cloud Connector access to your Azure resources, including Storage Accounts that contain VNet Flow Logs used for traffic visualization. After running the script, you enter your Tenant ID and Subscription ID(s) in the Xshield portal and complete the connection.
Prerequisites
Before you begin, ensure you have the following:
- Azure Tenant ID for your subscription
- Active Azure subscription with administrative access
- Azure AD account with the Owner role permissions to:
- Create service principals
- Create, update, and delete custom roles
- Assign roles at the subscription scope
What the Script Does
The script sets up the Colortokens Xshield Cloud Connector in your Azure tenant by enabling the Colortokens service principal to assume a customer-scoped role within a specified subscription. You log in to your Azure tenant with the required permissions and execute the script. The script includes the Colortokens service principal ID; you only need to provide the target subscription ID where the role will be created and assigned.
Deploy Action
When run with the deploy action, the script performs the following:
- Instantiates the Colortokens Xshield Cloud Connector service principal in the tenant (if it does not already exist)
- Creates the required custom role if it does not exist, or updates it if it does
- Access to the Azure Resource Graph
- Read access to all object storage accounts to retrieve vnet flow logs for traffic visualization
- Assigns the custom role to the Xshield Cloud Connector service principal for the specified subscription
Delete Action
When run with the delete action, the script performs the following:
- Removes the custom role from the specified subscription
- Removes the Xshield Cloud Connector service principal from the tenant
Step 1: Download Script
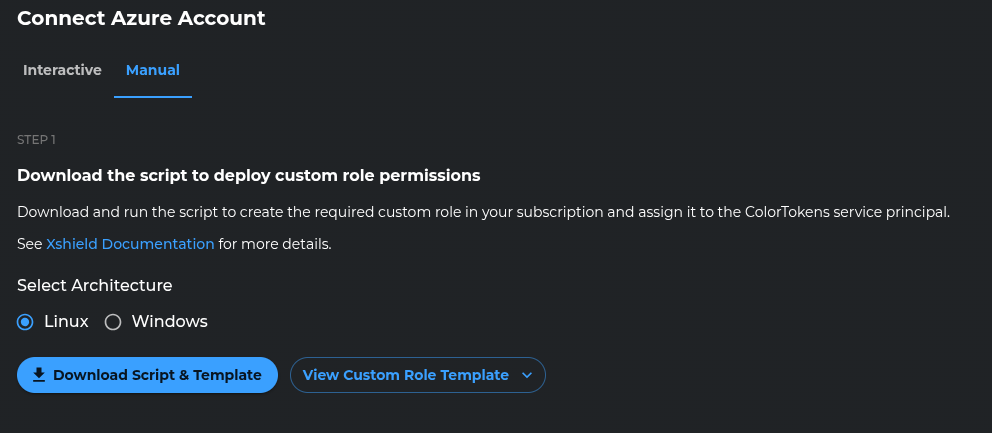
Download the Script
In this step, download the script required to deploy custom role permissions in your Azure subscription.
- Select the appropriate operating system (Linux or Windows).
- Click Download Script & Template to download the deployment script.
- Change the permissions of the script to make it executable:
chmod +x xshield-cloud-connector-customrole.sh - To review the permissions being deployed, click View Custom Role Template.
Executing the Script
-
Log in to your Azure tenant (where the subscriptions are located) using the Azure CLI:
az login --tenant <TENANT_ID>Note: The user logging in must have the Owner role permissions
-
Run the downloaded script in your Azure environment to:
NOTE: Colortokens Service Principal ID is already embedded in the script and no need to provide it.
- The script will create the required custom role that grants:
- Access to the Azure Resource Graph
- Read access to all object storage accounts to retrieve vnet flow logs for traffic visualization
- The script will assign the role to the Xshield Cloud Connector service principal for the specified subscription
Linux
./xshield-cloud-connector-customrole.sh --deploy <SUBSCRIPTION_ID>
Windows
./xshield-cloud-connector-customrole.ps1 -Action Deploy -SubscriptionId <SUBSCRIPTION_ID>
On successful deployment, you will see a message indicating that the custom role has been created and assigned to the Xshield Cloud Connector service principal.
✅ Cloud Connector Role Deployment completed successfully.
NOTE: To remove the custom role permissions, run the script with the --delete action.
Do this for all the subscriptions that you want to onboard.
Step 2: Enter Account Details

Provide the Azure account details for the subscriptions that you want to onboard.
- Enter your Tenant ID.
- Enter one or more Subscription IDs.
- You may add subscriptions manually or import them from a CSV file.
Ensure the entered subscription IDs match those where the custom role permissions were deployed in Step 1.
Step 3: Complete Onboarding
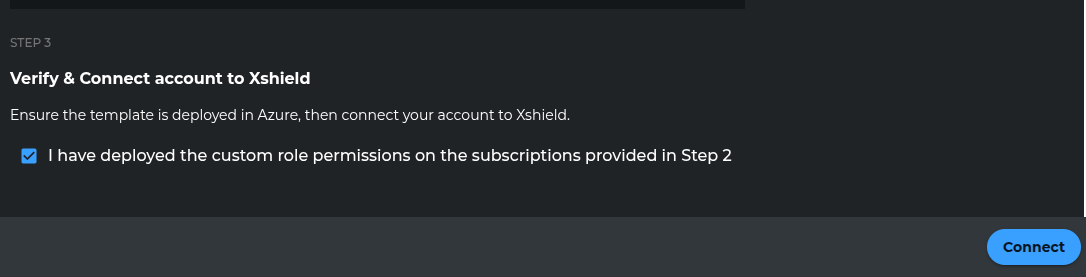
Finalize the onboarding process by verifying and connecting your Azure account.
- Confirm that the custom role permissions have been successfully deployed by selecting the confirmation checkbox.
- Click Connect to complete the onboarding process and connect your Azure account to Xshield.
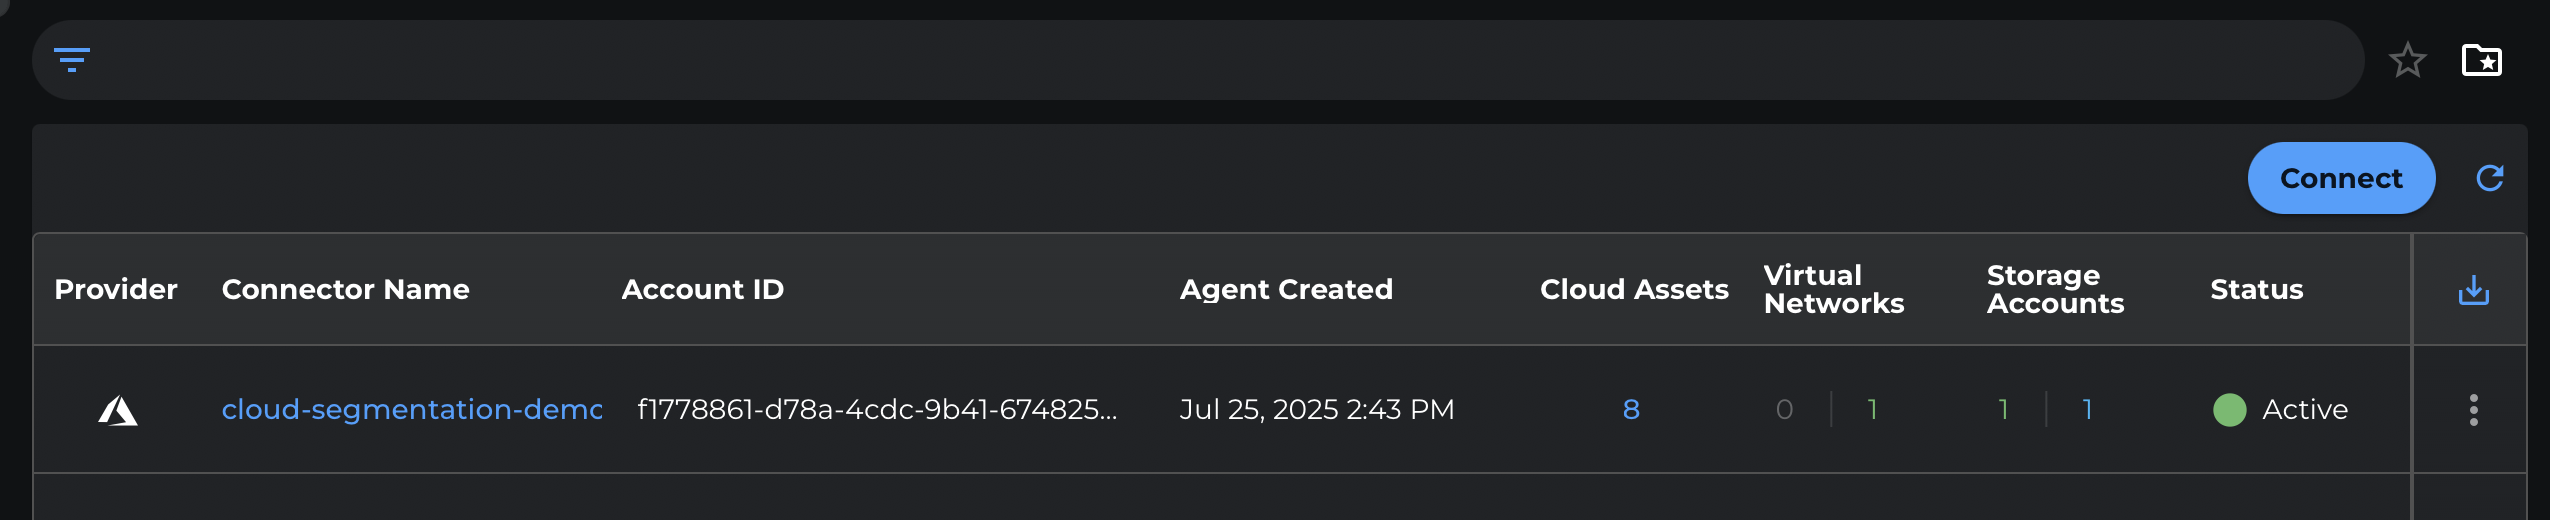
- You'll be redirected to the Cloud Connector dashboard
- Verify that your subscription name appears in the dashboard, confirming successful onboarding
Next Steps
After successful onboarding:
- Your Azure resources will begin appearing in the Xshield platform
- Network traffic analysis will be available if storage access was enabled
- You can start configuring security policies for your Azure environment