Supporting Static Devices
This guide provides step-by-step instructions for configuring end hosts with a /32 subnet mask and the Gatekeeper LAN/VLAN VIP as the default gateway. These steps are required for:
- Static mode Gatekeeper deployments
- Static end hosts in any Gatekeeper deployment
Ubuntu 22.04 Server Configuration
Important: Execute all CLI commands as a sudo user. It is recommended to perform these operations from a direct console connection rather than SSH, as we will be modifying the default gateway.
Step 1: Verify Existing Network Configuration
First, check your current netplan configuration and routing table:
sudo su
cat /etc/netplan/00-installer-config.yaml

# This is the network config written by 'subiquity'
network:
  ethernets:
    ens160:
      addresses:
        - 172.16.81.10/24
      nameservers:
        addresses: [ "8.8.8.8" ]
      routes:
        - to: default
          via: 172.16.81.1
  version: 2
Check your current routing table:
ip route
Example output:
default via 172.16.81.1 dev ens160 proto static
172.16.81.0/24 dev ens160 proto kernel scope link src 172.16.81.10
172.17.0.0/16 dev docker0 proto kernel scope link src 172.17.0.1 linkdown
Step 2: Edit Netplan Configuration
Edit the netplan configuration file to set the mask as /32 and the default gateway as the Gatekeeper LAN/VLAN VIP. In this example, the Gatekeeper LAN/VLAN VIP is 172.16.81.254.
sudo vi /etc/netplan/00-installer-config.yaml
Update the configuration to look like this:
# This is the network config written by 'subiquity'
network:
  ethernets:
    ens160:
      addresses:
        - 172.16.81.10/32
      nameservers:
        addresses: [ "8.8.8.8" ]
      routes:
        - to: 172.16.81.254/32
          scope: link
        - to: 0.0.0.0/0
          via: 172.16.81.254
  version: 2
Step 3: Apply Netplan Configuration
Apply the new network configuration:
sudo netplan apply
Step 4: Verify Routing Configuration
Check that the default route has been configured correctly:
ip route
Expected output:
default via 172.16.81.254 dev ens160 proto static
172.16.81.254 dev ens160 proto static scope link
Step 5: Verify Gateway Reachability
Confirm that you can reach the new gateway:
ping 172.16.81.254
Example output:
PING 172.16.81.254 (172.16.81.254) 56(84) bytes of data.
64 bytes from 172.16.81.254: icmp_seq=1 ttl=64 time=0.480 ms
64 bytes from 172.16.81.254: icmp_seq=2 ttl=64 time=0.401 ms
64 bytes from 172.16.81.254: icmp_seq=3 ttl=64 time=0.406 ms
^C
--- 172.16.81.254 ping statistics ---
3 packets transmitted, 3 received, 0% packet loss, time 2029ms
rtt min/avg/max/mdev = 0.401/0.429/0.480/0.036 ms
Step 6: Verify External Network Reachability
Verify that you can reach addresses outside of your current subnet/VLAN:
ping 10.11.96.247
Example output:
PING 10.11.96.247 (10.11.96.247) 56(84) bytes of data.
64 bytes from 10.11.96.247: icmp_seq=1 ttl=64 time=1.08 ms
64 bytes from 10.11.96.247: icmp_seq=2 ttl=64 time=0.568 ms
^C
--- 10.11.96.247 ping statistics ---
2 packets transmitted, 2 received, 0% packet loss, time 1001ms
rtt min/avg/max/mdev = 0.568/0.823/1.079/0.255 ms
Windows Desktop/Server Configuration
Step 1: Identify Current Network Settings
First, note your existing IP address and default gateway.
Step 2: Update Network Configuration
- Open "Network and Internet Settings"
- Select "Change adapter options"
- Right-click on the Network interface
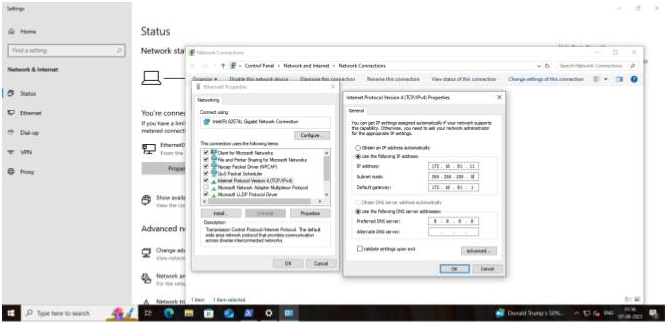
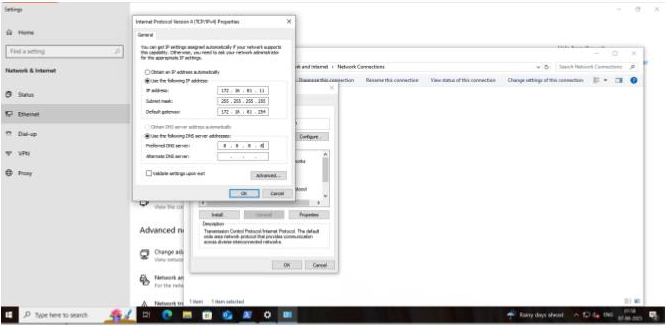
- Select "Internet Protocol Version 4 (TCP/IPv4)"
- Click "Properties"
- Edit the subnet mask to
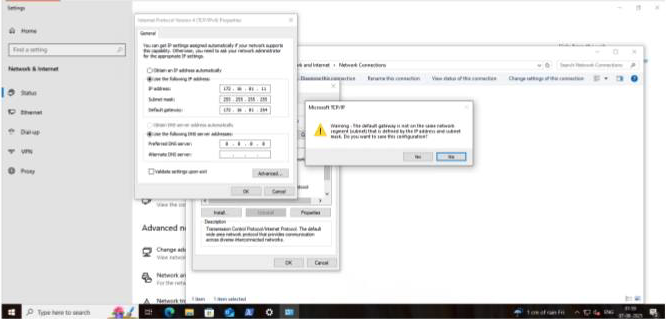
255.255.255.255 - Change the default gateway to the Gatekeeper LAN/VLAN VIP
- Click "OK" to apply changes and "YES" on the warning message (this is expected due to the /32 mask)
Step 3: Verify Configuration
- Open PowerShell or Command Prompt
- Run the following commands to verify your changes:
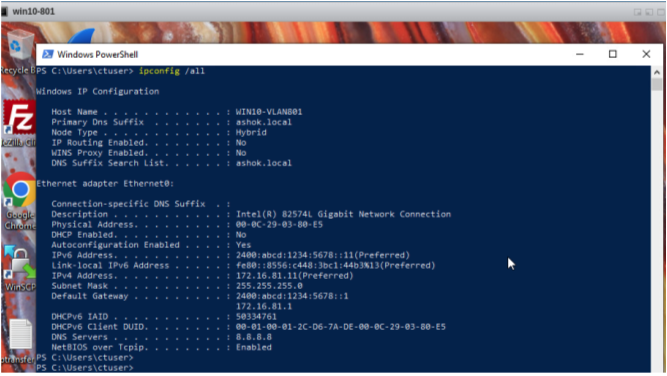
ipconfig /all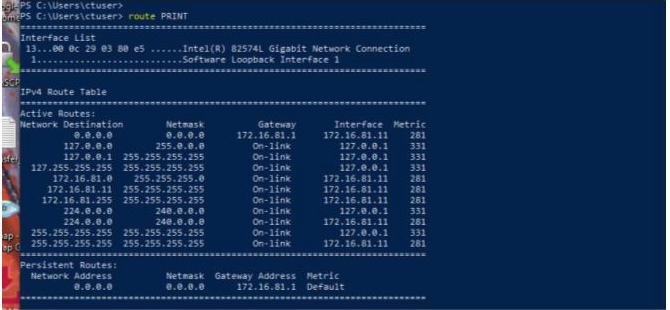
route PRINT - Test connectivity by pinging the default gateway:
ping [gatekeeper-lan-vip] - Test external connectivity by pinging an address outside your network

Ubuntu 22.04 Desktop Configuration
Step 1: Access Network Settings
- Open Settings
- Select Network
- Verify the existing IP address and default gateway
Step 2: Update Network Settings
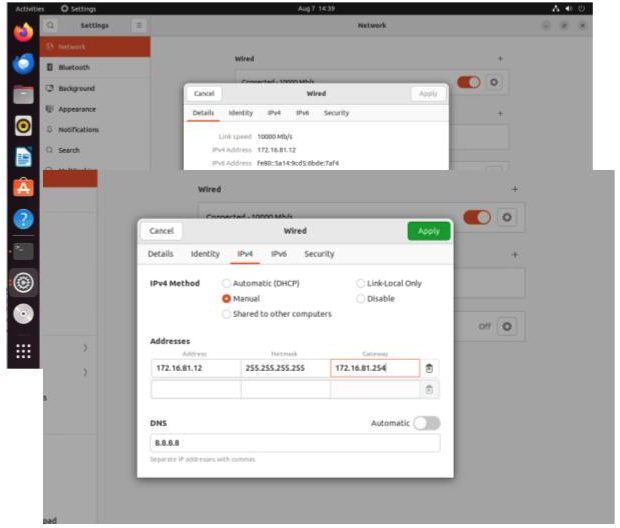
- Click on the IPv4 tab
- Change the subnet mask to
255.255.255.255(or select /32) - Change the gateway to the Gatekeeper LAN/VLAN VIP
- Click "Apply"
Step 3: Restart Network Connection
- Disable the "Wired Connection"
- Re-enable the "Wired Connection"
Step 4: Verify Configuration
- Open a terminal
- Run the following commands to verify your changes:
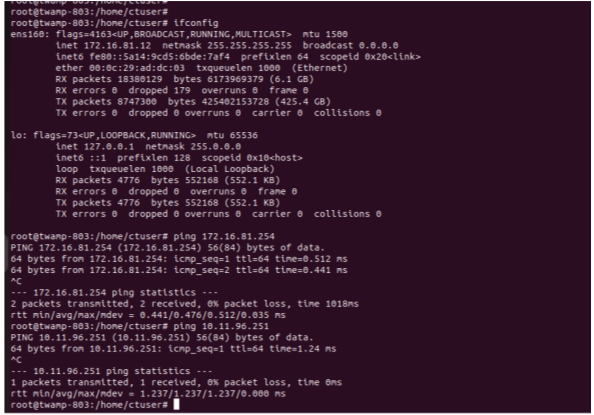
ifconfig
ip route - Test connectivity by pinging the default gateway:
ping [gatekeeper-lan-vip] - Test external connectivity by pinging an address outside your network