Approach 2 - Lab Setup in Local Workspace, vSphere or other CSPs:
Prerequisites
- Xshield Tenant and API Key:
- Get Access to Xshield tenant from your local administrator or Devops.
- Generate API key credentials on the Xshield tenant.
- System Requirements: You can run the lab setup on your local workspace or remote Azure VM running Ubuntu 22. The lab setup requires at least 4 vCPUs/16 GB of RAM and 30 GB of storage for the VM.
- If there are permission issues in executing commands please execute
sudo suat the start of Lab setup procedure
Downloading the Lab Setup Tar file
-
Ensure that you have
wget,tarinstalled on the workspace being used to setup the lab environment. You can either use your local Ubuntu workspace or a remote Azure/AWS VM with Ubuntu 22 as the base OS.- Please run the following:
sudo -iapt-get update -y
apt install wget tar curl python3 python3-pip python3-venv pipx
python3 -m pip install pipx
env PIPX_HOME=/opt/pipx PIPX_BIN_DIR=/usr/local/bin
python3 -m pipx ensurepathIf you installed via
--useras root, ensure/root/.local/binis inPATH:export PATH="$PATH:/root/.local/bin"
pipx --versionLog out and log back in (or start a new shell) so your
PATHis updated. -
To retrieve the most recent version of the lab package, execute the command below:
wget https://<artifacts url>/ct-xshield-util/latest/packages/xshield_lab.tar.gzPlease replace
<artifacts_url>with the appropriate URL for your domain:- For ng.colortokens.com and bom.colortokens.com, use artifacts.<domain url> For example: artifacts.ng.colortokens.com
- For all other domains, use artifacts-<domain url> For example: artifacts-ng-stage.colortokens.com
Ensure that you substitute
<domain>with your specific domain name to form the correct URL for downloading the package. -
Untar the Xshield lab package.
tar -xzvf xshield_lab.tar.gz
Installation Steps
-
Please follow steps from Prepare Configuration Credentials to create the config file
-
Once API private key is uploaded/copied to the VM, please change the file permissions to be accessible only by you. Note that, this private key is NOT your SSH private key.
sudo chmod 644 <path/to/your/api/private/key> # Example: /path/to/key.pem -
Go to the repo root directory and execute
python3 -m pipx install --force .sudo tee /etc/profile.d/xshieldutil_repo.sh >/dev/null <<'EOF'
export XSHIELDUTIL_REPO=<repo root path> (e.g. /etc/colortokens)
EOFsudo chmod 644 /etc/profile.d/xshieldutil_repo.sh -
Follow the Deployment steps on Administration guide to create the lab environment via system wide CLI option.
-
Alternatively, execute below steps to perform the installation of dependency packages
-
Go to lab directory inside the xshield lab package
cd <lab/package/path>/lab
-
Follow these steps to install Python and required packages on Linux.
Execute the below command under lab/ directory
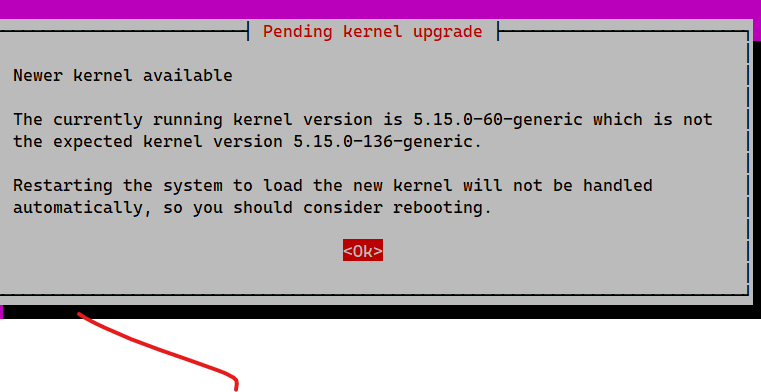
bash install.shIf the install.sh script execution is stuck with an interactive screen and is not accepting user input, please follow below steps

  Press Ctrl+Z or Ctrl+C to exit the current script execution
  Perform reboot of the VM using `reboot` command
  Once the machine is up, execute `sudo su` and navigate to `lab/` directory `cd lab` and execute the install.sh again `bash install.sh`
-
Build the config data either by copying the downloaded config file or via interactive options menu
-
Option 1:
 Configuration setup:
 You can set up the config.yaml file in one of two ways:
   1. If you already have a config.yaml and API private key, select Option 1 and provide their file paths.
   2. If you do not have a config.yaml, select Option 2 to generate one using the interactive setup.

 Please choose an option:
 1) Use existing config.yaml and API private key
 2) Generate config.yaml interactively
 1
 Please provide the config.yaml file path
 <path-to-config.yaml-file>       #Example: /home/ctuser/config.yaml
 Please provide the API private key filepath
 <path-to-private-key-file>       #Example: /home/ctuser/colortokens_api_key.pem
 Config file: /home/ctuser/config.yaml
API private key: /home/ctuser/colortokens_api_key.pem -
Option 2:
Please choose an option:
 1) Use existing config.yaml and API private key
 2) Generate config.yaml interactively
 2
 Configuration is not valid or is missing required fields. Please provide config details:
 No valid configuration found. Let\'s create one.
 Enter your Xshield domain (e.g., https://ng.colortokens.com): <XSHIELD_URL>
 Enter your deployment key: <DEPLOYMENT_KEY> (e.g. 6g3gryhs3s0pm)
 Enter your fingerprint: <FINGERPRINT> (e.g. 13:24:13:14:4e:b0:e1:4c:1d:42:ff:f5:13:15:11:10)
 Enter your tenant ID: <TENANT_ID> (e.g. 17e74a1e-6a12-42f9-b21d-a11a5e323c33 )
 Enter your user ID: <USER_ID> (e.g. b8b111acb-a2ad-4339-94a1-daaaa0db3721)
 Enter your pem file location: <PRIVATE_KEY_PATH> (e.g. /home/ctuser/colortokens_api_key.pem)
 Configuration saved to /home/ctuser/xshieldUtil/config/config.yaml
-
-
Activate the python virtual environment
source ~/venv-activateor
source .venv/bin/activate -
Add SSH user to docker group. Adding SSH user to the docker group is only required the first time.
sudo chmod 666 /var/run/docker.sock
- Once all the steps are successfully executed, please go back to the respective tutorials lab setup page or adminsitration guide for further instructions on deploying the lab