Approach 1 - Lab Setup in Azure VM - Recommended:
Pre-requisites
- Xshield Tenant and API Key:
- Get Access to Xshield tenant from your local administrator or Devops.
- Generate API key credentials on the Xshield tenant.
Provisioning the Azure VM from the shared VM Image
-
Visit the Azure Portal Shared VM Image page for Xshield Util
-
Click on Create VM.

-
Please provide the following details for the VM creation under Basics tab on the VM creation page:
-
In the Project details section
- Please ensure that the subscription and resource group match your team (Contact DevOps team for resource-group access)
- Engineering team: Use Subscription
ctsp-nextgenand Resource grouprg-temporary-commonorrg-shared-commonfrom the drop-down menu, if the resource-group mentioned is not listed, please contact Devops team for access - Sales team: Use Subscription
Sales-Solution-Engineering(Contact DevOps team for resource-group name if not available)
-
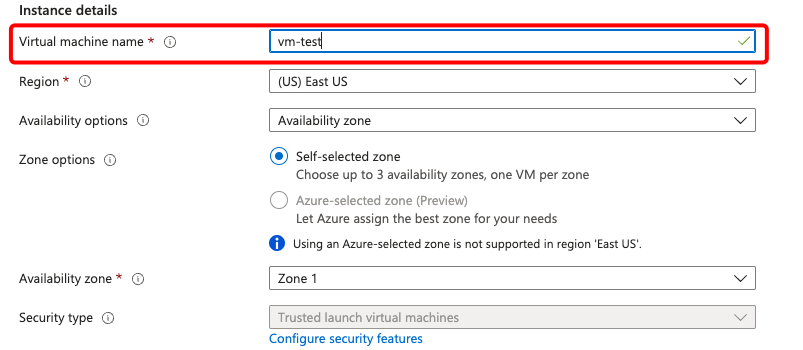
In the Instance details section
-
Provide a suitable Virtual Machine name
-
Either keep the default values or select your preference for the following fields
- Region
- Availability options
- Zone options
- Availability Zone
- Security type
-
Ensure the Image is
cgcolortokens/xshieldUtil/latest - x64 Gen2 -
Ensure the VM architecture is selected as
x64 -
Ensure the Size is
Standard_D4s_v5type or select a variant from the drop-down menu with at least4vCPU, 16GB RAM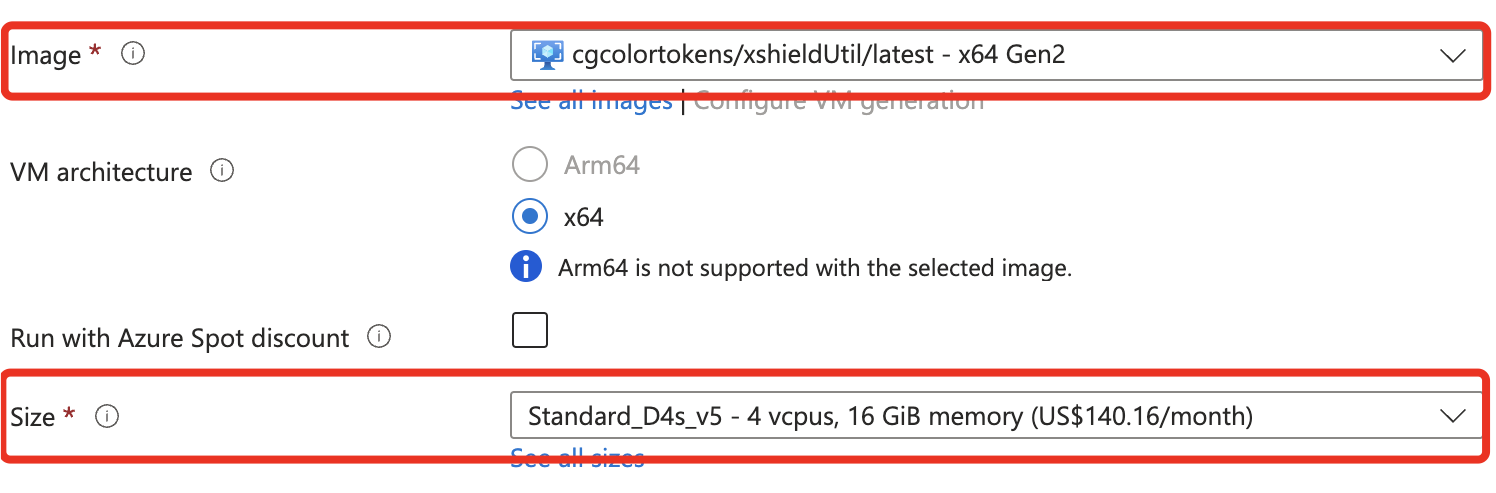
-
-
In Administrator account section
- Select the Authentication type as
SSH public keyunder - Provide a suitable Username for SSH access

- Select SSH public key source to be either
Use existing key stored in AzureorGenerate new key pairfrom the drop-down menu- If you've selected
Use existing key stored in Azureand already having an ssh key available from your previous VM instance creation or otherwise using an existing key, select the name of the key from drop down menu under Stored Keys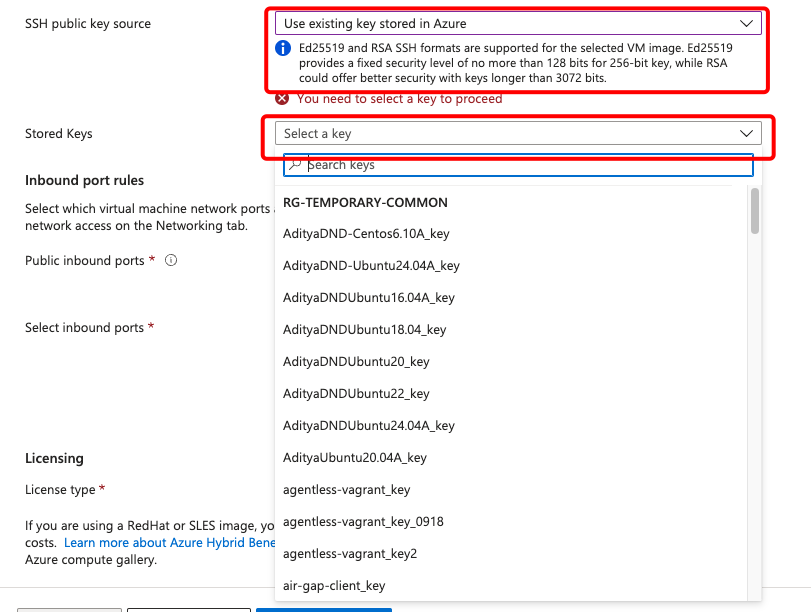
- If you are creating the VM instance for the first time and don't have an existing ssh key available, select
Generate new key pairfor generating a new key. - Select the suitable SSH Key Type (recommended -
RSA SSH Format)and provide a Key pair name for the key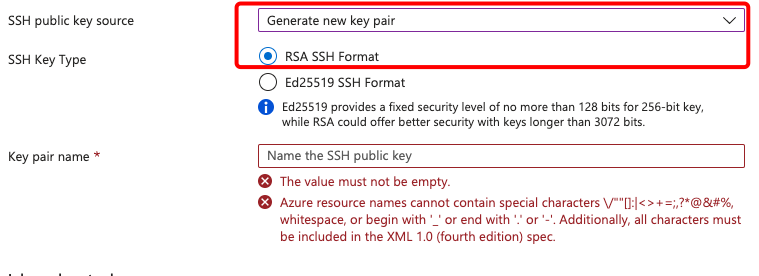
- If you've selected
- Select the Authentication type as
-
Keep the Inbound port rules to default values and ignore the warning message as this is for the testing environment
-
Set the License type to
Otherfrom the dropdown
-
Click on Next: Disks> to fill up other details
-
-
After landing on the Disks tab, please follow below steps:
- Select the OS disk size as
Image default (30 GiB) - Select OS disk type as
Standard SSD Diskfrom drop-down menu - Select the checkbox for
Delete with VM - Keep the default value for other fields in this page
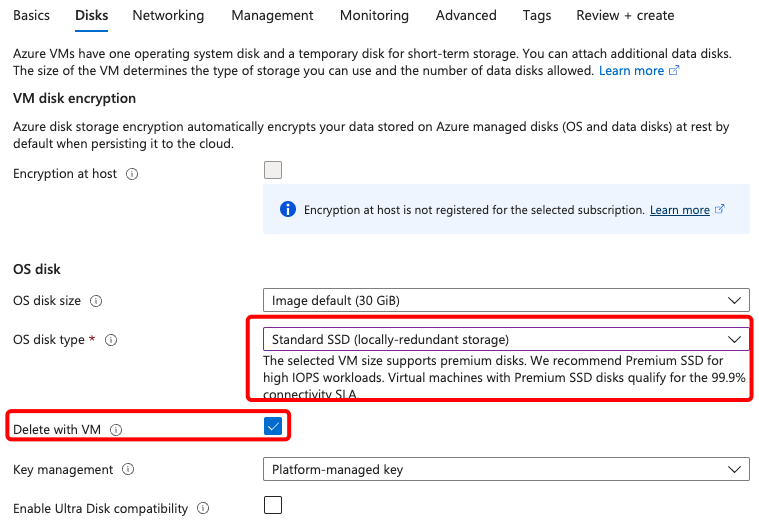
- Click on Next: Networking>
- Select the OS disk size as
-
After landing on the Networking tab, please follow below steps:
-
Keep the default value for all fields in this page
-
Note that, the virtual network and subnet will be pre-filled with default values and can be different in your case based on the Resource group, Subscription chosen.
-
Ensure a Public IP is selected for the Virtual Machine
-
Select the checkbox for
Delete public IP and NIC when VM is deleted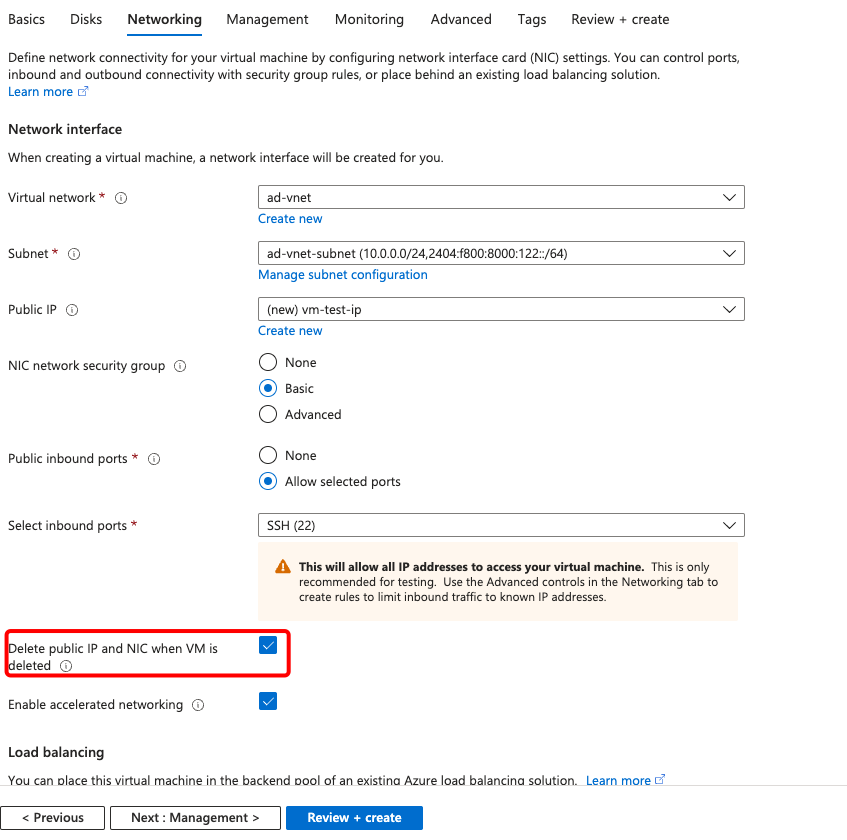
-
Click on Next button till you reach the Tags tab
-
-
After landing on the Tags tab, please follow below steps:
- Provide the Name field as
ownerand Value as<your-email-id>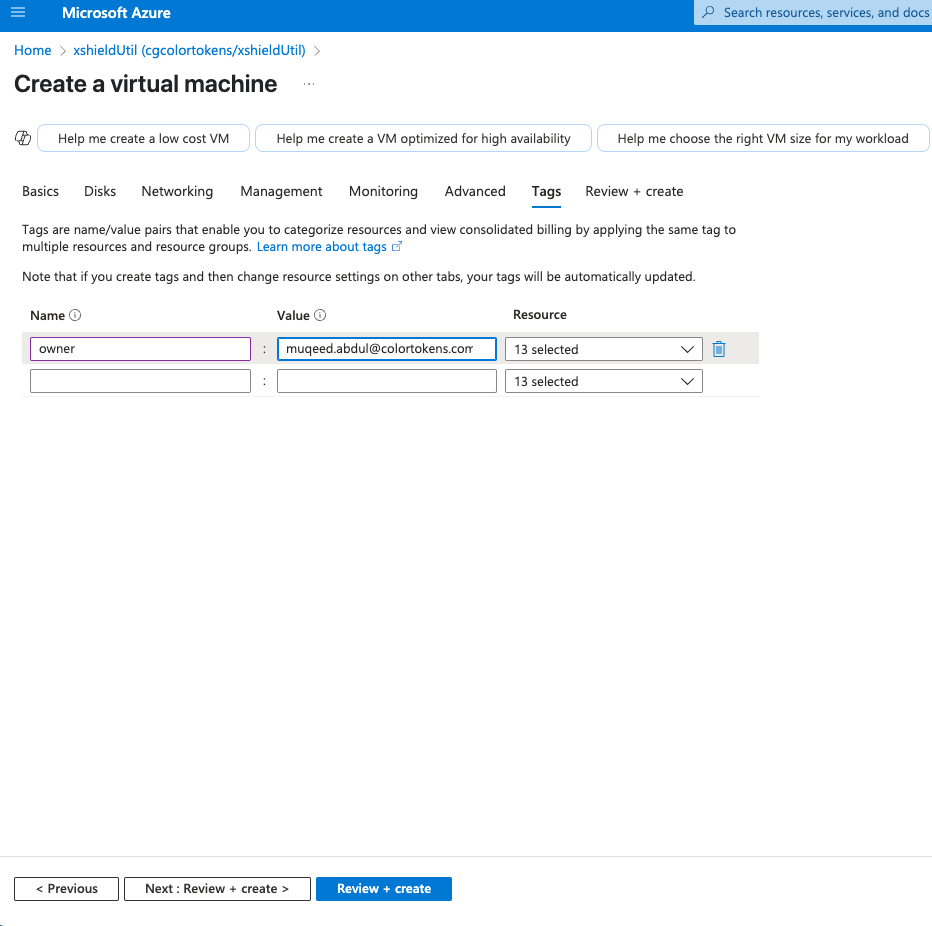
- Click on Review + Create for validating the user inputs for Virtual Machine creation on Azure.
- Once the validation is passed, click on Create for provisioning the Virtual Machine.
- Provide the Name field as
-
If a new SSH key pair was generated, please click on
Download private key and create resourceto download the .pem file and save it to the local machine.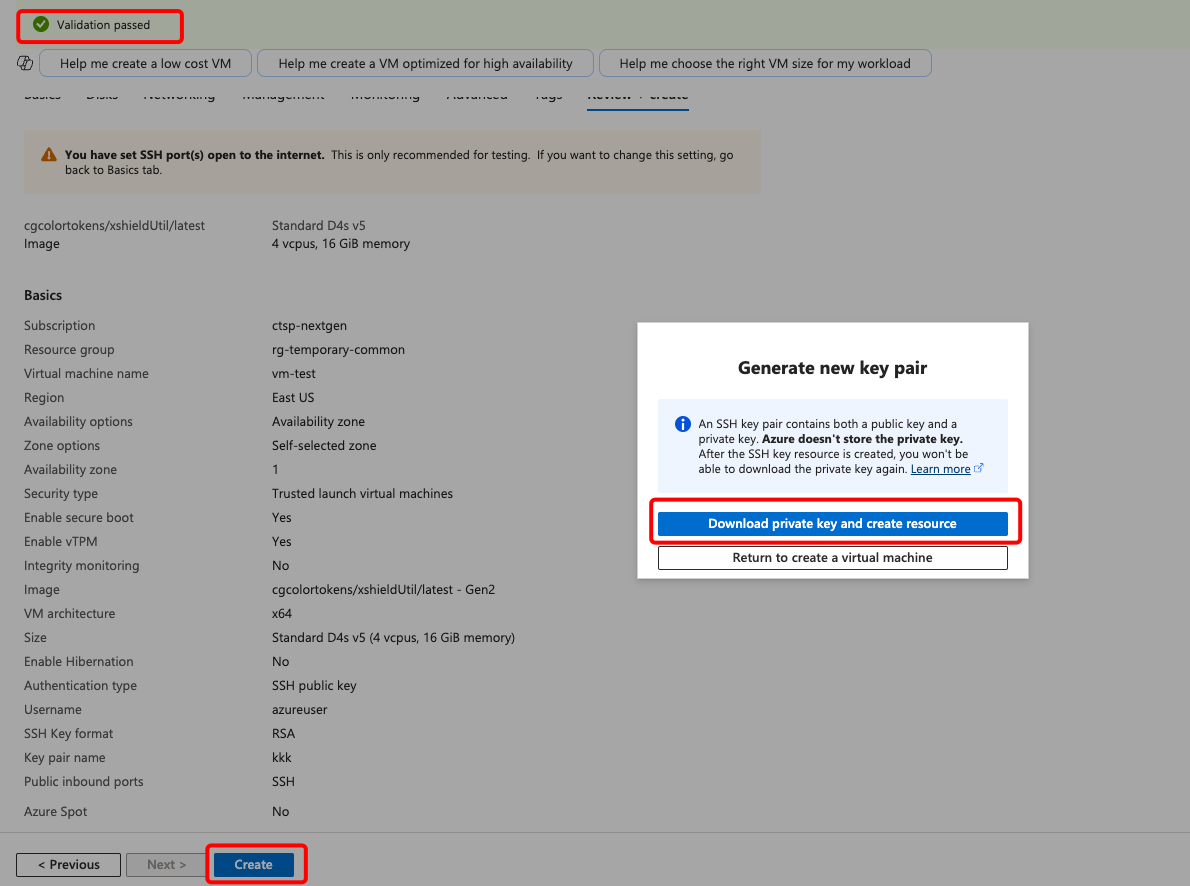
-
Once the VM resource is provisioned on Azure UI, verify the details of the VM by clicking on
Go to resource.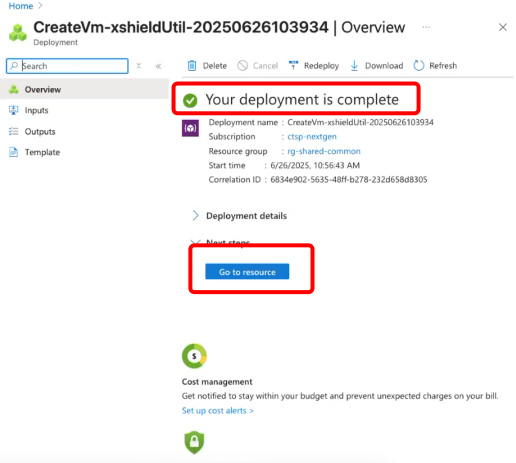
-
Copy the public IP address for login to the VM.
-
If an existing key stored in Azure is used for creating the VM, then use the .pem file for SSH access to the VM.
-
If you've generated the key pair along with the VM, then use the downloaded .pem fle for SSH access to VM
-
Modify the .pem file permissions to be accessed only by you via below command
sudo chmod 600 <your-pem-file>.pem -
You can now SSH into the VM as follows via a terminal:
ssh -i <your-pem-file>.pem youruser@yourIP
Now that you have the lab setup VM provisioned on Azure using the shared VM Image. You can follow the below steps to install the lab environment tool on your VM.
Installation Steps
-
Change directory on the Azure VM to
/etc/colortokensdirectory i.e.sudo -icd /etc/colortokens/ -
Please follow steps from Prepare Configuration Credentials to create the config file needed for authentication against Xshield tenant.
-
Once API private key is uploaded/copied to the VM, please change the file permissions to be accessible only by you. Note that, this private key is NOT your SSH private key
sudo chmod 644 <path/to/your/api/private/key> # Example: /path/to/key.pem
Recommended Approach for Deployment of Xshield Lab:
- Follow the Deployment steps on Administration guide to create the lab environment via system-wide CLI option.
Alternate Approach for Deployment of Xshield Lab:
-
Execute below steps to perform the installation of dependency packages required for initiating the lab setup from the /etc/colortokens/lab directory, this is a one time activity.
cd /etc/colortokens/labbash install.shIf the install script execution is stuck with an interactive screen and is not accepting user input, please follow below steps

- Press Ctrl+Z or Ctrl+C to exit the current script execution
- Perform reboot of the VM using
rebootcommand - Once the machine is up, execute
sudo suand go tocd /etc/colortokens/lab - Execute the install.sh again
bash install.sh
-
Build the config data either by copying the downloaded config file and API private key or via interactive options menu
- Option 1:
 Configuration setup:
 You can set up the config.yaml file in one of two ways:
   1. If you already have a config.yaml and API private key, select Option 1 and provide their file paths.
   2. If you do not have a config.yaml, select Option 2 to generate one using the interactive setup.

 Please choose an option:
 1) Use existing config.yaml and API private key
 2) Generate config.yaml interactively
 1
 Please provide the config.yaml file path
 <path-to-config.yaml-file>       #Example: /home/ctuser/config.yaml
 Please provide the API private key filepath
 <path-to-private-key-file>       #Example: /home/ctuser/colortokens_api_key.pem
 Config file: /home/ctuser/config.yaml
API private key: /home/ctuser/colortokens_api_key.pem- Option 2:
Please choose an option:
1) Use existing config.yaml and API private key
2) Generate config.yaml interactively
2
Configuration is not valid or is missing required fields. Please provide config details:
No valid configuration found. Let\'s create one.
Enter your Xshield domain (e.g., https://ng.colortokens.com): <XSHIELD_URL>
Enter your deployment key: <DEPLOYMENT_KEY> (e.g. 6g3gryhs3s0pm)
Enter your fingerprint: <FINGERPRINT> (e.g. 13:24:13:14:4e:b0:e1:4c:1d:42:ff:f5:13:15:11:10)
Enter your tenant ID: <TENANT_ID> (e.g. 17e74a1e-6a12-42f9-b21d-a11a5e323c33 )
Enter your user ID: <USER_ID> (e.g. b8b111acb-a2ad-4339-94a1-daaaa0db3721)
Enter your pem file location: <PRIVATE_KEY_PATH> (e.g. /home/ctuser/colortokens_api_key.pem)
Configuration saved to /etc/colortokens/config/config.yaml -
Activate the python virtual environment
source ~/venv-activate -
Add SSH user to docker group. Adding SSH user to the docker group is only required the first time.
sudo chmod 666 /var/run/docker.sock -
Once all the steps are successfully executed, please go back to the respective tutorials lab setup page or adminsitration guide for further instructions on deploying the lab