Xshield Utility installation guide for Windows
Download the Utility Package
-
Open/Run powershell in
administratormode -
Navigate to your workspace directory (For example: C:\Users\muqeed.abdul)
-
Execute below command to download the latest xshield_utility release version
Please replace
<artifacts-url>in the command with the appropriate URL of your domain:- For ng.colortokens.com and bom.colortokens.com, use artifacts.<domain url> eg: artifacts.ng.colortokens.com
- For all other domains, use artifacts-<domain url> eg: artifacts-syd.colortokens.com, artifacts-fra.colortokens.com
Ensure that you substitute
<domain>with your specific domain name to form the correct URL for downloading the package.Invoke-WebRequest -Uri https://<artifacts-url>/ct-xshield-util/latest/packages/xshield_utility.tar.gz -
After successful download of the file, Untar the downloaded tar file
  mkdir -p xshield_utility
  tar -xvzf xshield_utility.tar.gz -C xshield_utility
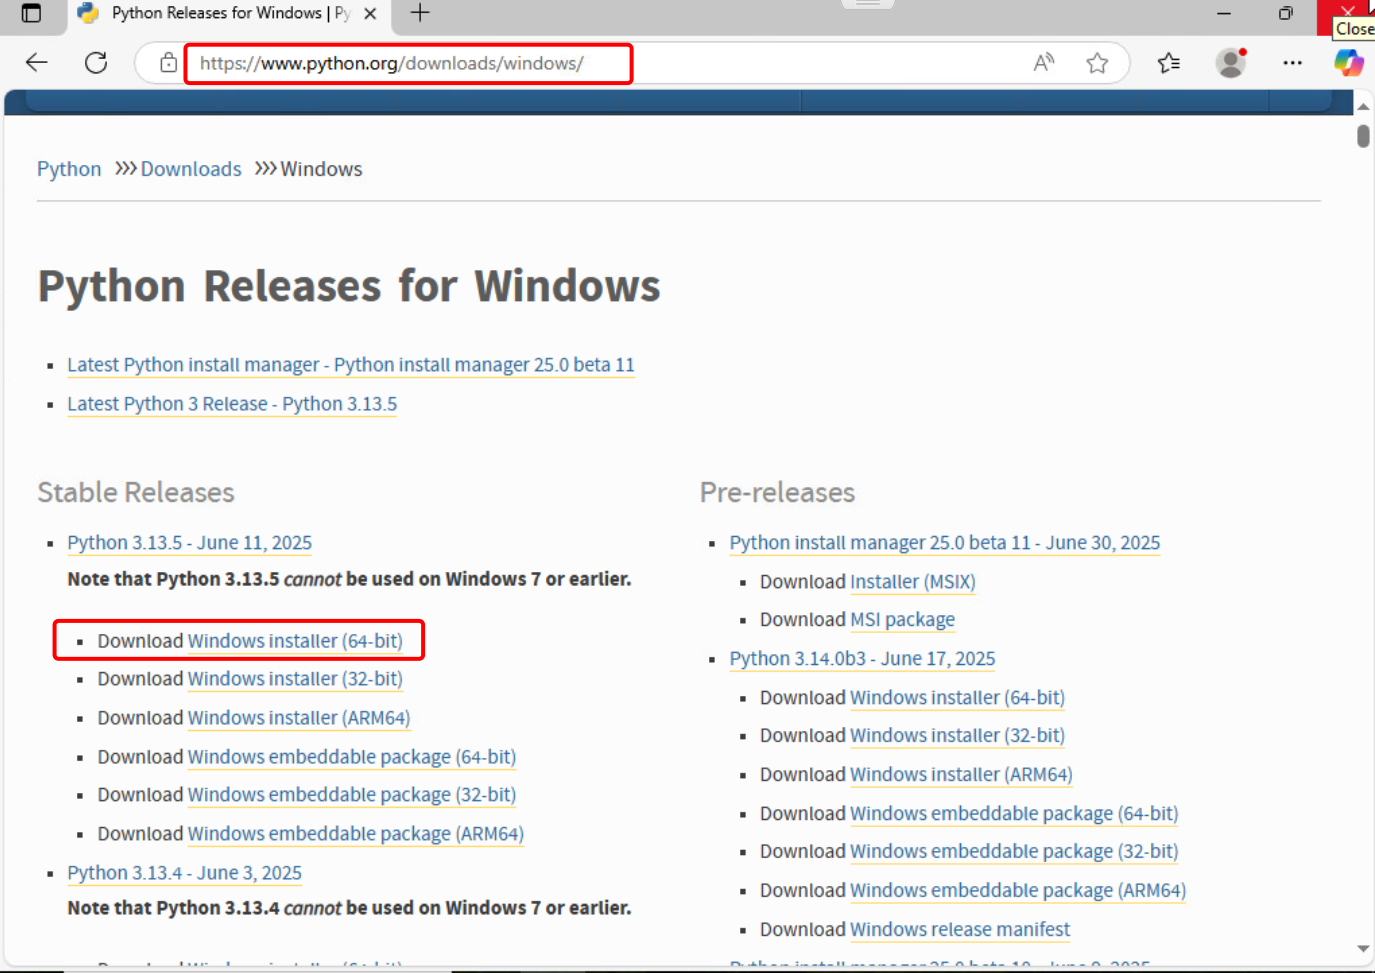
Download the Python Package
-
Download python as Windows installer (64-bit) for version 3.10 or higher on the workspace machine
-
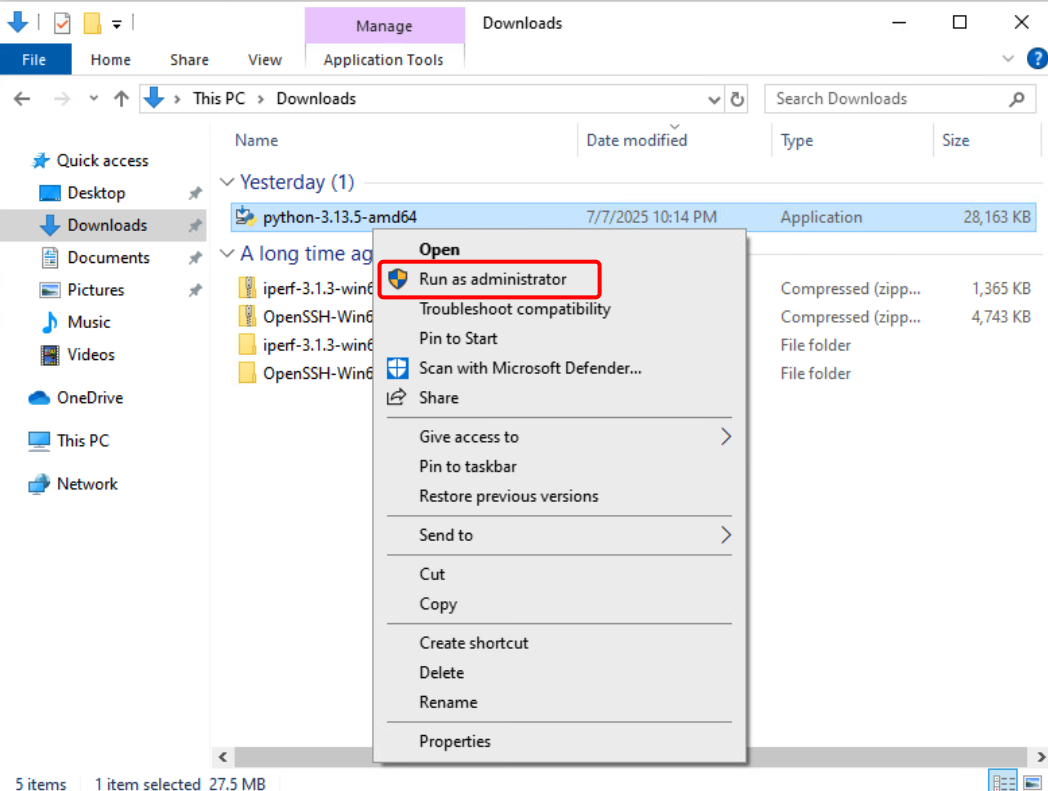
Follow the instructions to install python
- Run the installer executable file as administrator
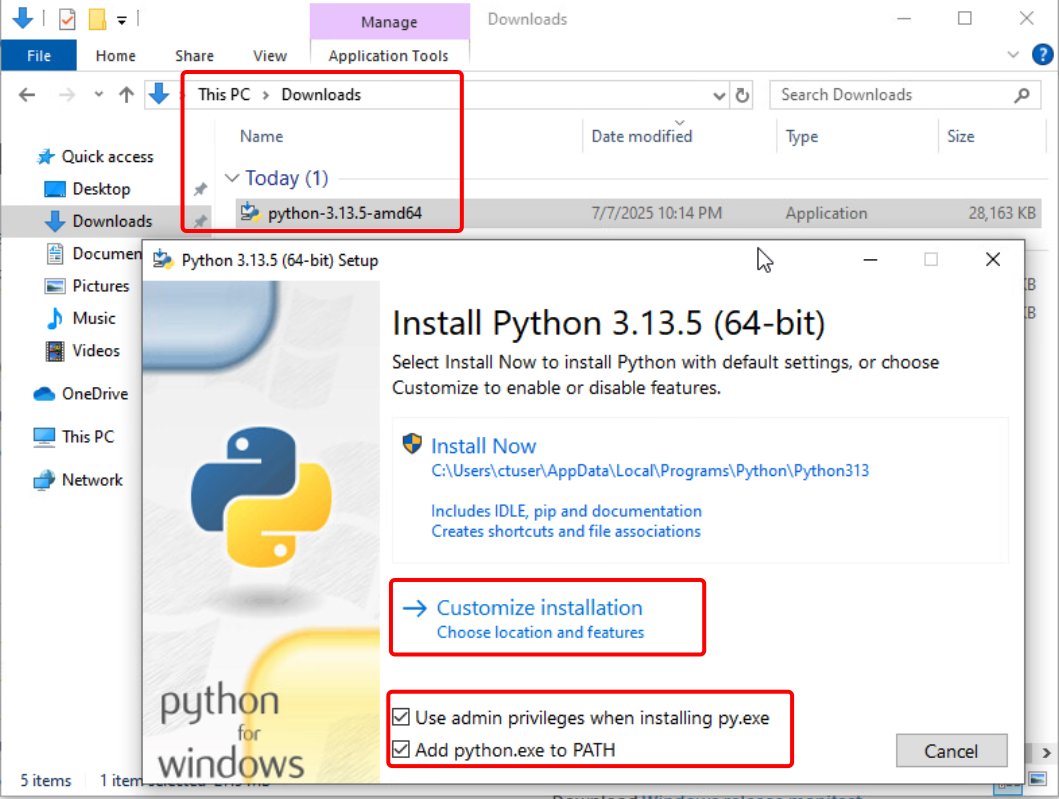
- Check the "Add Python to PATH" and "User admin privileges" boxes option and Click Custom installation
- Select all optional features and click Next
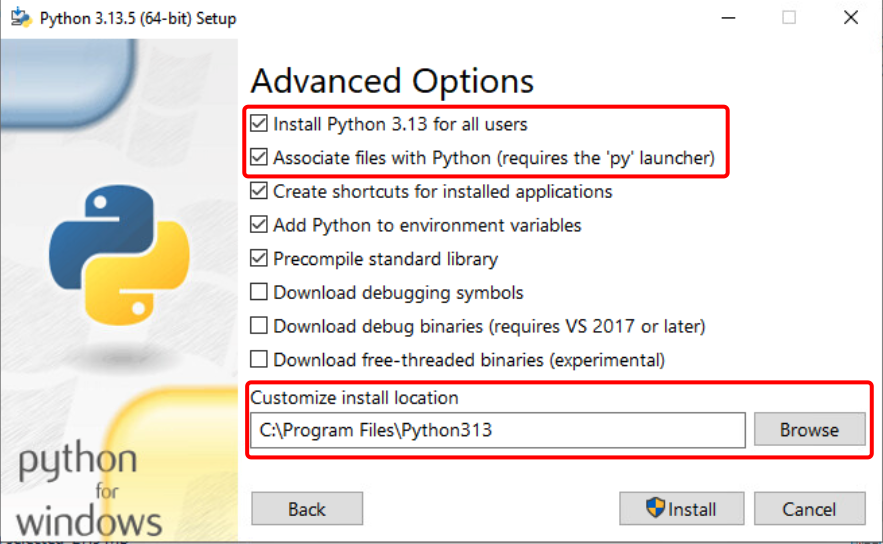
- Under Advanced Options, select "Install Python for all users" and "Add Python to environment variables"
- Browse the Installation location to "C:\Program Files\Python3" or keep the default path already provided
- Click Install

- Run the installer executable file as administrator
Create and activate python virtual environment
- Create virtual environment for python under
xshield_utility/utildirectorycd xshield_utility/util
python -m venv .venv - Set permissions for execution of further commands
Set-ExecutionPolicy -ExecutionPolicy Unrestricted -Scope CurrentUser -Force - Activate python virtual env
.\venv\Scripts\Activate.ps1 - Install the dependencies using
pip install -r requirements.txt - If you are using an IDE such as VS Code or Pycharm, open the
xshield_utilitydirectory in the editor as a project - Add the python interpreter with existing virtual environment from util directory
- Once the virtual env is activated, open the terminal from IDE window and validate the virtual env is activated with (.venv) at the start of the path
Update the config file
- Change the directory to config for updating the config file with the one downloaded from the tenant (make sure the API private key path is also provided and is accessible)
cd ../config - To validate the configuration against the Xshield tenant, change the directory to util directory and execute
  cd ../util
python xshield_util.py --help - Please check the administration guide for steps to launch the xshield utility tool and perform command executions Deployment of Xshield Utility tool